Our users love to use InkThemes for their different business requirements. Recently, we have also seen a need for integrated applications in the theme itself to simplify various needs of different users.
Need of online appointment booking is one of them. There are various domestic services like spa services, clinical services, restaurant services. For all such daily use services, users like to book appointments priorly.
Therefore there is an online appointment booking WordPress Theme which creates online business sites and creates facility to book appointments priorly from anywhere in the world. An absolute easy online appointment management system.
AppointWay is an online appointment booking Theme.
In this AppointWay WordPress Theme Tutorial, you will learn to create online Appointment Booking Websites for your multi – business services.
Idea for Appointway – WordPress Appointment theme
Recently, one of our customers who was developing a website for a dental clinic told us about a problem which he was facing. The problem was that his client wanted a website through which they can book appointments directly from the website and at the same time his client didn’t want to pay recurring payments every month for appointment booking.
In other words, he wanted a site through which he can book appointments without having to pay again and again as all the existing SaaS based solutions asks for monthly recurring fees.
Other than that using an additional application and integrating it with their existing site is an added hassle in itself which makes the entire process a bit complicated.
He asks us, if we have a theme which can do that for their clients in an easy way.
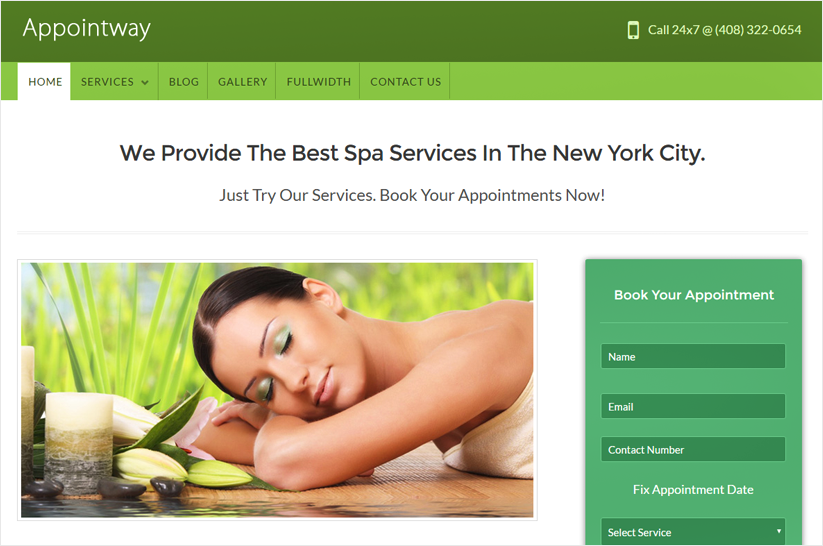
The idea was simple i.e. to make a simple and easy to use product which itself has an inbuilt feature of appointment booking so that there won’t be any need for the customers to use an external application for booking the appointments.
Appointway is a theme which makes it very simple to book an appointment for any type of business. Moreover, since the theme is already integrated with Payment solution you have pretty much everything to book and collect payments for an appointment right out of the box. Any business professional can create his business website easily and start to book appointments in no-time.
Need of Appointway?
Appointway is a simple appointment booking theme. Business owners from different fields will love to use this theme for their business website. Let’s have a look which type of business owners need the Appointway theme or what kind of business websites you can create with Appointway to book appointments:
- Beauty Salons
- Dentists
- Doctors
- Tattoo Studios
- Advisors & Consultants
- Massage Therapists
- Health Clubs
- Lawyers
Moreover, you can set up and book appointments for multiple services, specify multiple booking slots for a particular time, you can specify the time duration and available appointment dates for any service, also you can display the business address along with a map location and set different prices for services and collect payments through an integrated PayPal gateway directly from your own website. With Appointway, you can build a professional and beautiful site for your business. Yet with so many features the theme is very simple to use and manage.
Note:- For all the readers, the Appointway WordPress theme has been released now. You can see the live preview of the theme through the following links:
AppointWay WordPress Theme Live Previews
As I said earlier, Appointway will add some useful features to the website. Like our other WordPress themes, Appointway is a completely responsive theme. It can be easily customized. It has various simple styling color options. Moreover, it will save the time and make things flexible for the users. Let’s have a quick look at the features of Appointway:
- Completely Responsive.
- Various Styling Options.
- Page info main heading and sub-heading for taglines for setting up the text.
- Simple appointment form for quick booking of the clients.
- Slider on the homepage with “Play and Pause” option.
- Showing contacts details on the top.
- Appointment booking form on home sidebar for multiple bookings.
- Timing and Address option on sidebar.
- Simple theme options panel for modification.
- Feature map option on the sidebar.
- 3 column feature section to showcase your business.
- Feature testimonial section to tell the clients about your business.
- Advertisement section.
- Simple footer widget area.
Unique Feature of AppointWay
The appointment booking form is one of the unique features in the Appointway theme which makes the theme completely different from other WordPress themes. The appointment form will help the clients to simply book their appointments directly from your website. The website owner can also show multiple services in the appointment form and the users can book their appointment for a particular service (i.e. one at a time). If the client wants to book an appointment for multiple services then he has to book another appointment for that particular service. Also at the time of selecting the date, the user will be notified instantly whether the appointment is available or not for that particular date.
If the appointment is available then the client will book the timing slot and proceed to payment options. If the appointment is not available then the client will be asked to choose another date. Once the appointment is booked for a particular date then there can be more appointments that can be booked for that particular date in case if it is available. Moreover, once the appointment is confirmed the client will be notified by an email.
On the other hand, the business owner can book the multiple booking slots for a particular time, i.e. at a given time, multiple bookings can be booked.
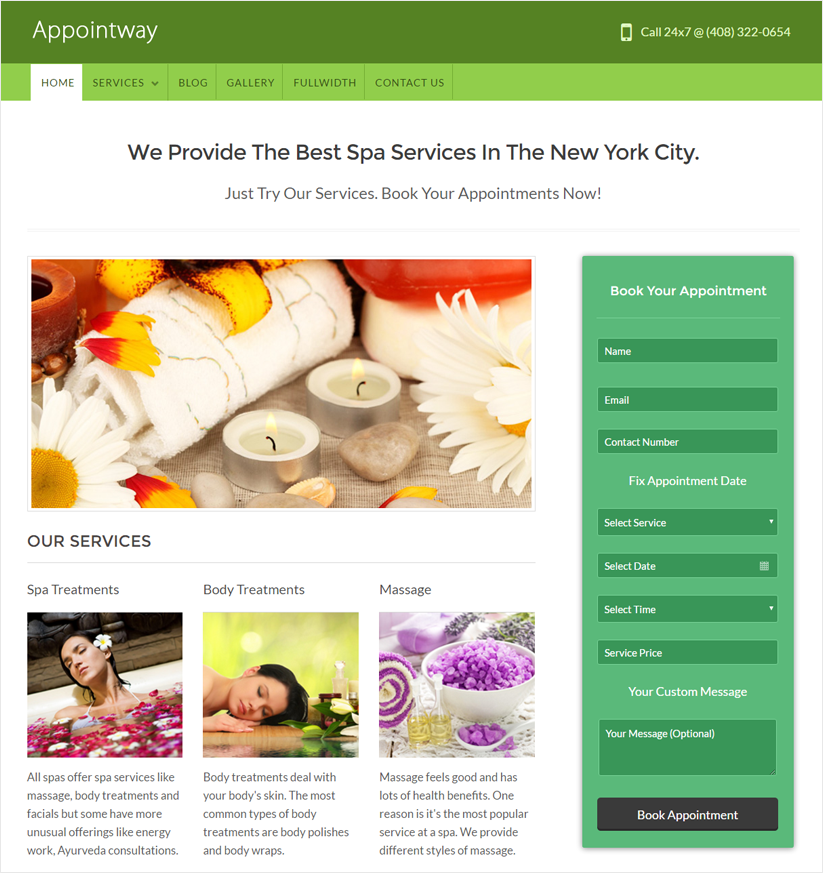
Flexibility and Simplicity in Appointway!
The Appointway theme is very simple and easy to use and any business professional can create his website without any difficulty. It requires a single click installation and your website will be ready within no time. Moreover, the theme provides flexibility to the users. Any user can book an appointment by simply submitting the appointment form displaying on the homepage sidebar.
It will be also easier for the user to know about the timings, contact details, address and location of the business displaying on the website. Multiple images displaying on the slider (with Play and Pause option) will represent a clear picture of your business to the clients.
Best WordPress Business Themes
This documentation tells you the following things:
- What is Appointway Theme?
- How to install Appointway Themes?
- How to upload logos, favicon on the website?
- How to activate the slider on the home page?
- How to use homepage feature area?
- How to use homepage feature sidebar?
- How to change the theme style?
- How to add Social Icons on the website?
- How to book appointments?
- How to customize Appointment form?
Let’s discuss the above topics one by one.
What is Appointway theme?
Appointway is a WordPress theme – very simple and effective for appointment booking. Through Appointway theme, the clients can directly book their appointments through your website. See the live preview of the theme.
The Appointway theme is very simple and easy to use and any business professional can create his website without any difficulty. It requires a single click installation and your website will be ready within no time.
How to install Appointway Theme?
Before installing the Appointway theme on your website make sure that:
- You have a web server installed on your machine.
- You have installed WordPress on your Web site.
- You have purchased the Appointway theme.
Installing the theme is very simple and easy. It will hardly take a minute. Just follow the process given below:
- Go to your WordPress Dashboard.
- Choose “Appearance” option.
- Select the “Install Themes” option.
- Click on “Upload” option.
- Click on “Choose file” button.
- Now select the zip file of Appointway and upload it.
- Click on “Install Now” button.
After installing the theme click on “Activate” option. This will activate the theme on your website. For the first time the theme will look like this:

Note: After activating the theme you need to install and activate the Ink Appointway plugin. Then it will show the Appointment form on the website. Initially, the Appointment form appears as blank.
Installing the plugin
- Go to your Dashboard and click on “Begin installing plugin option”.
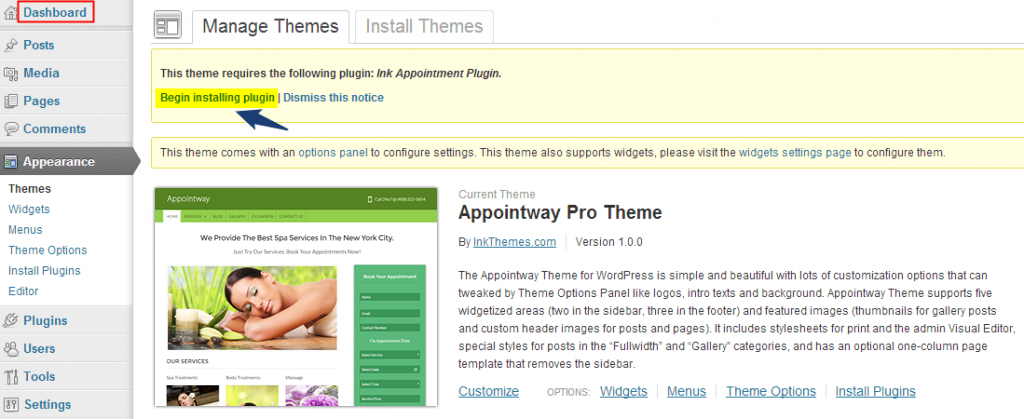
- On the next page click on “Install” option.

- After installing the plugin click on “Return to the Dashboard” option.

Now if you visit your website, you will see that the Appointment is activated on the website.
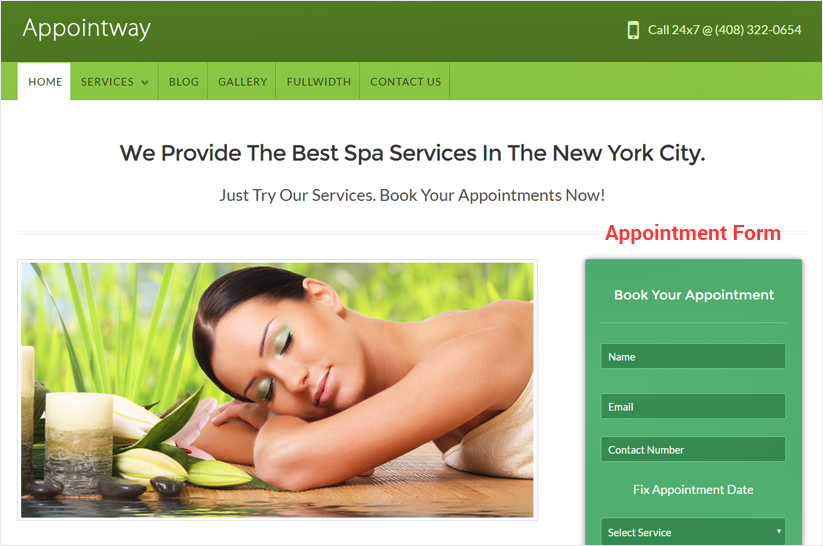
How to upload logo, favicon and background image on the website?
Uploading logo, favicon and background image on the website is very simple. Moreover, you can mention the contact details on the website, contact number for tap to call feature, add Google tracking code and turn on the front as on or off. Just go to your Dashboard and do the following steps:
Dashboard–> Appearance–> Theme Options–> General Settings
After uploading the logos, favicon and images, click on “Save All Changes” button.

Now visit your website it will be shown as:
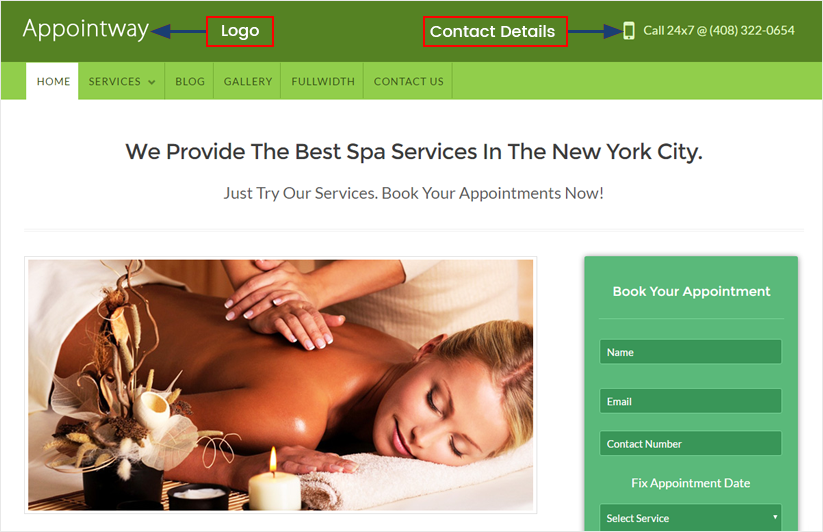
How to activate the slider on the home page?
In the slider, you can show maximum of seven images whereas minimum would be one. You can activate the slider on the home page by performing the following steps given below. Moreover, you can also set the links for the images to redirect the user to any pages.
Dashboard–> Appearance–> Theme Options–> Slider Setting
Click on “Upload Image” button and upload the images which you want to show on slider.

Note: The recommended size for the slider images is 694px wide x 345px height.
After uploading the images in the slider, the “Play and Pause” button will be activated in the slider which will allow the user to play and pause the images in the slider.

How to use home page feature area?
In home page feature area, you can add headings and sub-headings for your business on the website. Try to make headings as punch lines so that it will attract most of the visitors.
In the 3 column feature area, you can showcase your services with decent images and with short descriptions of the services.
Moreover, in the Testimonial settings, you can write about your business and share this with the visitors. You can also upload your testimonial image and mention your name in the Testimonial Link Text.
There is also an option of advertising your sponsors. For this, you can upload the images of your sponsors in the home page bottom section providing the links for the images.
Follow the procedure given below and make changes to your website.
Dashboard–> Appearance–> Theme Options–> Home Page Feature Area
Adding Heading & Sub headings on the website.

After making these changes your website will appear as
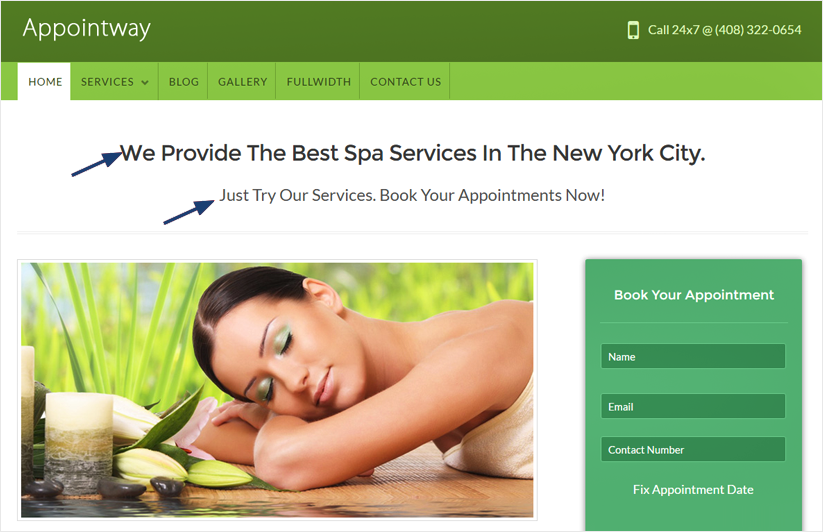
Using 3 column feature area.

After making these changes your website will appear as:

Adding Testimonial heading and description.

After making these changes your website will appear as:

Using the homepage bottom feature section.

After making these changes your website will appear as:

How to use home page feature sidebar?
In the home page sidebar, you can show the opening and closing time of your services. You can mention the address details and can show a map for your business location.
Follow the procedure and make changes to these settings.
Dashboard–> Appearance–> Theme Options–> Home Page Feature Sidebar

After making the following changes you website will appear as:

How to change the theme style?
There are various styling options available in the theme. You can change the style of the theme through the following procedure.
Dashboard–> Appearance–> Theme Options–> Styling Options
Moreover, you can also add your own CSS code here for any customization.

How to add Social Icons on the website
Social icons are useful for a website. There are various social icons available in the theme. The social icons will be displayed in the footer. You can use them through the following procedure.
Dashboard–> Appearance–> Theme Options–> Social Icons

How to book appointments?
Once you activate the Ink Appointment plugin, the appointment form will appear on the website. This will allow the users to book the appointments directly from the website. There are also various payment options available in the theme. Follow the steps and create your appointment services.
Dashboard–> Appointments–> Create Appointments

After creating multiple services and settings their prices, you can add their date slot and time slot.

Note: After creating the multiple services, you have to add date slot and time slot for individual services.
Adding the date slot for the services.

Adding the time slot for the services.

You can also mention the interval time of your services for individual days that will automatically define the time slots in between the opening time and closing time of the services.
Note:- You can do multiple booking for a particular time slot. It depends on your requirement.
How to customize Appointment form
You can set the heading of the appointment form, mode of payment, mail ID on which you want to receive payments, etc. Follow the steps given below and set the appointment form as per your desire.
Dashboard–> Appointments–> Settings

Managing the currency mode
There are various currency options available for receiving the payments. You can choose your mode of currency from the available currency list which is supported by your country.

Hope you find this tutorial helpful.


