InkThemes has come up with the best magazine WordPress theme BlogSpring that comes with an outstanding design and amazing styling options. BlogSpring theme is perfect for Blogging Enthusiasts.
The theme consists of various effective features that will make your website awesome. The theme is very simple to use and gets installed within no time.
This tutorial will guide you, how you can use the BlogSpring Magazine theme on your website. With the help of this tutorial, you can make the best portfolio WordPress site and feature all your blogs efficiently in front of your audience.
How You Can Add An Advertisement In Your Website With BlogSpring WordPress Theme?
Advertisement is the best source to earn money online as well as to grab the attention of your website visitors. Isn’t it?
You will be happier to know that with BlogSpring theme, you can easily show any type of advertisements like the latest offers, deals, limited offers and many more in the header section of the home page of your website.
You can follow the steps given below that will guide you to add an advertisement in the BlogSpring WordPress theme.
1. I hope you have successfully installed the BlogSpring theme on your WordPress.
Now under your WordPress Dashboard, go to Appearance option and select Theme Options listed under sub-options.
Go to Dashboard –> Appearance –> Theme Options

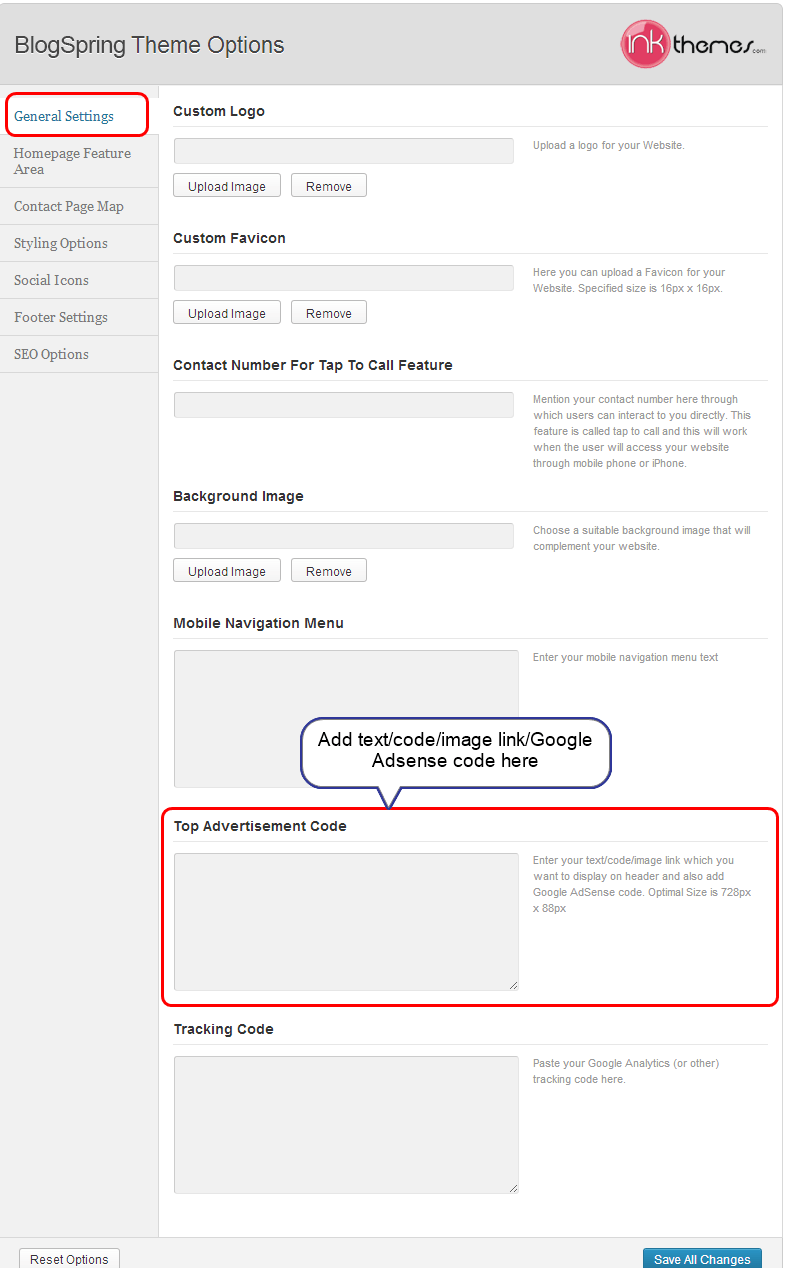
2. Under the theme options panel, go to General Settings option listed under BlogSpring Theme Options
You can see image given below, Top Advertisement Code option listed under general settings, so you can add the advertisement code or text or image link or Google AdSense code under this field and then click on Save All Changes option.
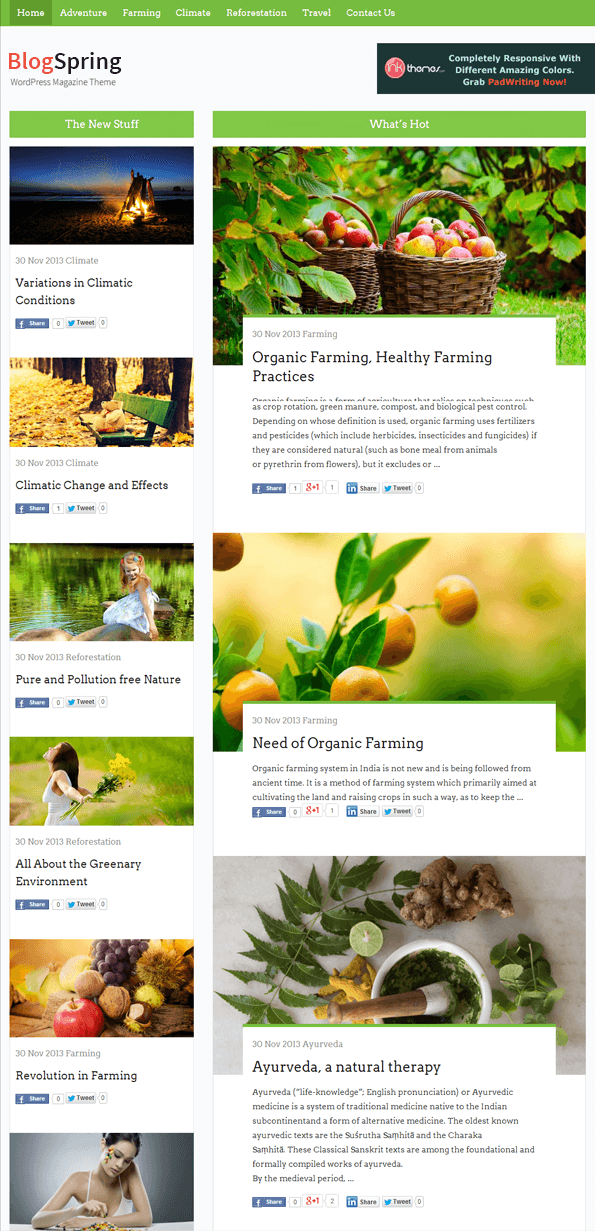
Now, you can see this is how the advertisement appear in the right header section of the home page.

How You Can Show A Post In The Feature Section?
Creating a post is very simple. BlogSpring makes it easier for you to show your popular posts on homepage feature section.
Go to Dashboard –> Posts –> Add New and write the suitable heading and content of the post.
Note: In BlogSpring theme, once you publish the post then by default, it appears in the The New Stuff column of the theme. But if you want to display the post in the feature section, you need to check on Feature on Homepage option.

You can select the category for the post or create a new category. Then click on Publish.

This is how the post appears in the feature section on your website.

Moreover, based on the count of social likes and shares on your post or stuff, the most popular post automatically listed on the top of the feature section of your website.
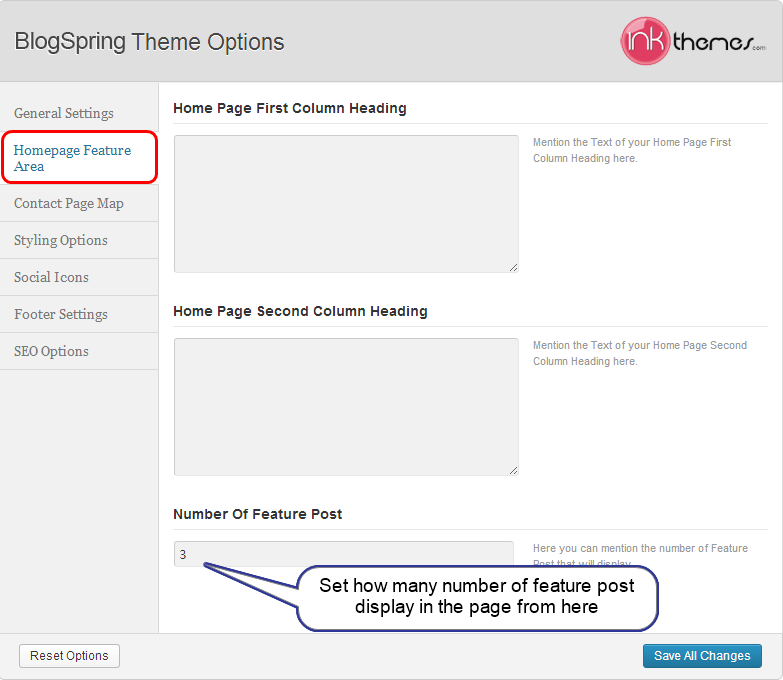
Additionally, you can also limit the number of posts in the feature section of the home page. For that,
Go to Dashboard –> Appearance –> Theme Options –> Homepage Feature Area
Write the number that you want to set and then click on Save All Changes option.
You can see in the image given below, this is how the 3-post appears in the feature section of the home page.
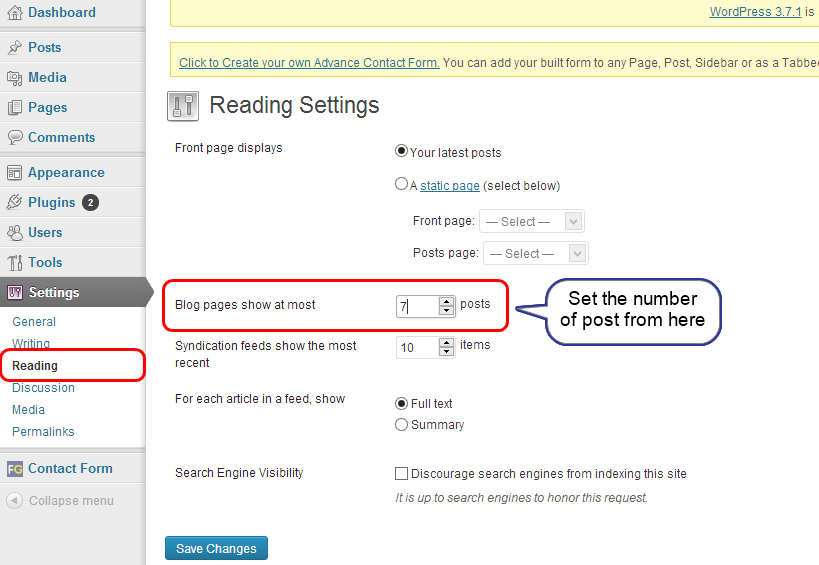
You can also limit the number of post under The New Stuff section by following the steps given below so that limited post appear on the homepage. For that
Go to Dashboard –> Settings –> Reading and set the number.
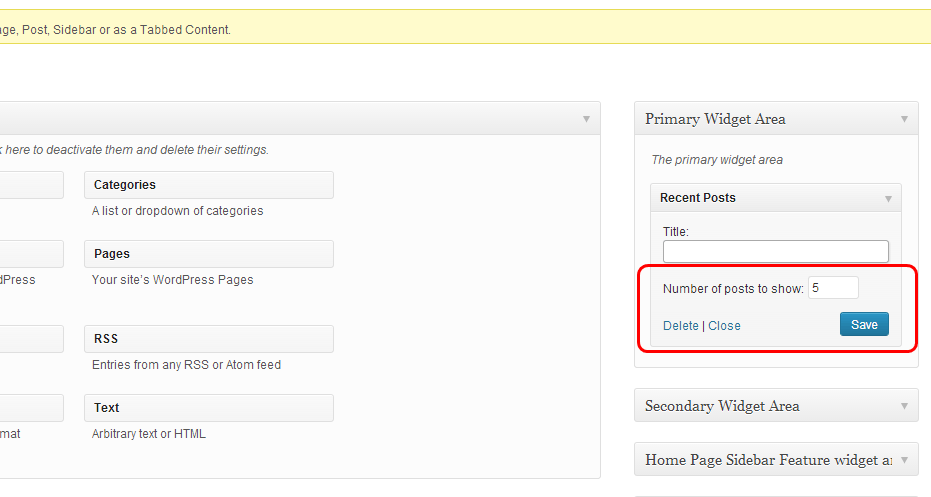
You can also limit the number of posts that you want to display in the sidebar section of your website. You can easily set the number of posts to show under Recent Posts widget. For that,
Go to Dashboard –> Appearance –> Widget, just drag and drop the Recent Posts widget in the sidebar section and set the number of posts, as you can see in the image given below.
How You Can List The Category Of The Post Under Menu?
If you own a blogging site then definitely you have a number of posts lie under the same category. Isn’t?
With BlogSpring WordPress theme, you can add those categories in the menu, so that as soon as the reader clicks on the particular category, then all the related posts appear on the home page.
Now, your readers find the related stuff more easily moreover, you can deliver your content more effectively.
Go to Dashboard –> Appearance –> Menus
Now click on the Categories tab and select the desired category that you want to list under menu and then click on Add To Menu option.

Category is added now and list under menu. Now click on Save Menu option.

You can see this is how the Main Menu appears in the front end with the listed category.

You can also see how the Footer Menu appears in the footer section.

I hope the working and features of BlogSpring theme are clear to you and you can easily make your website with the help of this magazine theme tutorial. If you have any doubts regarding this tutorial or want to ask anything about the theme then feel free to share your thoughts.


