Have you realized that subscriptions/membership-based business models are prospering these days? Considering the current business standards, it is highly profitable and generates a huge ROI.
But every great business idea has a hurdle. And, in this case, it’s finding a reliable medium or platform to initiate your membership based endeavors.
Lucky for you, we have just the perfect solution –
Membro – Subscriptions/Membership WordPress Solution
The latest creation of InkThemes, Membro WP theme specializes in creating membership sites or subscription-based site.
The complete Membro WordPress system comprises of a WordPress theme with a sleek design, along with a couple of WordPress plugins.
These one-click WP plugins are responsible for creating plans (one-time or subscriptions) and the search module for the complete site.
Let’s start with the basics but first,
Download Membro WordPress Solution
A Step By Step Tutorial To Create A Credible Online Membership Platform
Preview of Membro WordPress Theme

How To Install The Membro WordPress Theme?
Before installing the Membro WP theme, you must have WordPress installed on your server. In case, you need help with that, please visit – https://codex.wordpress.org/Installing_WordPress
Now, once you are over with WordPress installation, you can begin the process of installing the Membro WP theme.
1. Using The WordPress Admin Theme Upload –
In order to install the Membro WP theme via the WordPress admin theme upload, you have to follow the path –
Dashboard → Appearance → Themes → Add New → Upload Theme
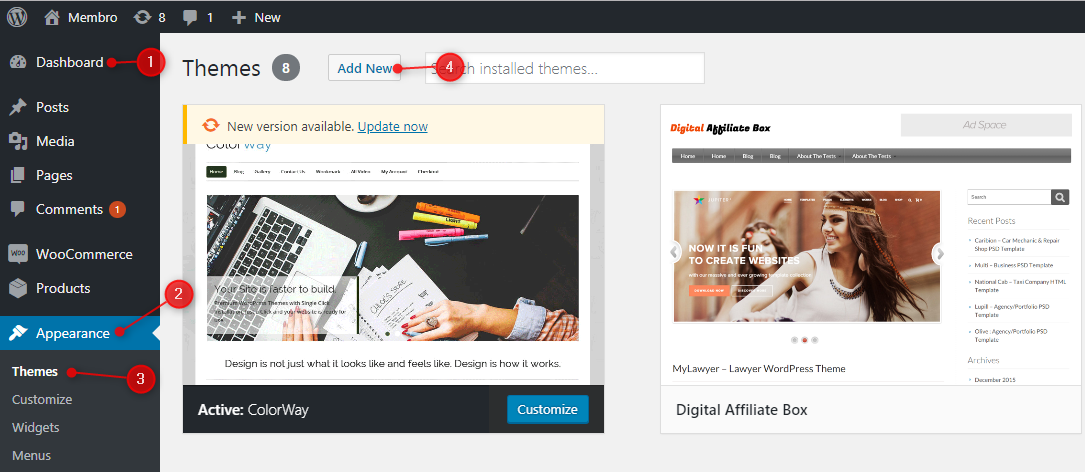
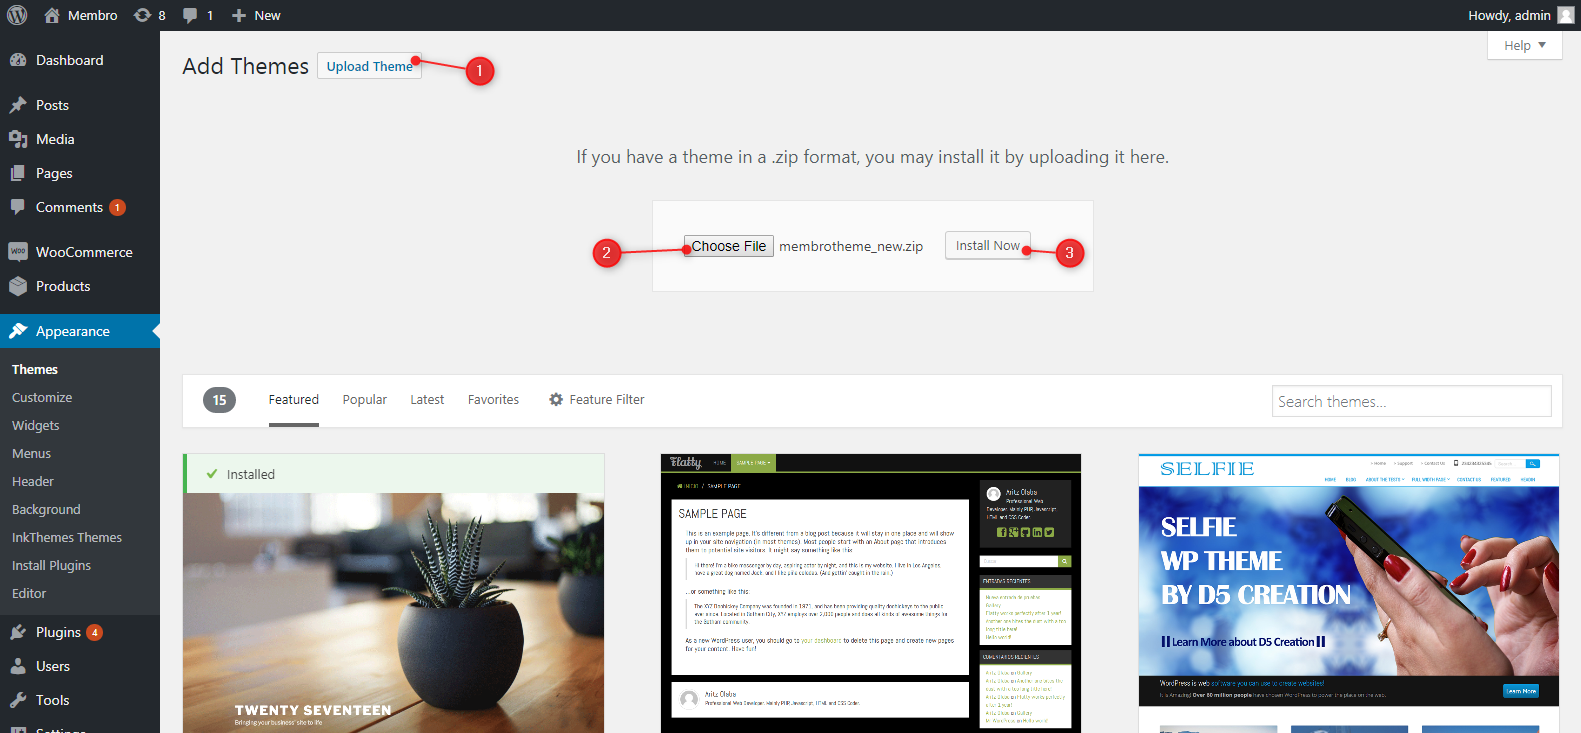
As soon as you click on the “Upload Theme” button, you are prompted to upload the theme file in .ZIP format.
Click on the “Install Now” button to complete the installation process.
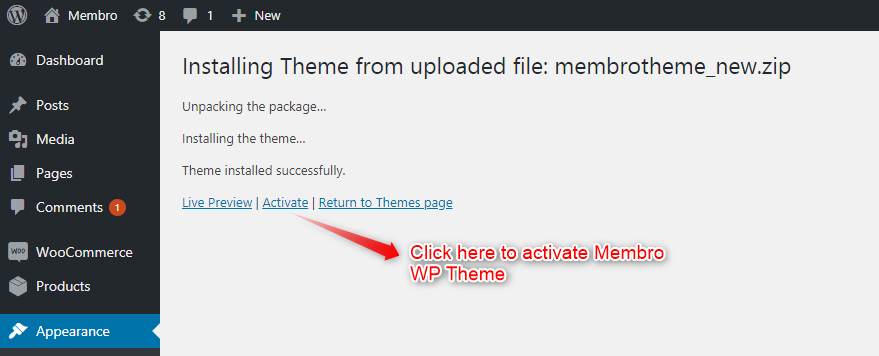
Since we wanted to give Membro WP theme much more efficiency, we have added Membro Plan creator plugin & Ajax Search Lite plugin for free.
Once the theme is installed, you are prompted to install and activate the above-mentioned plugins.
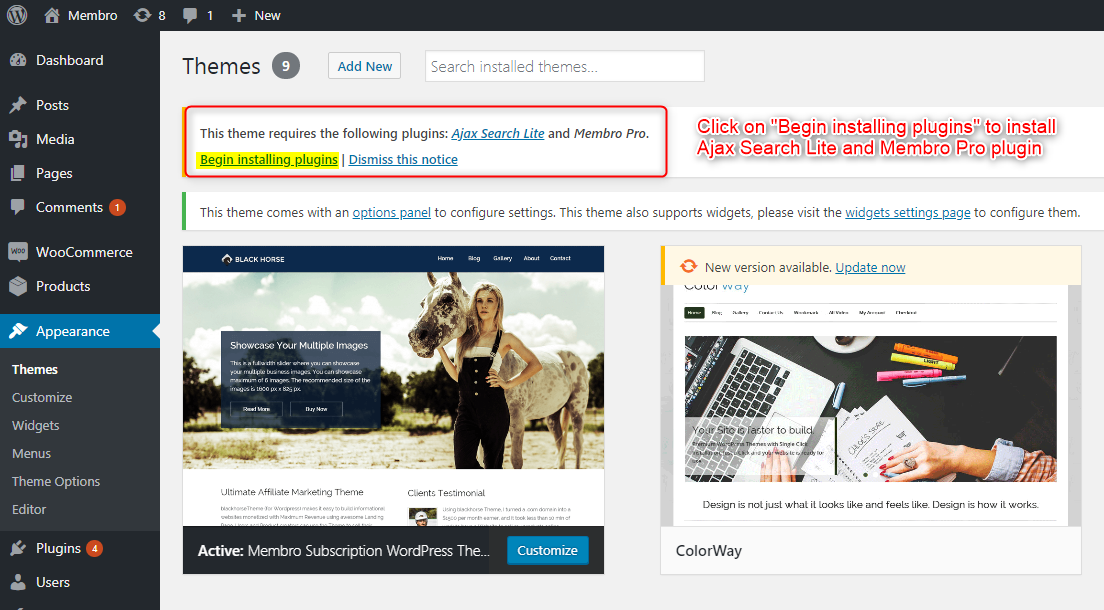
2. Manual Installation Using FTP –
Manual installation of the theme can be carried out by using FTP client. For this, you have to extract the zip file of the Membro theme on your computer.
Once the zip file is extracted, you have to manually upload it by accessing the host through the FTP manager.
You can configure its setting to create a membership/subscription based website after its installation.
Once the installation is complete, you have to build new pages for the menu, for quick & easy site navigation.
Creating New Page
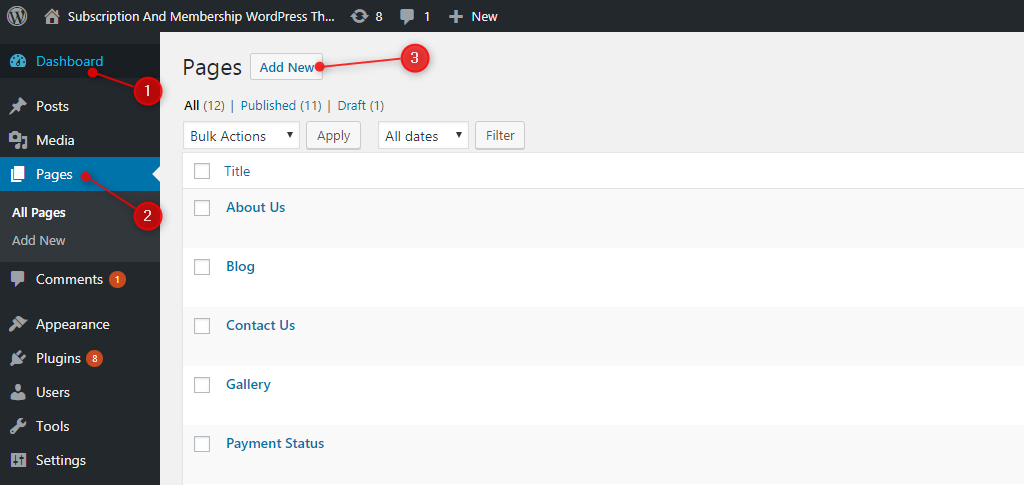
To create a new page, you have to follow the path –
Dashboard → Pages → Add New
Once you create required amount of pages, you have to assign them appropriate template from the “Page Attribute” panel. For example,
- Assign “Blog Template” for the Blog page.
- Assign “Contact Template” for the Contact Us page.
And so on.
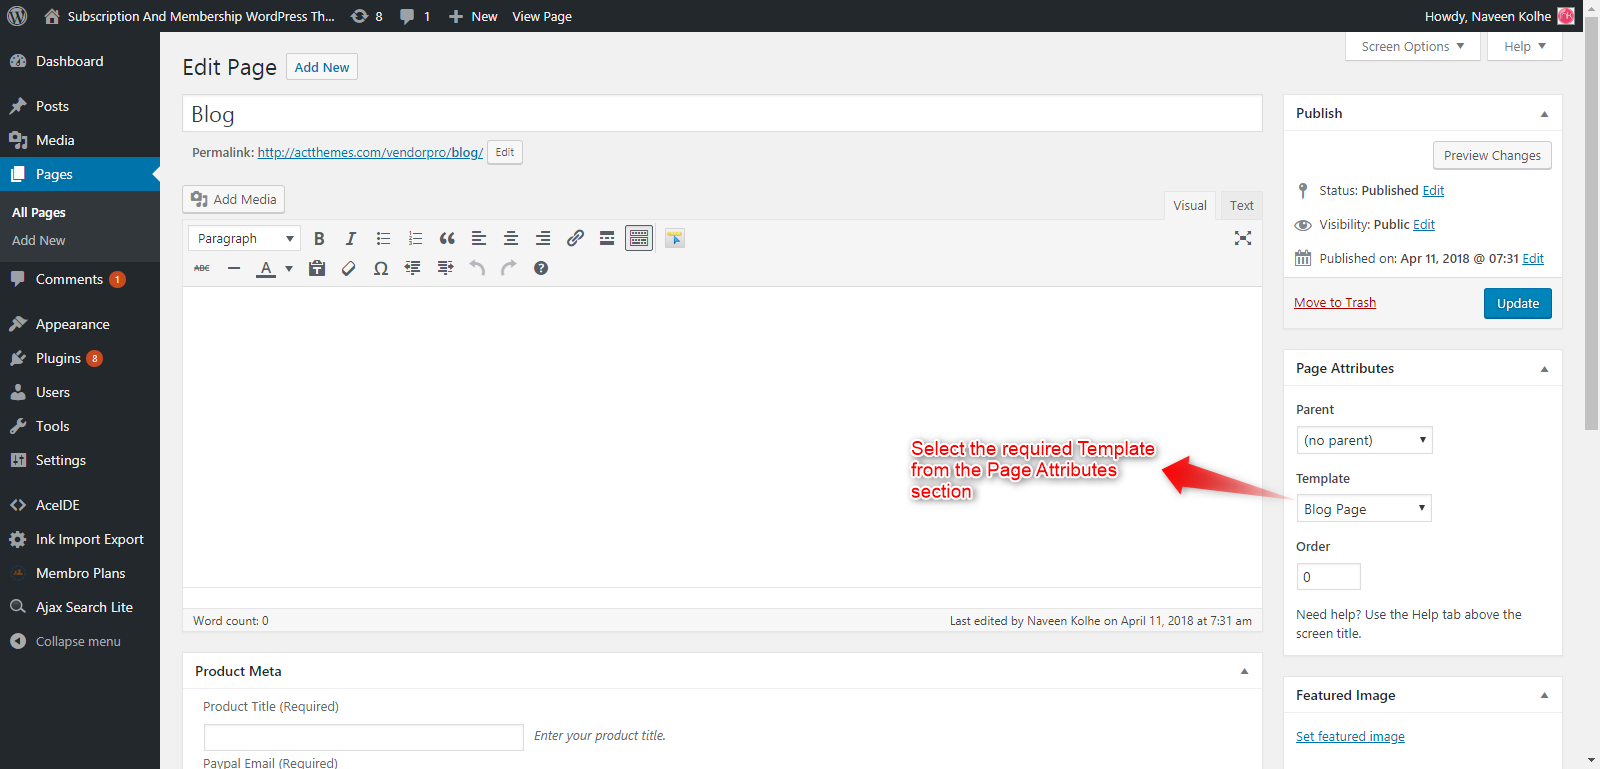
These pages can/will be used to create theme’s Menu for quick site navigation.
Improving Membro WP Theme’s Efficiency By Updating Theme Options
Once the theme is installed and all the pages have been created, you can customize the theme.
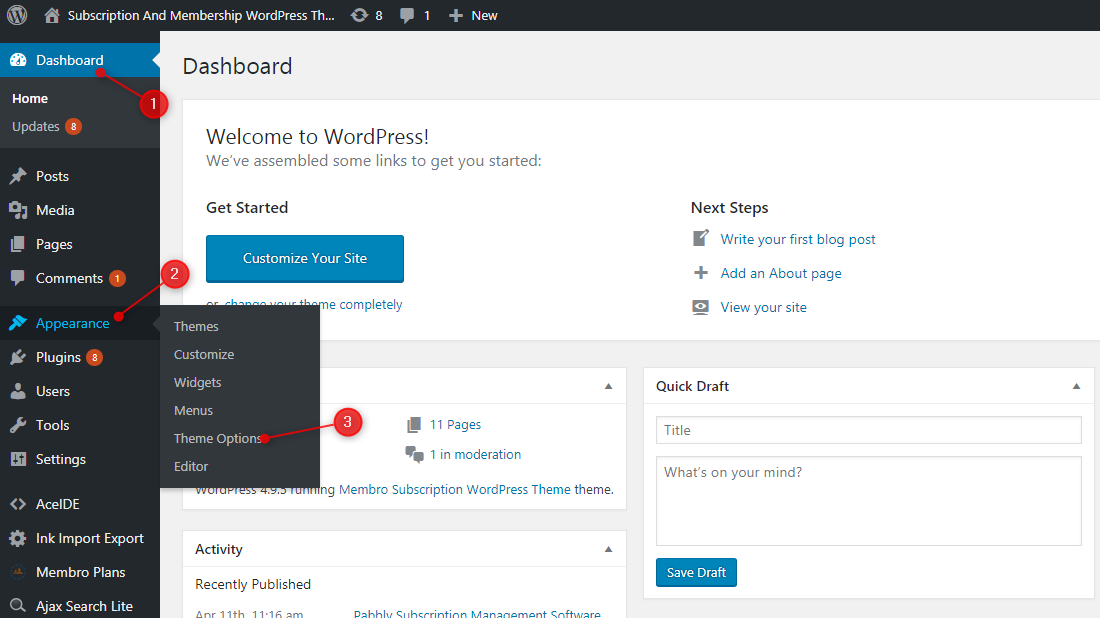
All the basics and advanced settings can be configured by the Membro Theme Options panel.
Follow the path – Dashboard → Appearance → Theme Options
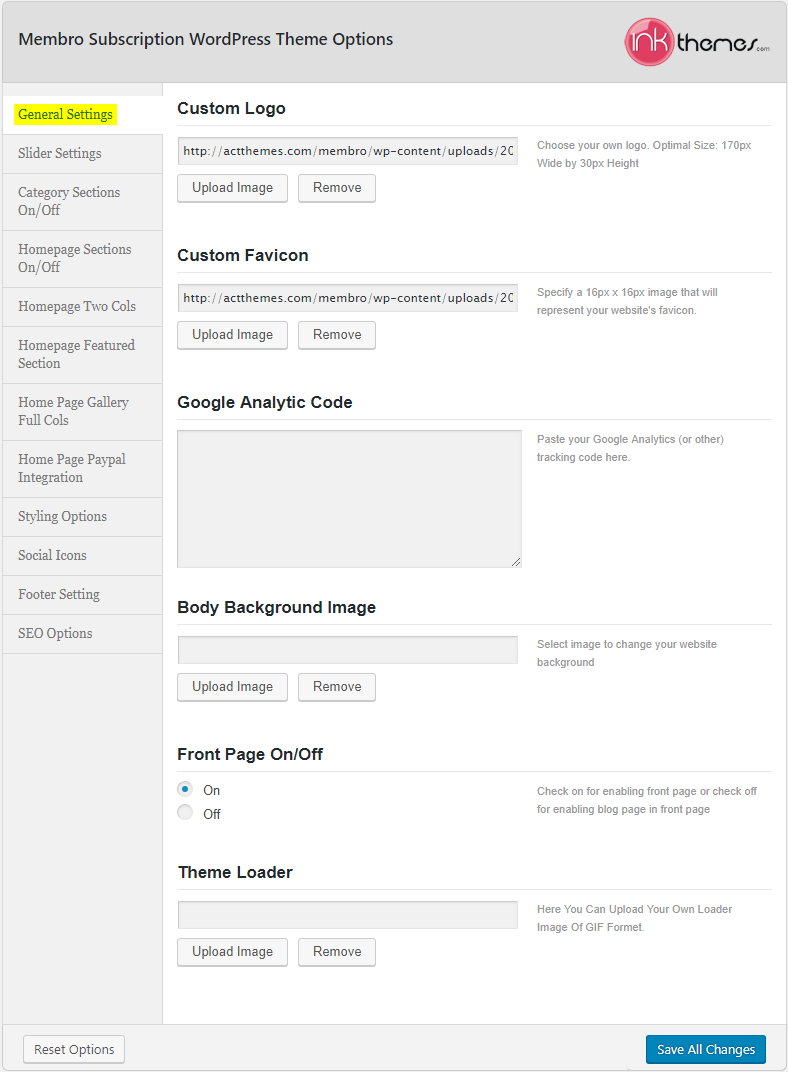
1. Upload site logo, favicon, etc. for better brand reputation
Dashboard → Appearance → Theme Options → General Settings
2. Create a better first impression by adding sliders
Dashboard → Appearance → Theme Options → Slider Settings

3. View content category wise
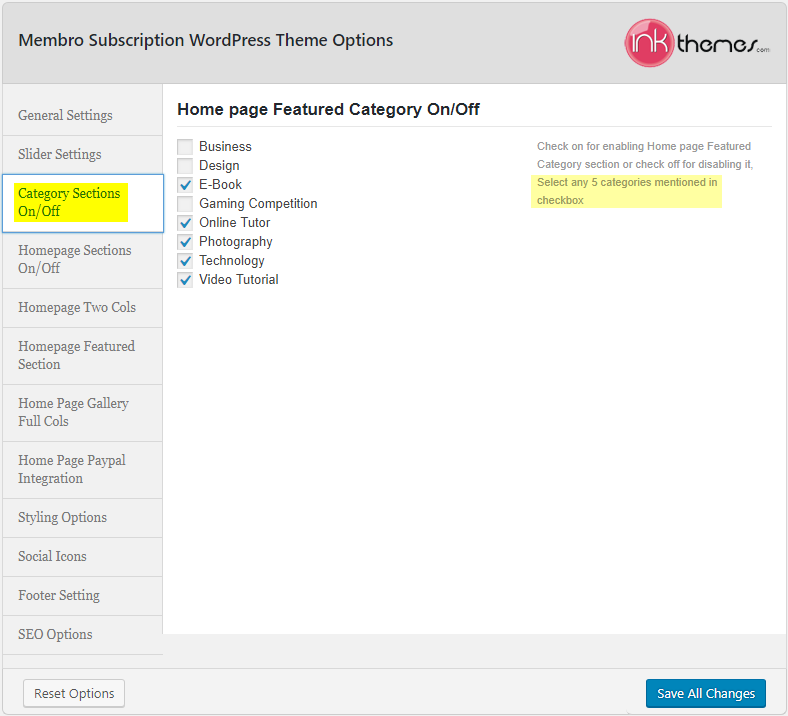
This theme option allows you to display at max 5 top categories of your products, in a dedicated categories section on the homepage.
In order to select categories, simply follow the path Dashboard → Appearance → Theme Options → Category Sections On/Off
3.1 Improve Visualization Of Featured Categories
Membro WP Theme provides you the liberty to focus on the core categories by uploading an apt image for it.
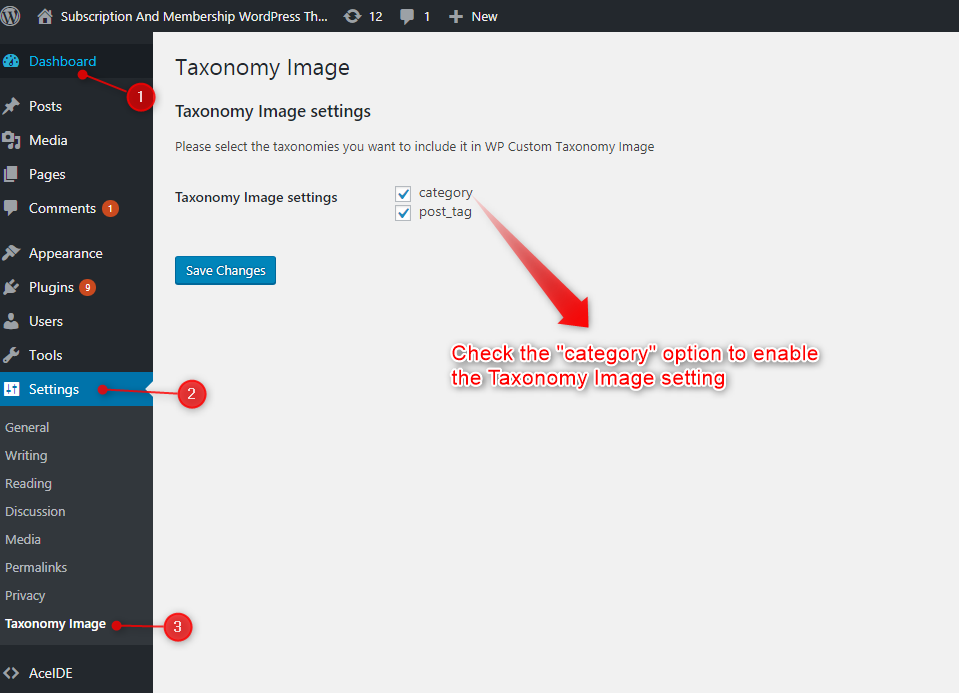
This feature will bring out the highlighted category but in order to do so, you have to enable its setting.
Follow the path – Dashboard → Settings → Taxonomy Image
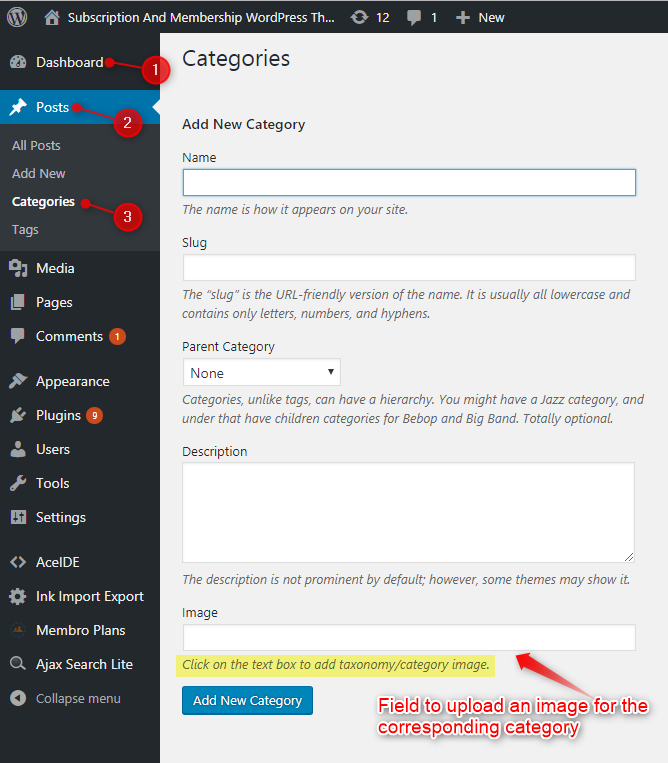
Once this setting is saved, you can see that an additional field is added to the “Categories” tab. This field will allow you to upload an appropriate image for the corresponding category.
Dashboard → Posts → Categories
4. Customize your homepage
The Homepage settings allow you to show/hide certain featured sections of the theme. By following the path – Dashboard → Appearance → Theme Options → Homepage Sections On/Off
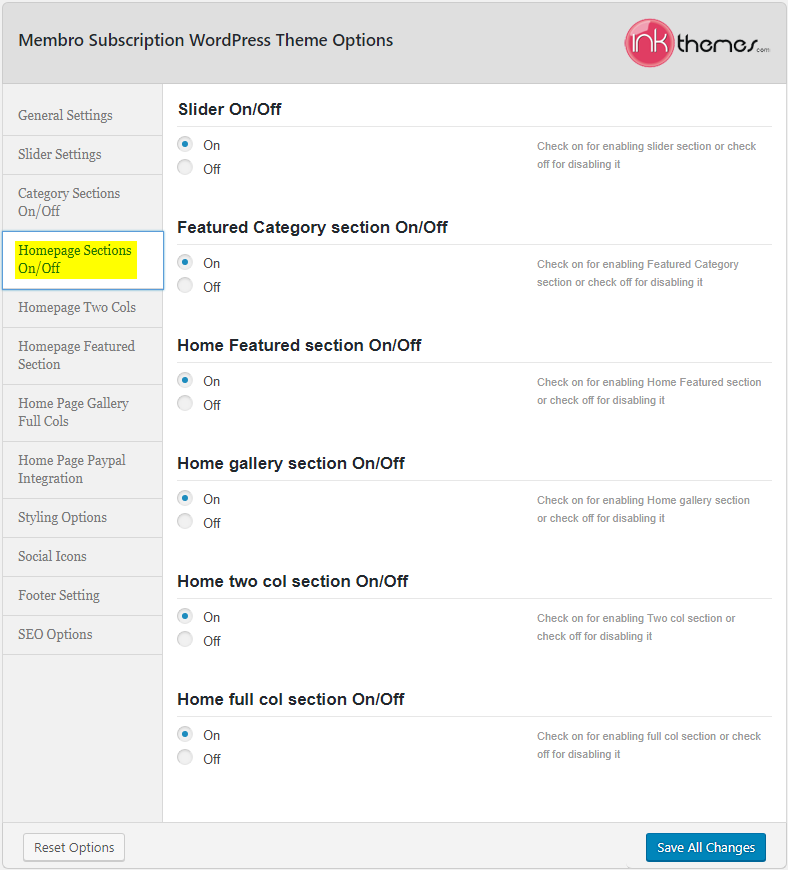
You can show/hide following sections –
- Slider
- Categories section
- Home featured section
- Gallery section
- Two & full column section
Every section has their own customizable options.
5. Accentuate your membership services briefly
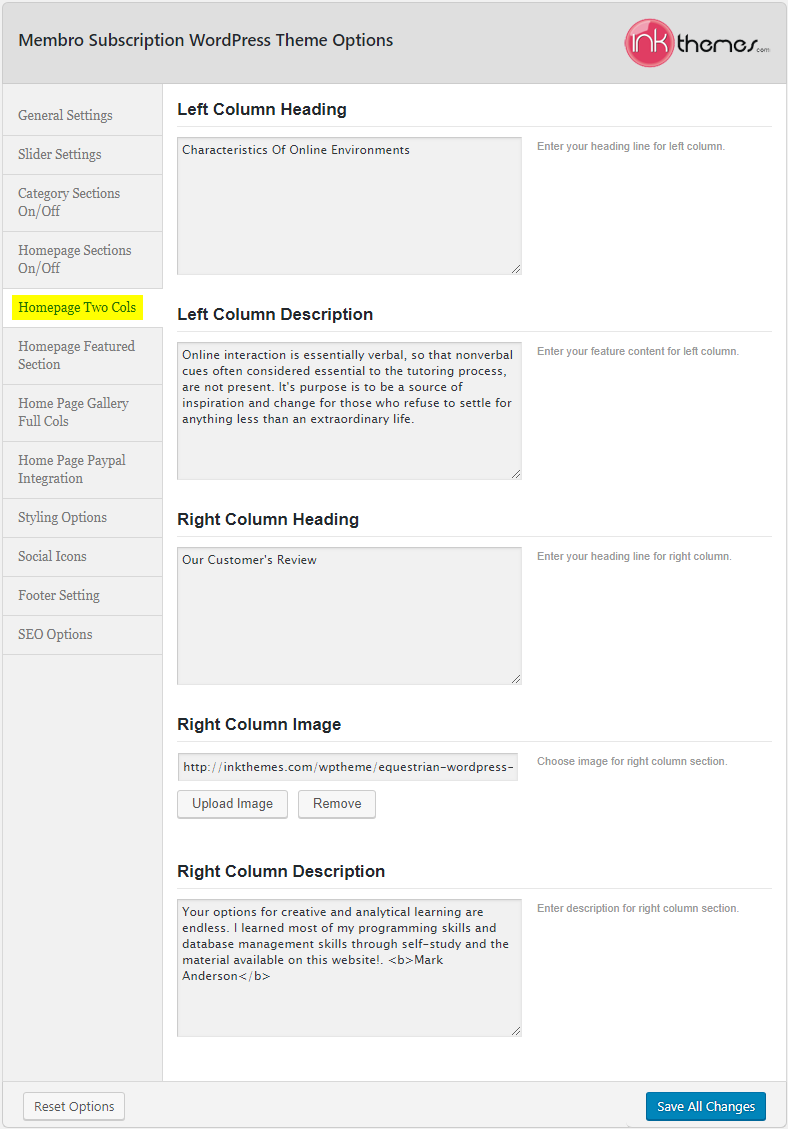
The theme allows you to emphasize your membership site through a dedicated 2 column section.
By following the path – Dashboard → Appearance → Theme Options → Homepage Two Cols you can update the section.
6. Highlight key points on homepage
We all know how important it is to showcase the core features of your business. The Membro WP theme has a special, dedicated section to highlight them viz. Home Featured section.
You can add up to 6 key points by following the path –
Dashboard → Appearance → Theme Options → Homepage Featured Section

7. Labelize your gallery
To add a catchy heading and a short description, you can follow the path –
Dashboard → Appearance → Theme Options → Homepage Gallery Full Columns

8. Securely monetize your membership plans
The core principle of a membership site is to sell your products & services and charge them on a recurring/one-time basis.
This can be very easily done by configuring the PayPal integration setting available at –
Dashboard → Appearance → Theme Options → Homepage PayPal Integration
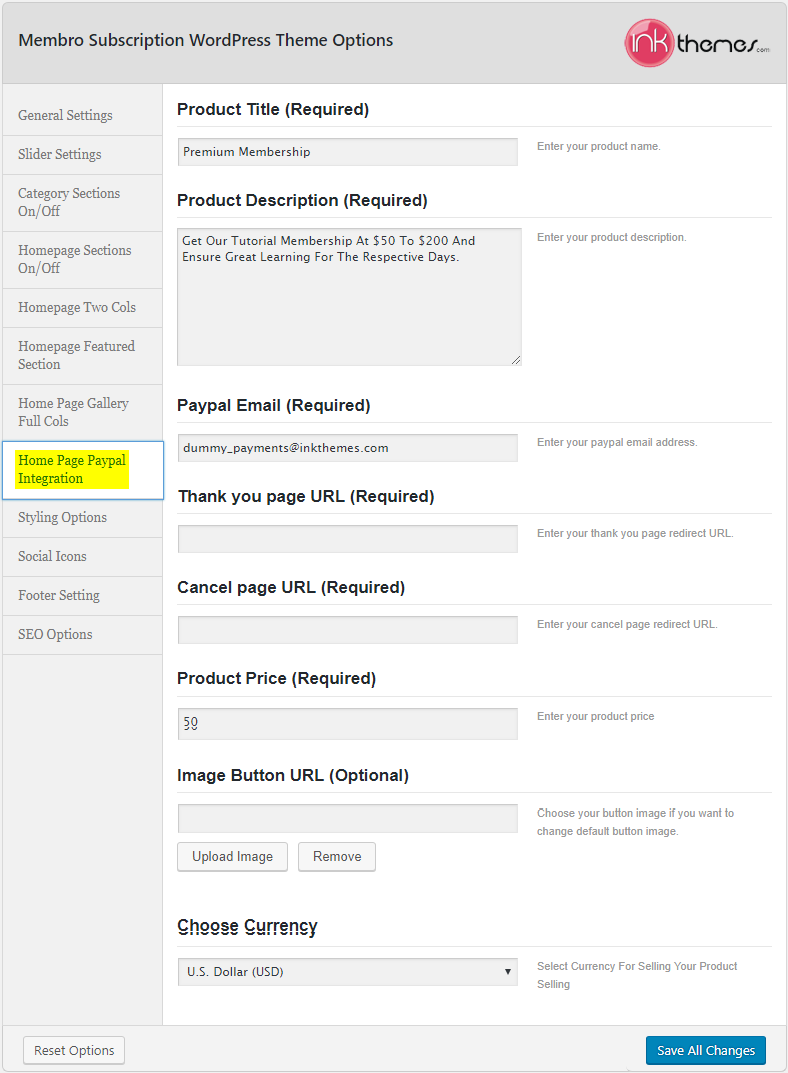
You can also set a preferred currency for your membership site.
9. Styling up your theme
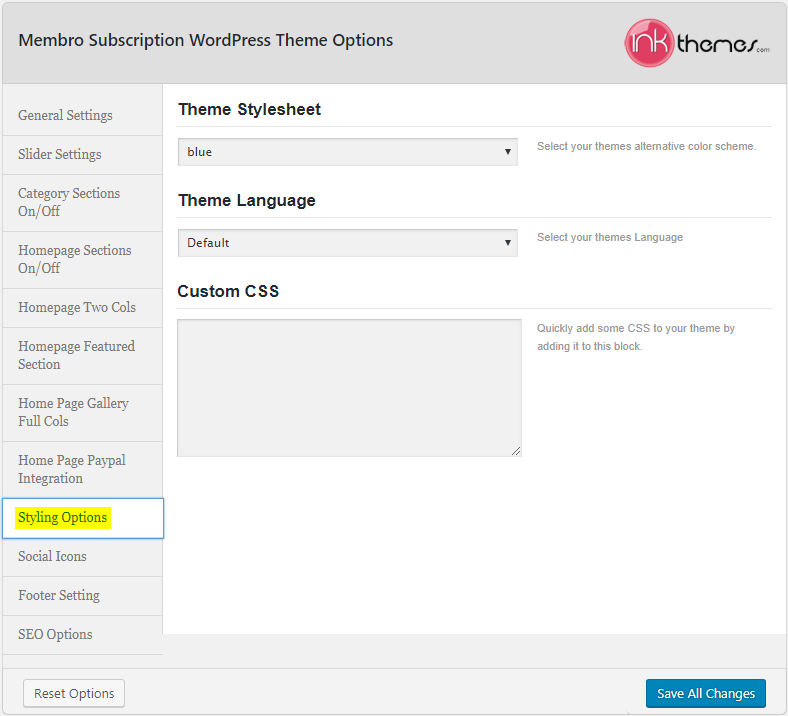
The Membro WordPress theme comes pre-loaded with multiple styling options. You can set a desired theme color scheme, select a theme language format or add custom CSS.
Follow Dashboard → Appearance → Theme Options → Styling Options
10. Socialize your membership theme
In order to maximize the social reach of your site, Membro WP theme allows you to link your social media accounts – Facebook, Twitter, LinkedIn and RSS.
Dashboard → Appearance → Theme Options → Social Icons
![]()
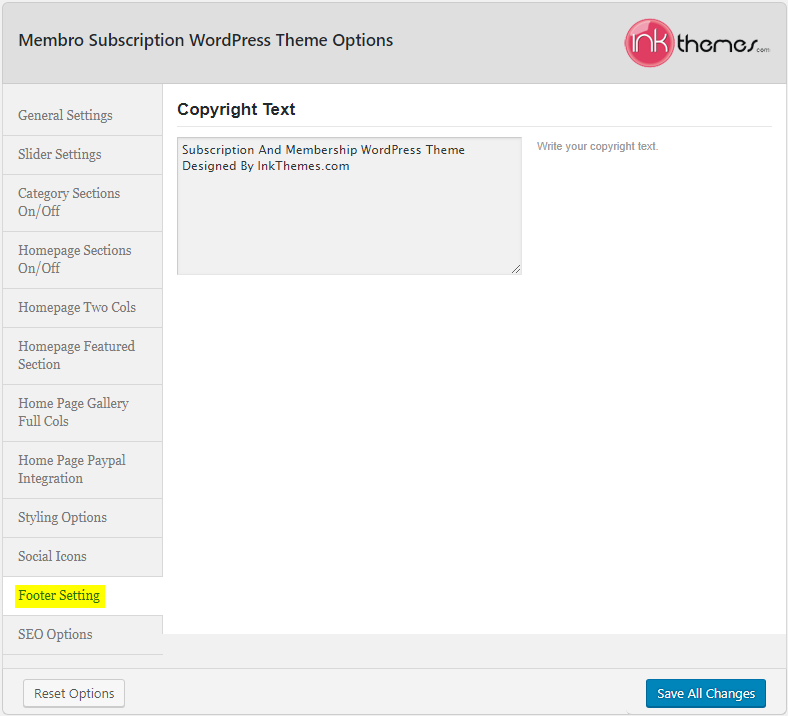
11. Protect your content via a copyright statement
Dashboard → Appearance → Theme Options → Footer Setting
12. Optimize your theme
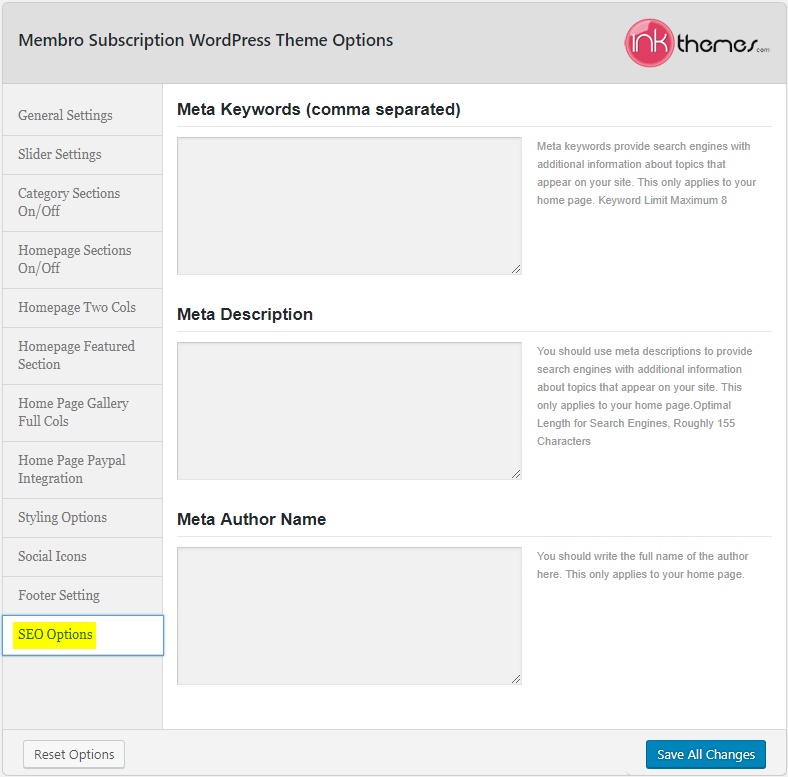
Keeping SEO in mind, the Membro WP theme permits you to optimize your site by adding Meta keywords, description and an author name.
In order to do so, you have to follow the path – Dashboard → Appearance → Theme Options → SEO Options
Advanced Customization Of Membro WP Theme
The Membro WordPress theme has been developed with the sole purpose to give you an upper hand in the arena of online membership platforms.
Membro theme is backed-up by a highly advanced Theme Customizer which will help you achieve this.
You can access the Customizer at – Dashboard → Appearance → Customize

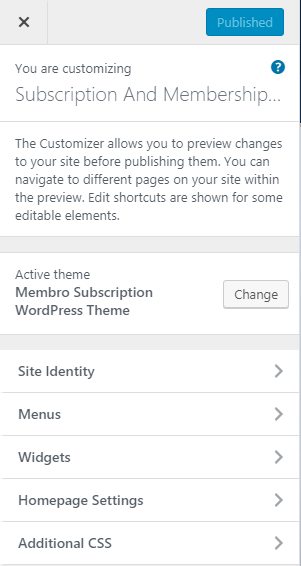
The Customizer allows you to preview changes to your site before publishing them. You can navigate to different pages on your site within the preview.
The theme customizer offers you the liberty to change the active theme, site identity, menus, widgets, homepage settings & additional CSS.
1. Create a unique site identity
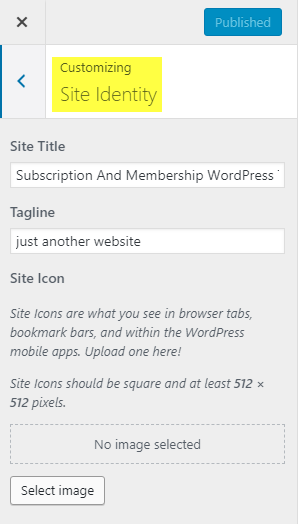
As you know, in order to create a great first impression, the customizer allows you to add a Site Title, Tagline and a Site Icon.
You can update this at Dashboard → Appearance → Customize → Site Identity
2. Quickly navigate via custom menus
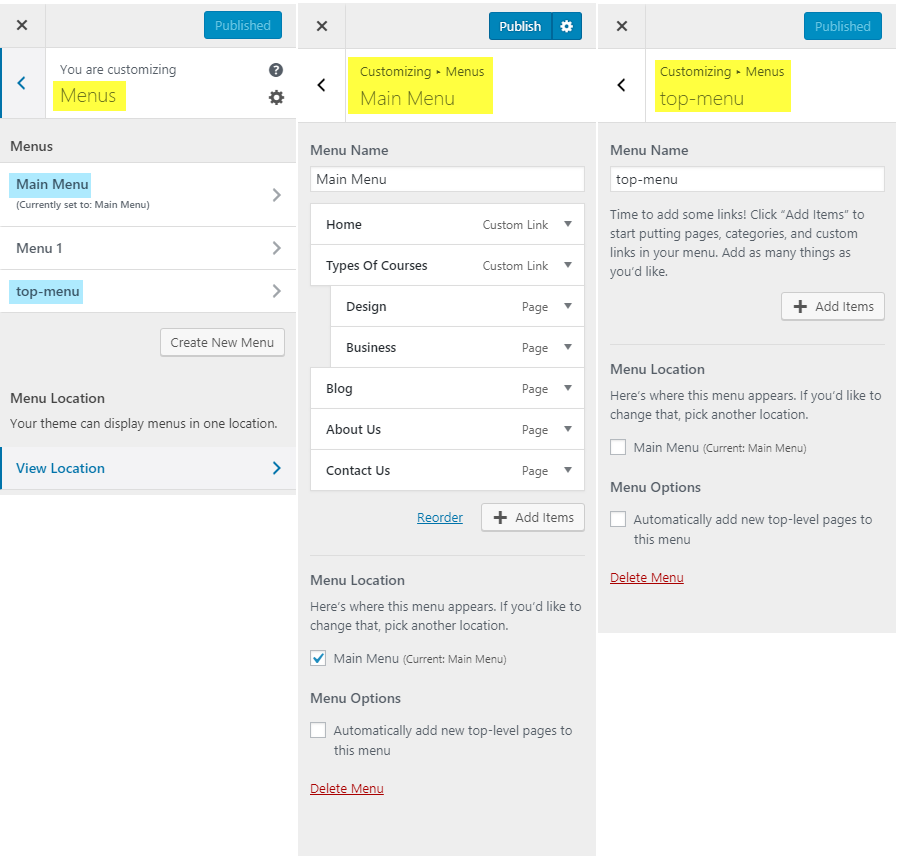
You can use this panel to manage navigational menus for content you have already published on your site. You can create menus and add items for existing content such as pages, posts, categories, tags, formats, or custom links.
Menus can be displayed in locations defined by your theme or in widget areas by adding a “Navigation Menu” widget.
Dashboard → Appearance → Customize → Menus
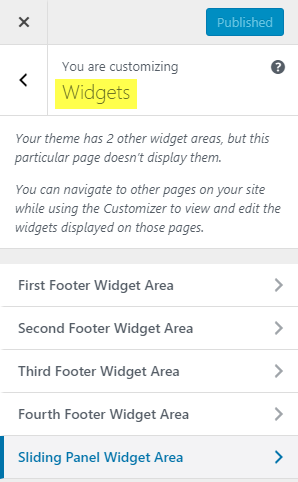
3. Widgetize your theme
As well all know, widgets are independent sections of content that can be placed into widgetized areas (commonly sidebars and footer) provided by your theme.
In order to customize/add – Dashboard → Appearance → Customize → Widgets
4. Choose what you want to display on the homepage
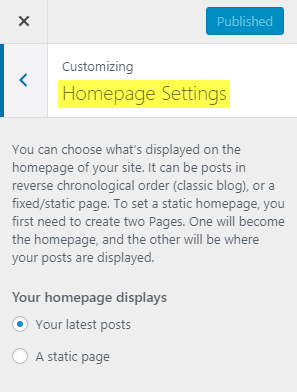
This customization setting allows you to choose what’s displayed on the homepage of your site. It can be posted in reverse chronological order (classic blog), or a fixed/static page.
You can make this changes at – Dashboard → Appearance → Customize → Homepage Settings
5. Give a personal styling touch to your theme
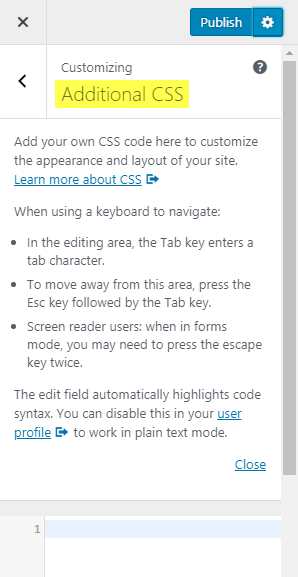
The final customization option offers you to add your own CSS code to customize the appearance and layout of your site.
Dashboard → Appearance → Customize → Additional CSS
How To Create A Membership Environment Using The Membro WP Theme?
Once you have customized all the settings, you are now all set to create a membership environment for your site.
You can achieve this with just a couple of modules i.e.
-
- Creating new membership/subscription plans for your products via Membro Plans plugin.
-
- Adding new content, products and services for selling.
1. Creating New Plans Through Membro Plans Plugin
Adding New Plans –
Dashboard → Membro Plans → Add Plan
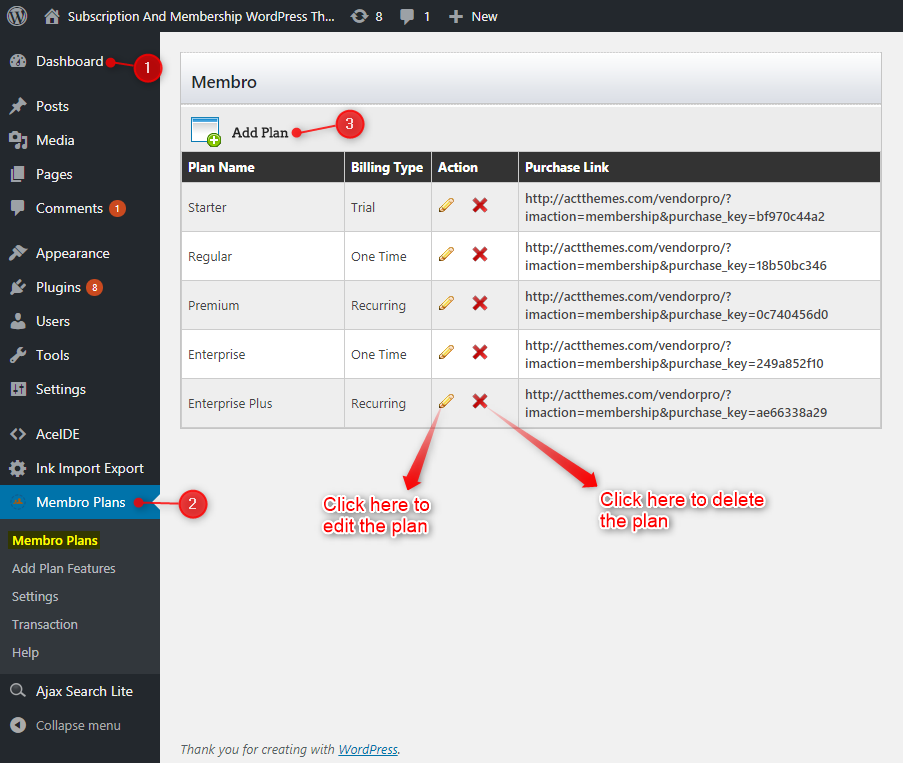
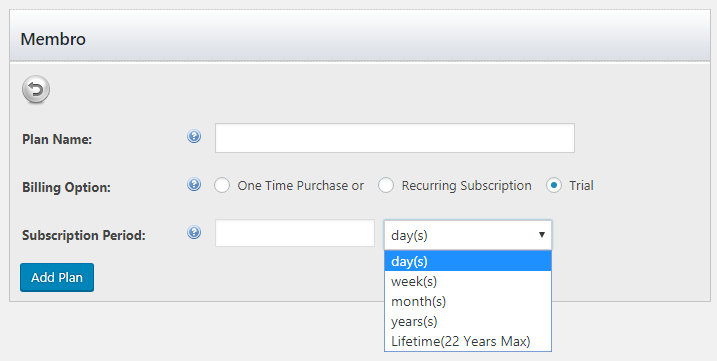
To create a plan, you have to first access the Membro Plans plugin which was installed at the time of theme installation.
Through this, you can create one-time payable or recurring subscriptions plans. Adding a trial period is also an available option.
Include Exclusive Features For Corresponding Plans –
Since all the plans are different, they must include some exclusive features. You can do this by Dashboard → Membro Plans → Add Plan Features

At first, you have to select the plan via the drop-down list and then add up to 10 plan features.
Membro Plans Payment Settings –
Dashboard → Membro Plans → Settings
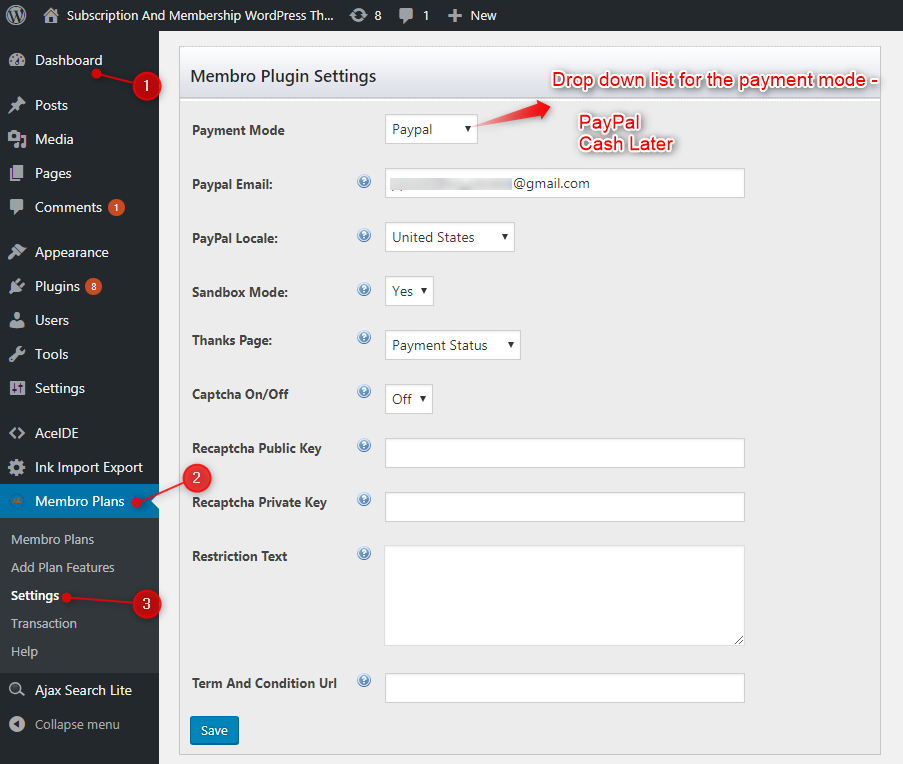
This section of the plugin focuses on the payment related settings. You can set the payment mode as PayPal or Cash Later, PayPal email & Locale, Thank you page redirection, etc.
This setting also permits you to add a Restriction Text. It will be shown in case the user is trying to access a premium content.
Monitor Transactions –
Dashboard → Membro Plans → Transaction
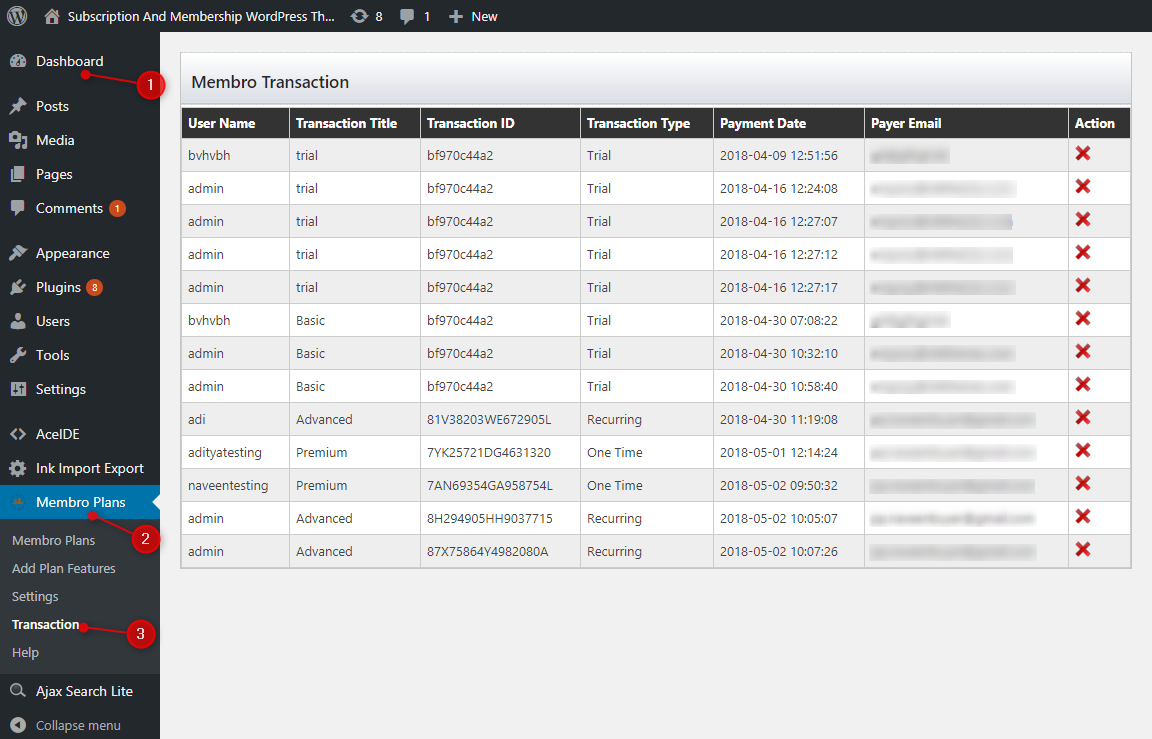
The Membro Plans plugin gives you the liberty to monitor the transactions processed on your membership site.
Membro Plans Help –
Dashboard → Membro Plans → Help

Membro Plans plugin provides following shortcodes for quick help –
-
- [login_reg] – This shortcode is used for creating login register page.
- [payment_status] – This shortcode is used for displaying payment status on thank you page.
- [im_pricing] – This shortcode is used for creating pricing page.
- [private_content] – This shortcode is used for protecting selected contents.
2. Creating New Content/Products/Services Via Posts
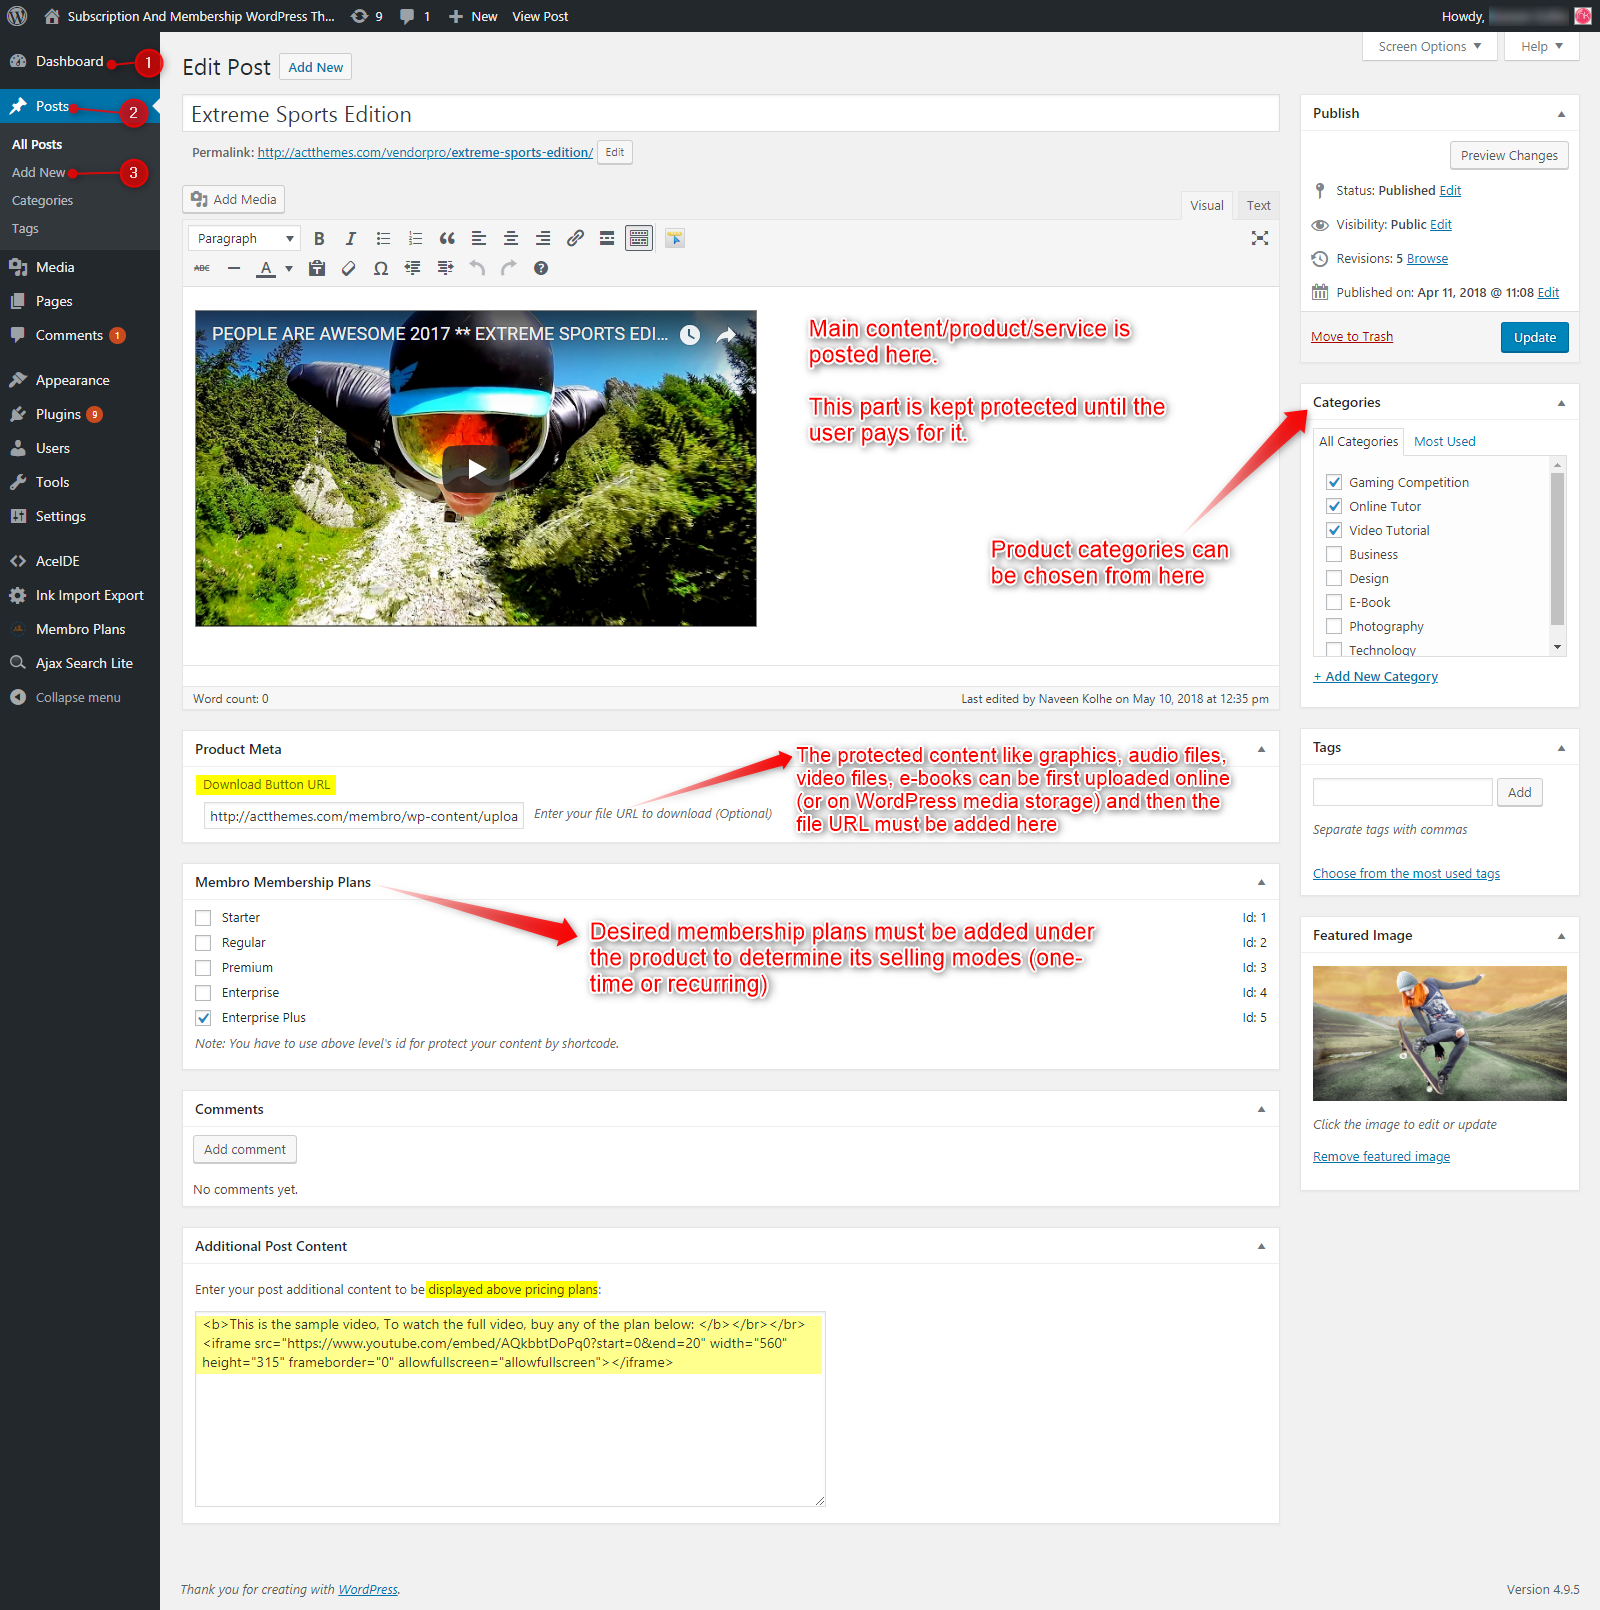
Lastly, you can add your products, services or content via Posts and monetize it under the subscription plans created via Membro Plans plugin.
Evidently, it is as simple as adding a post, choosing an apt category for it and protecting it under premium content by setting up a subscription plan.
Highly Coherent Search Module
The final module that makes Membro WordPress Theme a must-have tool for your online membership endeavors is Ajax Search Lite – A Search module plugin.
You get this plugin as an added bonus just like Membro WP plugin.
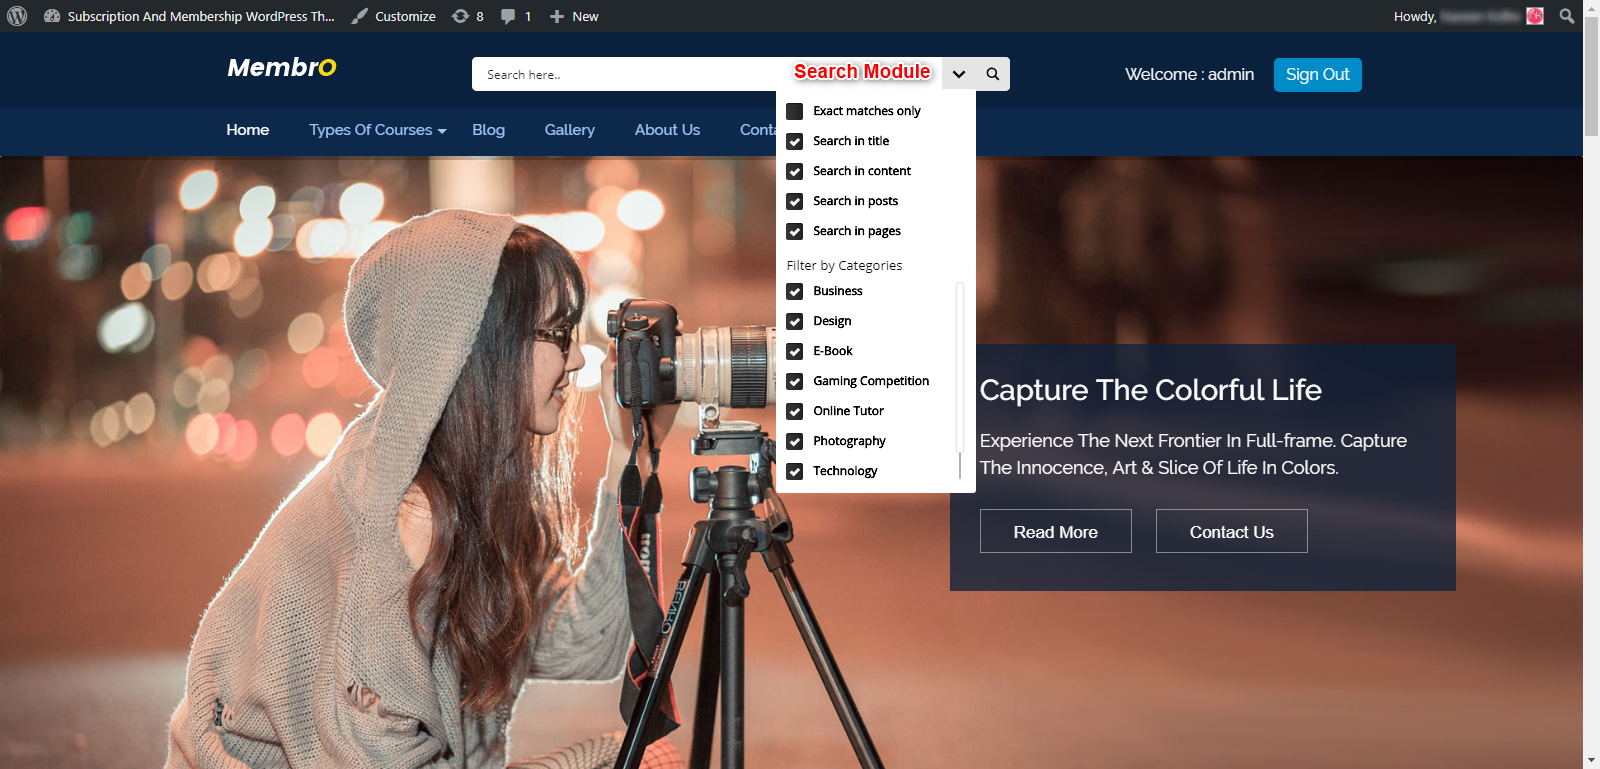
This plugin searches the keywords in title, content, pages and posts, along with exact matches only. You can also filter search criteria with categories.
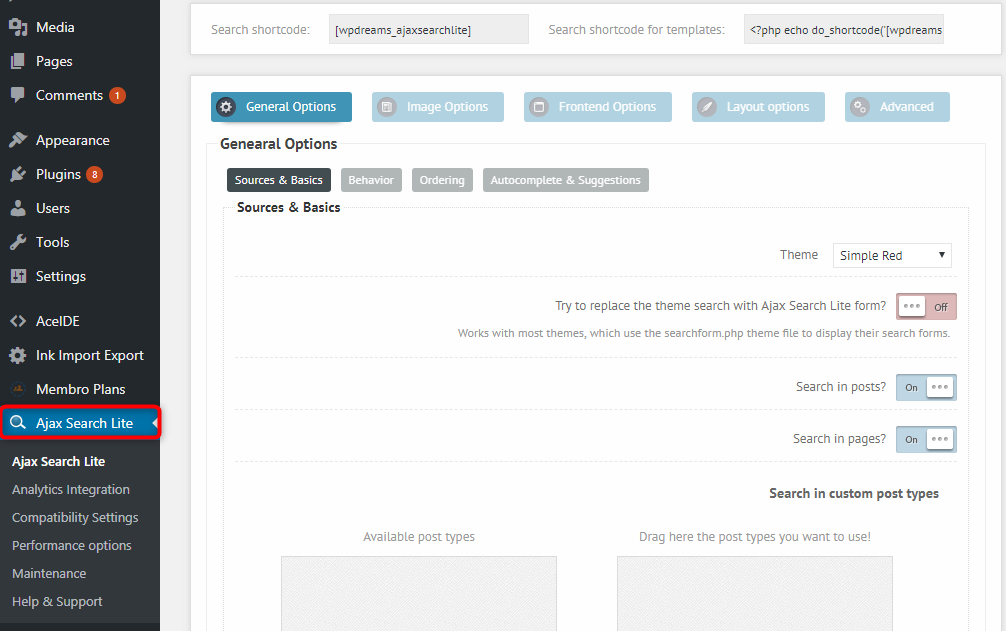
Advanced settings for the plugins are available under –
- General Options
- Sources & Basics
- Behavior
- Ordering
- Autocomplete & Suggestion
- Image Options
- Frontend Options
- Layout Options
- Advanced
What’s next?
I hope this documentation fulfills your quest to create a reliable membership/subscriptions based site. In case you have any question in your mind about the theme, feel free to shoot it in the comments section below.
Or, with just a press of a button, you can get the prompt response for all of your queries.
Intrigued with creating highly functional systems?
Take a look at other interesting Do-It-Yourself guides –


