Introducing new interesting business corporate WordPress theme-Harrington.
Harrington WordPress Business Theme
This blog is a complete WordPress Theme tutorial for Harrington. You can easily build your WordPress Corporate Business website with the help of this theme tutorial.
The theme is extremely beautiful and set to leverage your business and corporate website to the sky limit. It is meant to give a true appeal to your business in front of your audience. The theme is perfect to build a business corporate website which is widely expressed.
The WordPress theme has got an interesting element to engage your audience. To give a true appeal to your business corporate site.
The theme consists of attractive sliders, column-feature area, widgetized footer-sidebar area, the blog featured area on the homepage. Besides, it has some templates to customize your blogs & pages according to your requirement.
You can easily build your WordPress business corporate website instantly.
Take a view on the Harrington configuration guide video tutorial as given below.
Here is a step by step configuration of the theme.
In the following Tutorial you will know about how to use Harrington WordPress theme on your website. Following are the points that have been explained:
- How to install WordPress Harrington Theme?
- How to upload logos, favicon on the website?
- How to activate the slider on the home page?
- How to use homepage feature area?
- How to use homepage bottom feature?
- How to use contact page map?
- How to change the theme, style options?
- How to add social icons on the WordPress website?
- How to use footer settings?
- How to create posts on the website?
- How to create drop-down menu on the website?
- How to create a gallery page on the website?
Let’s discuss the above topics one by one.
How to Install the Theme?
Before installing Harrington theme make sure that:
- You have a web server installed on your machine.
- You have installed WordPress on your server.
Installing the theme is very simple and easy. It will hardly take a minute. Just follow the simple steps given below:
- To install the theme go to your WordPress dashboard.
Dashboard -> Themes -> Install Themes
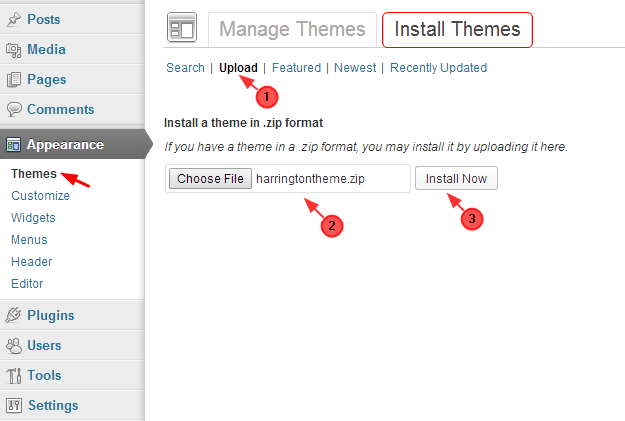
- Choose the downloaded harringtontheme.zip file and upload it on your dashboard.
Upload -> Choose File -> Install Now - Click on Activate option to activate the theme.

- This is the final screenshot, once the theme is installed.

- The theme is now activated and you can configure it from the Theme Options panel.
How to Upload Logo, Favicon and Background image on the website?
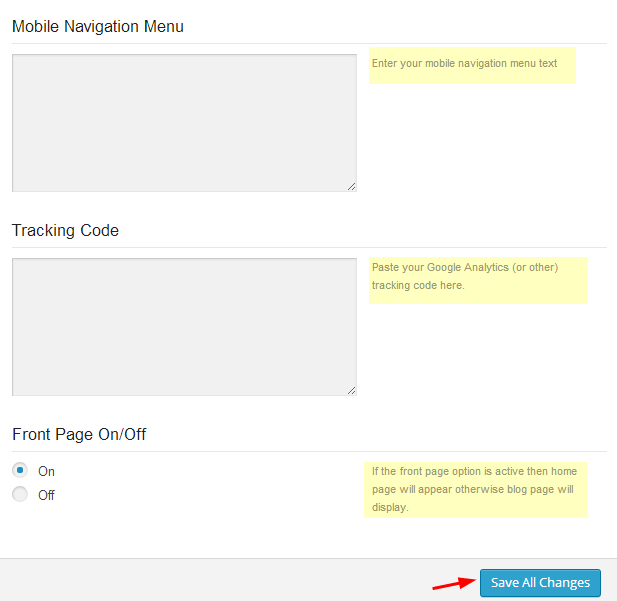
- Uploading logo, favicon and background images on the website is very simple. Moreover, you can mention the mobile navigation menu on the website (which will display when the theme is opened in mobile browsers) and add Google tracking code. Just go to your dashboard and do the following steps:Dashboard -> Appearance -> Theme Options -> General Settings
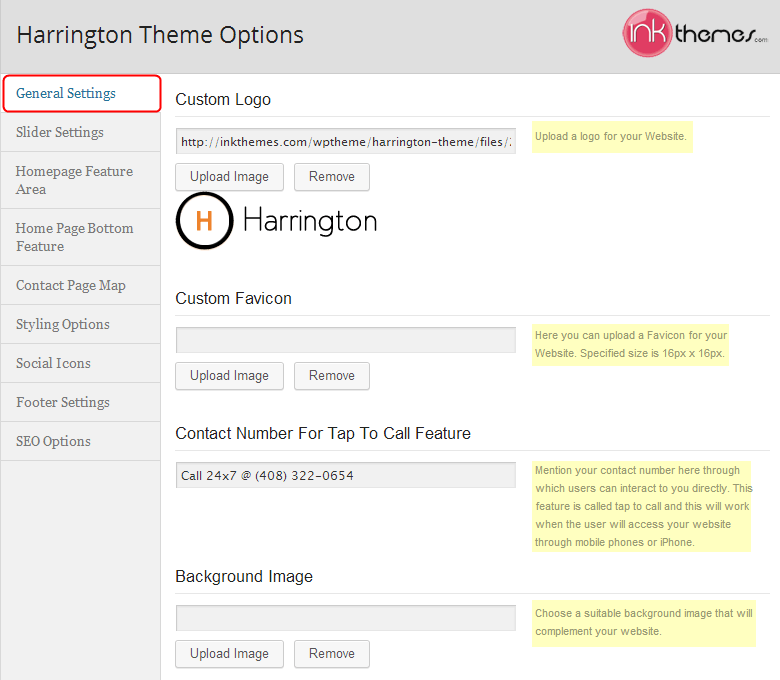
- After uploading the logos, favicon, mobile navigation menu and tracking code, click on Save All Changes button.
How to Activate the Slider on the Home page?
Before I show you how to implement slider settings, let me tell you something very interesting thing about the sliders in the theme.
In Harrington theme, the slider is designed with Kenburns effect. This is something like a magnetic effect. The images in the sliders will zoom and move. The overall feature gives a neat and attractive look.
- In the slider, you can show maximum of 6 images, whereas minimum would be one. With each slider image, you can set the heading and short description according to you. Moreover, you can also give a link for slider images and its text.
Note: The optimal size for slider image is 1600px wide * 750px height.
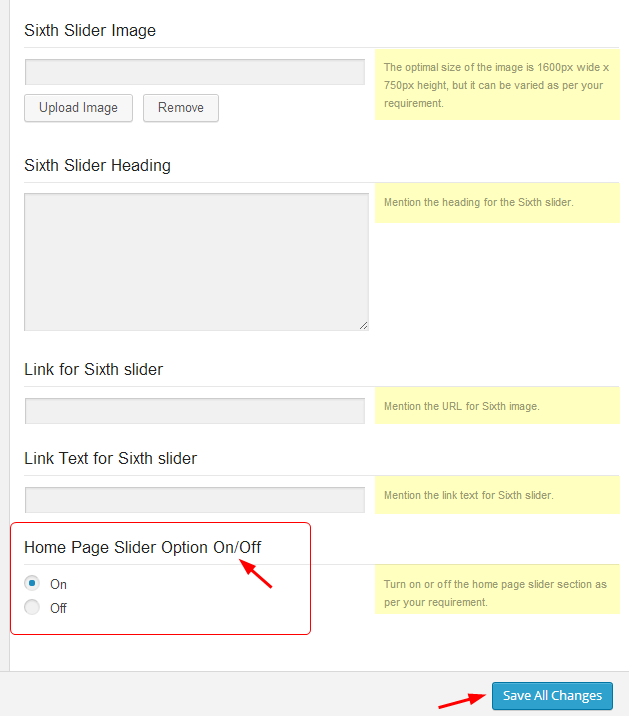
- You can activate the slider on the home page by performing the following steps given below.
Dashboard -> Appearance -> Theme Options -> Slider Settings
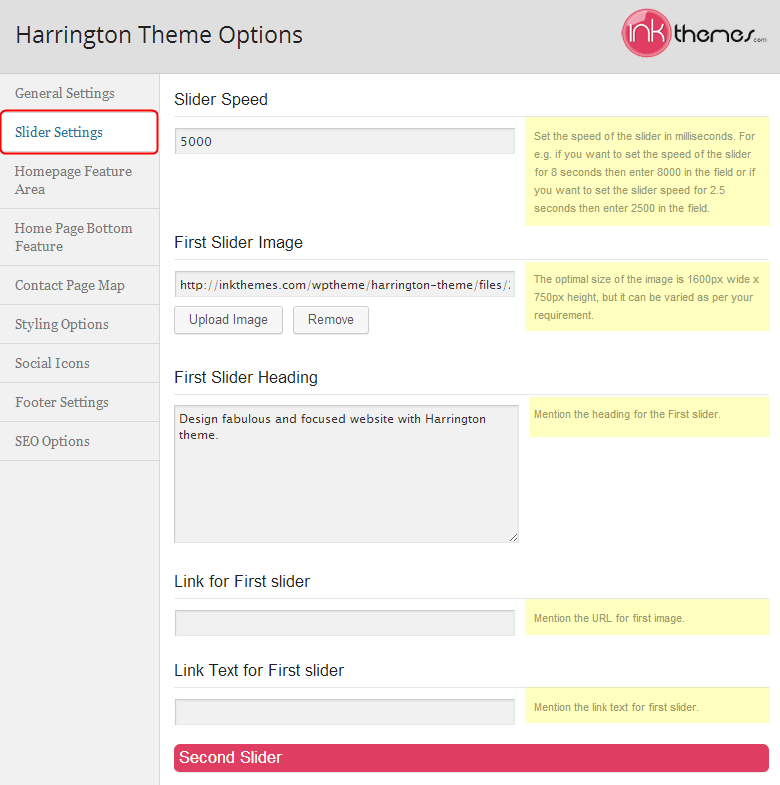
- Click on Upload Image button and upload the images which you want to show in the slider.
- Moreover, you can also set the slider speed (in milliseconds) according to you.
- For e.g. If you want to set the slider speed as 5 seconds then enter 5000.
- There is an option to show or hide the slider. Just check off the required radio button in the field Home Page Slider On/Off, either to show the slider or hide it. You can see in the image below.
How to use Homepage Feature Area?
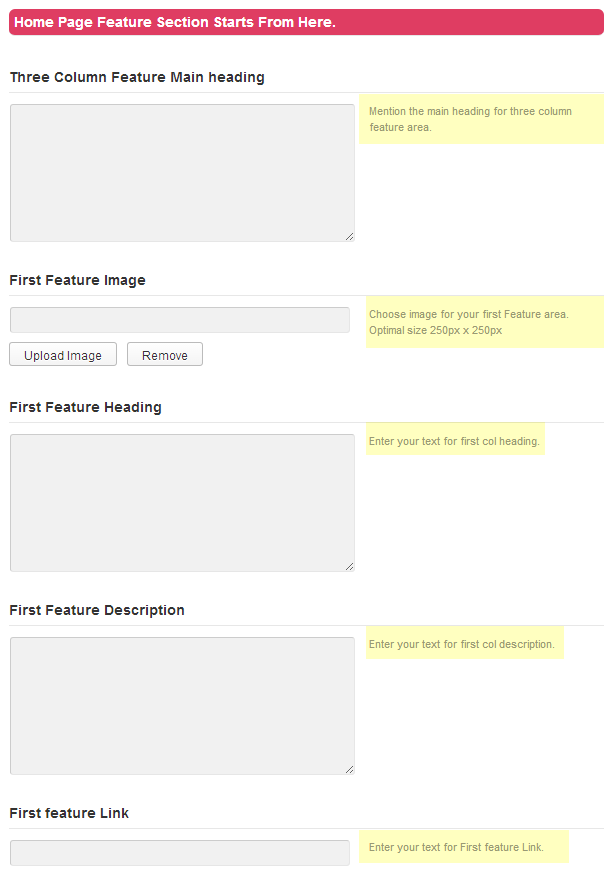
- The homepage feature area consists of 2 feature sections.
- You can set feature circle image, feature heading, feature description and feature link in each of the sections.
Note: The optimal size for feature circle images is 250px wide * 250px height.
- You can either show the feature area or hide the feature area by check off the desired radio button in Home Page Top Heading Section On/Off.
For that Go to
Dashboard -> Appearance -> Theme Options -> Homepage Feature Area
- You can give heading and write text in the feature area in the following section as shown below.
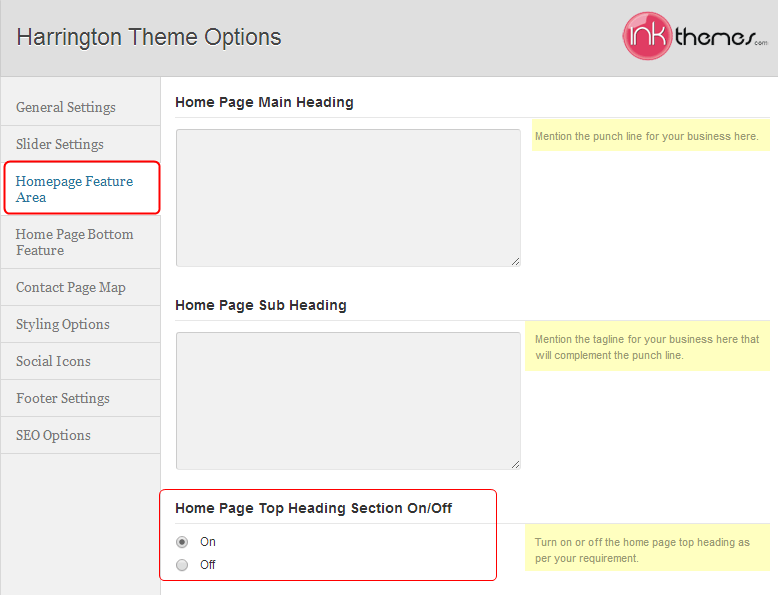
- You can show or hide the feature area by selecting one of the radio buttons in the options Homepage Three Column Feature Area On/Off. After finishing desire settings, click on Save All Changes button.
How to use Homepage Bottom Feature?
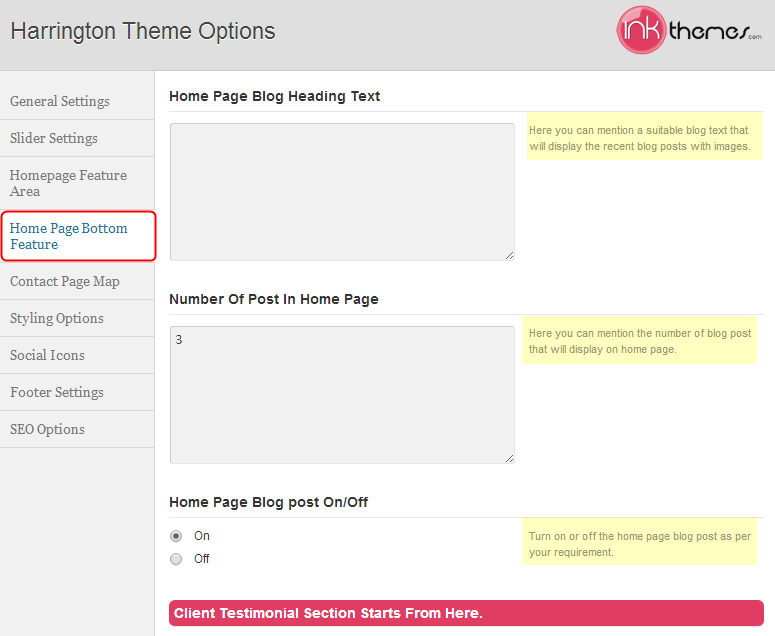
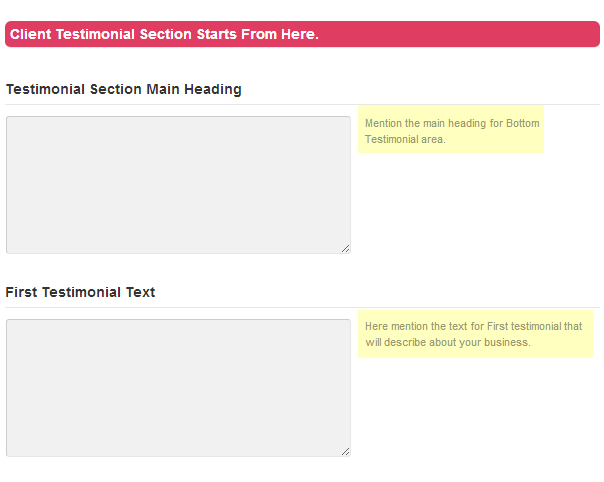
The home page bottom feature consists of following sections- Home Page Blog Heading, Number Of Post In Home Page, Home Page Blog Post On/Off, Testimonial Settings.
In Homepage Blog Heading you can set an appropriate heading and short description of the latest featured blogs.
In Number Of Post In Home Page, you can set the required number to display the latest post on the homepage.
In Home Page Blog Post On/Off, you can show or hide your blog post by selecting either On/Off the radio button.
To set the settings Go To
Dashboard -> Appearance -> Theme Options -> Home Page Bottom Feature
- You can write the testimonial in options as shown below:
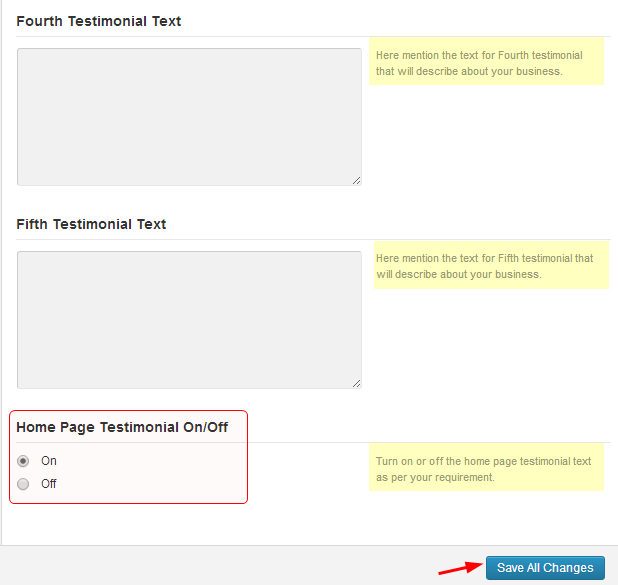
- You can show or hide the testimonial with the following option as given below.
How to use Contact Page Map?
You can show the map location of your business on the website by pasting the iframe code generated by google map in this section and then click on Save All Changes.
For that Go to
Dashboard -> Appearance -> Theme Options -> Contact Page Map

How to Change the Theme Style?
There are various styling options available in the theme. You can change the style of the theme through the following procedure.
Dashboard -> Appearance -> Theme Options -> Styling Options

Moreover, you can also add your own CSS code here for any customization.
How to Add Social Icons on the website?
Social icons are very useful for a website. There are various social icons available in the theme. The social icons will be displayed in the footer.
You can use them through the following procedure.
Dashboard -> Appearance -> Theme Options -> Social Icons

How to use Footer Settings?
You can set the text of your choice that will be displayed in the footer. You can do it through the following procedure.
Dashboard -> Appearance -> Theme Options -> Footer Settings

How to Customize SEO Settings?

How to Create Posts on the WordPress Website?
You can easily create a post on your website by following steps given below:
Step1. Dashboard-> Posts-> Add New

Step2. Write the post name with relevant content as shown in the image given below:

Step3. You can select the category for the post or create a new category.

Step4. Set featured the image of the post.
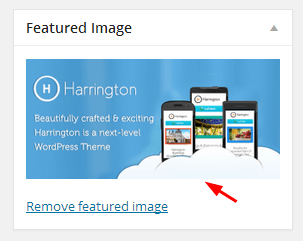
Step5. Save the changes and click on Publish.

How to Create Drop down Menu on Website?
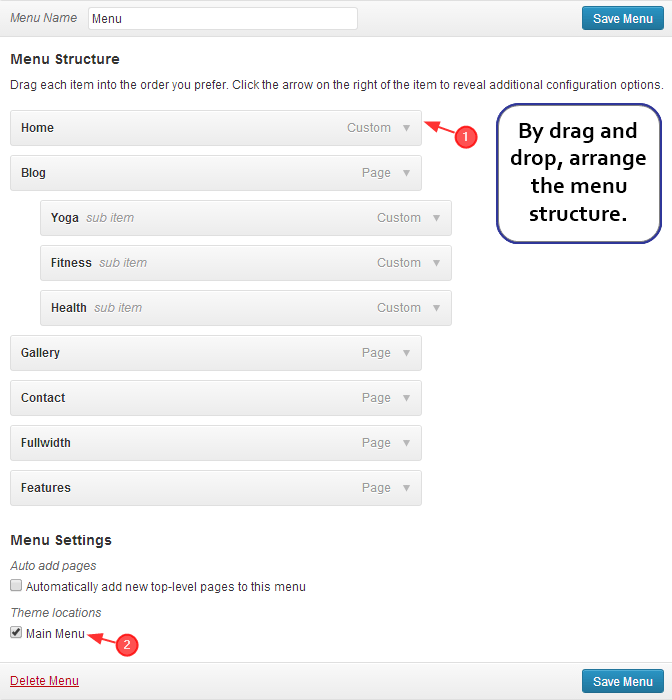
You can easily customize the menu with the following steps:
Step1. Dashboard-> Appearance -> Menus

Step2. Give Menu Name (let’s say menu) and click on Create Menu.

Note: Don’t forget to save the menu before starting to create the menu structure.
Step3. Create a custom link of the home page of the website, for that, go to link tab, give Link Text and URL and click on Add to Menu.

Home page is now added and listed in the menu.
Step 4. Add other pages in the menu structure.
For that, select pages from the Most Recent option by putting check and click on Add to Menu.

You can drop-down the pages according to your choice.
Step 5. Put a check on Main Menu and then click on Save Menu.
How to Create Gallery page on the Website?
You can easily create a gallery page in the theme by following the steps given below:
Step1. Dashboard -> Pages -> Add New

Step2. Select the template as Fullwidth Page.

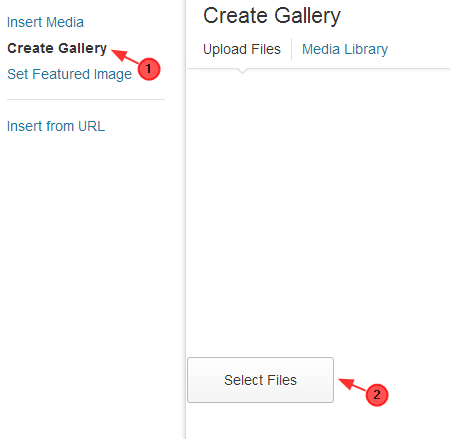
Step3. Click on Add Media to create a gallery.

Step 4. Click on Create Gallery.

Step 5. Go to Upload Files-> Select Files
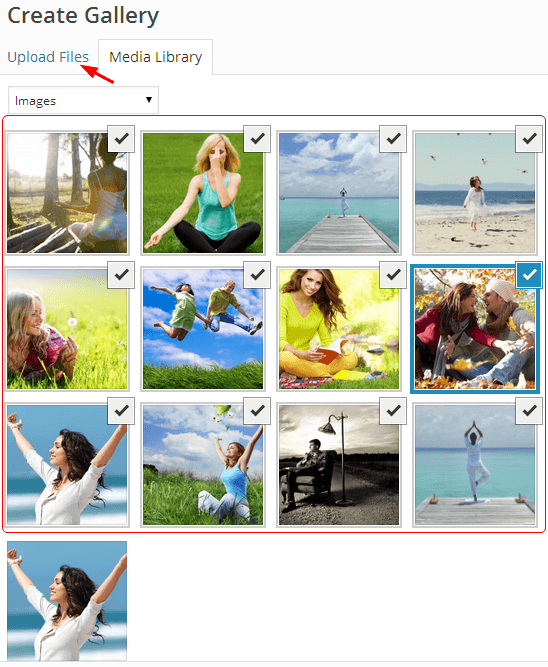
Step 6. Select the required images and upload them in a gallery.
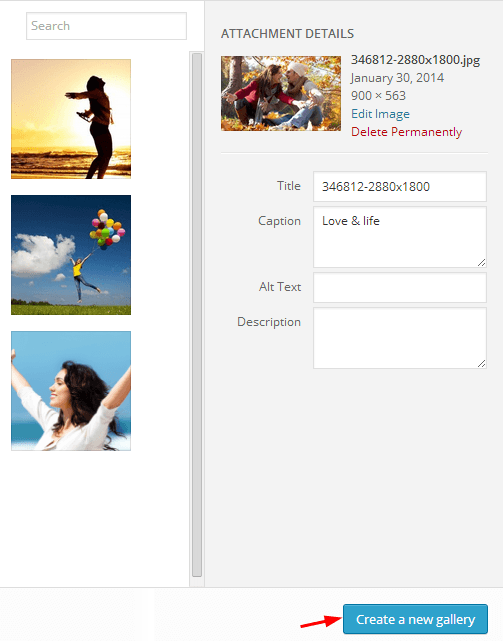
Step7. Click on Create a new gallery button.
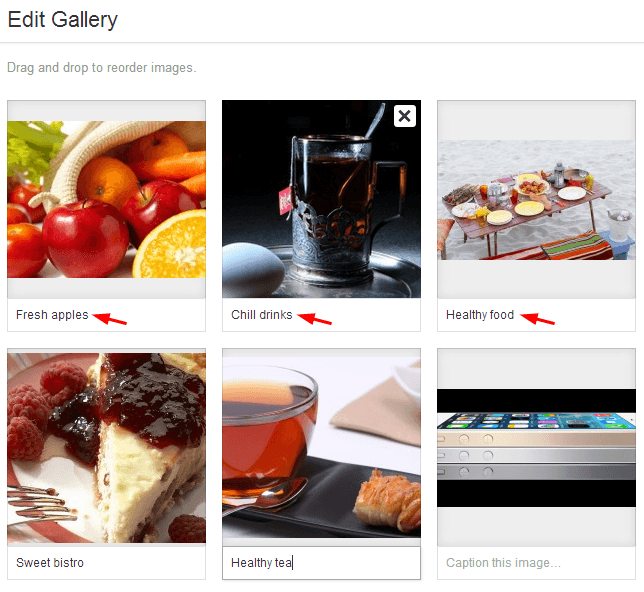
Step 8. You can write a caption for each image as shown below:
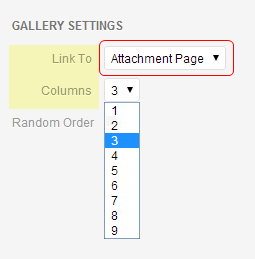
Step 9. Select Column number from the option.
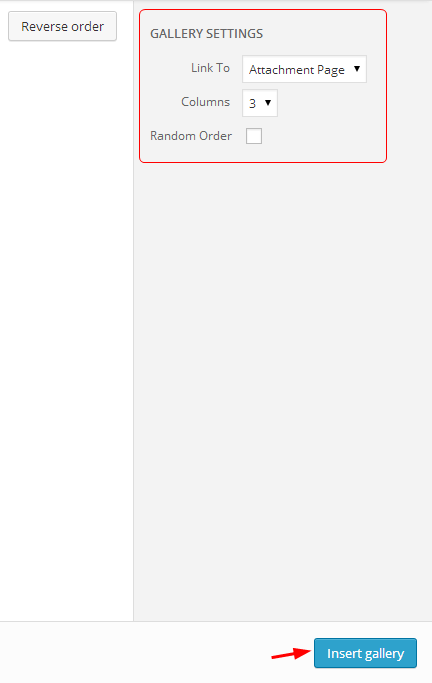
If you want to create a gallery of 3 column, select 3 in front of the columns.
Similarly, you can create a gallery of 4 column or multiple column by selecting the number from the drop down.
Make sure that Link To field is set to Attachment Page.
Step 10. Click on Insert gallery.
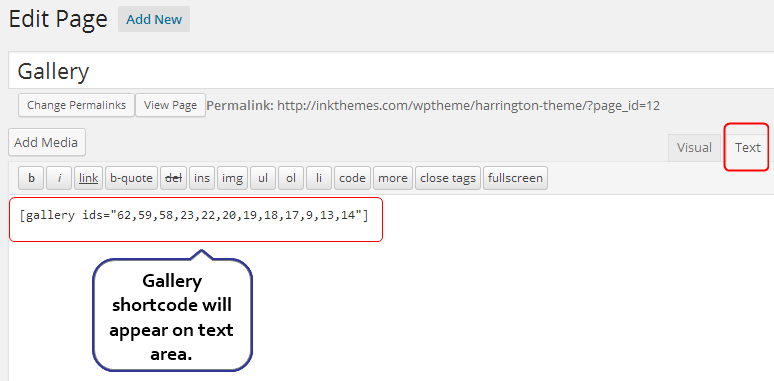
Once the gallery is created, you can see a gallery shortcode will automatically appear on the gallery page. See the below screenshot for the reference:
Step 11. Save the changes and click on the Publish button.
Once, you create the gallery, the final gallery will appear like this as given below:
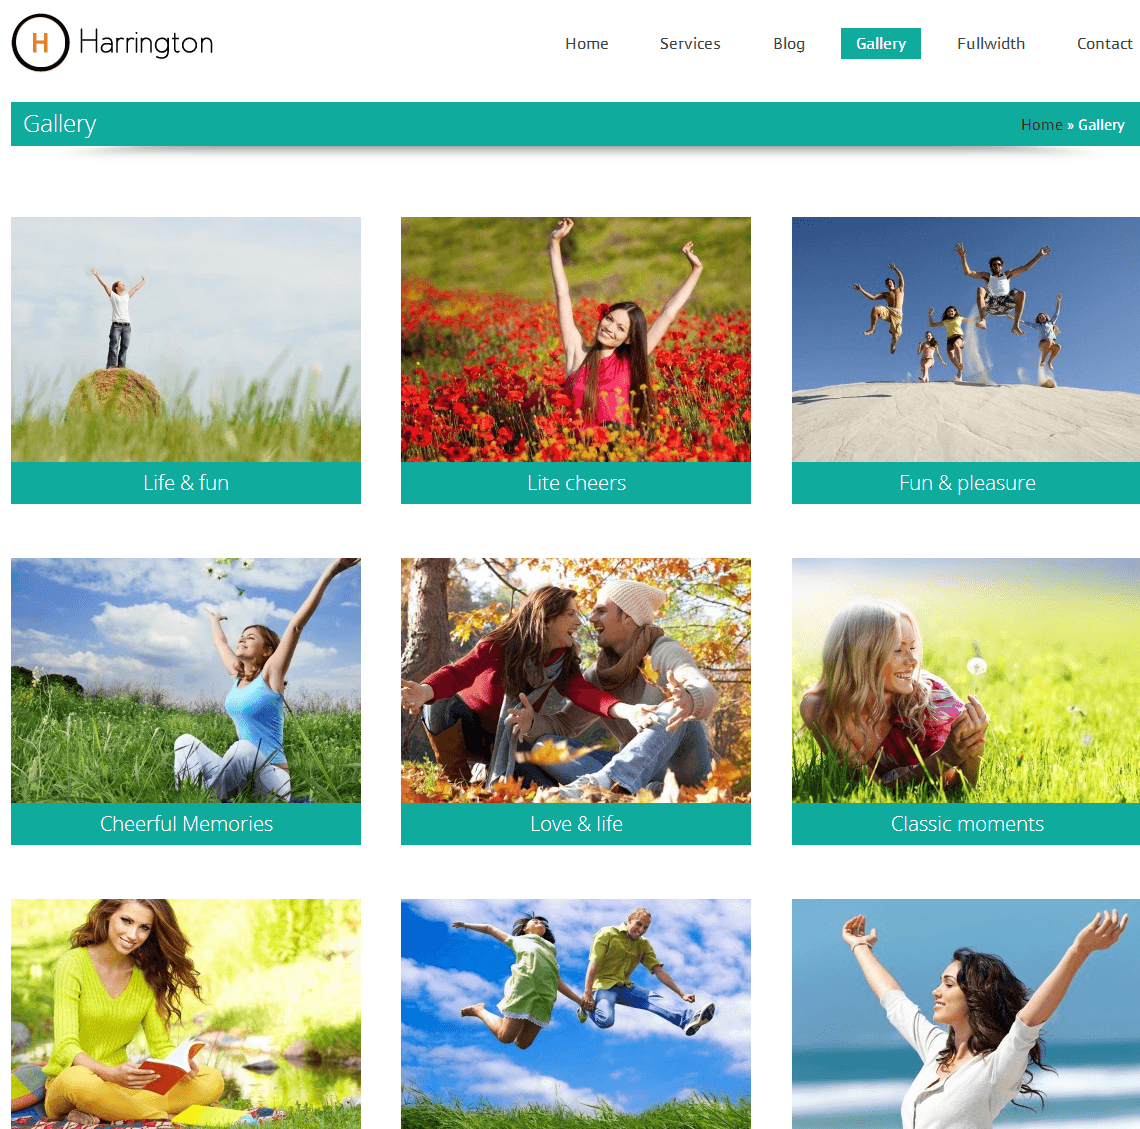
With this, you have completed creating the main features on your website’s home page.
Besides, the theme has widgitized footer and sidebar. You can easily put widgets on sidebar and footer according to your requirement.
Conclusion
Above, I have explained to you, how you can create a website with Harrington theme in simple steps.
If you face any problem while deploying your website with the theme, you can contact us at https://www.inkthemes.com/community/.
The theme cost $45 but through coupon code, you can buy the theme at 20% discount.
Coupon code: HARRINGTON20


