GROW YOUR BUSINESS BY 30-90% USING THIS AMAZING SYSTEM
PRESENTING “TIME-SAVING + MONEY MAKING” TOOL
InkAppointment WordPress Plugin
A highly capable 360-degree solution for booking appointments, capturing leads, collecting payments but most importantly,
You get to harness the profit & loyalty of your clients by notifying & reminding them about the scheduled appointment using automatic SMS & Emailing Feature
Ink Appointment plugin is a business-oriented plugin that dramatically increases the number of booking by removing the need to go manually back and forth. This plugin allows your customer to book online 24/7, send automated text via SMS or Email and receive online payment through PayPal. The plugin is designed to fit the needs of doctors, lawyers, beauty related businesses like spa and beauty salon and other service providers.
Well if you want the complete solution for your business you can download our SmartBooking WordPress theme integrated with appointment booking plugin. Well if you don’t want to change the look and feel of your site you can try our appointment booking plugin just click the link below.
Ink Appointment WordPress Plugin
What Ink Appointment Plugin can do for your business?
As I have mentioned above this plugin is the for business-oriented website and is an ideal way to accomplish an online appointment booking for your customers, now I will speak more in-depth about it. This is a widgetized plugin and you can easily integrate it with any of the WordPress websites. It has inbuilt booking form where you can display all the services offered by you and when your?customer visits your site they just have to do following things-
- Fill their details.
- Choose the particular service according to their suitable time slot at a specified date.
- Submit the Appointment Form.
As soon as the customer completes the appointment booking, the system will automatically confirm the booking and send an email to the website owner and the user. The booking details will be stored in WordPress dashboard and can be visible to you.
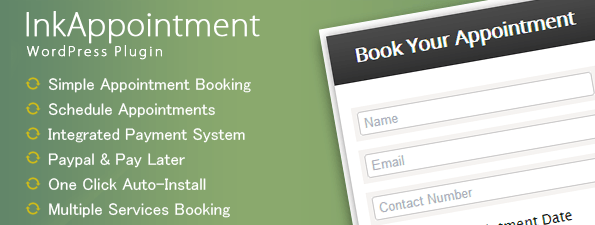
Key Features:
-
Email & SMS Booking Notifications.
-
Appointment Reminders via Email & SMS.
-
Calendar View for Booked Appointments.
-
Enable/Disable Appointment Days & Dates.
-
PayPal/Pay Cash Later payment options with different Currencies.
How To Install Ink Appointment?
You can install the Ink Appointment plugin on your dashboard very easily with any of the Premium WordPress themes from InkThemes, although I have implemented it with Colorway theme. Simply follow the steps given below:
- First off, install any suitable theme on your dashboard for e.g. Colorway theme.
Go to Dashboard -> Appearance -> Themes -> Add New -> Install Themes.
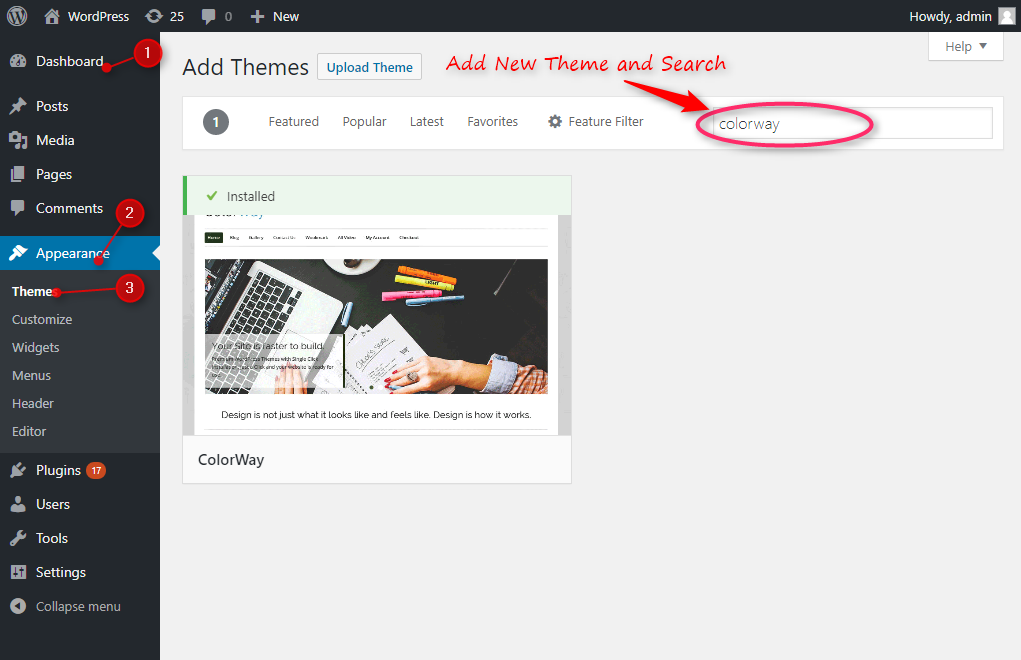
- Install the Colorway theme and activate it.
- Under the Dashboard choose Plugins option.
Dashboard -> Plugins-> Add New - After that a page will appear with the heading Install Plugins option.
- Go to Upload option, click on it.
- In the next step, select the Ink Appointment plugin.zip file from the desktop and upload it.
- After uploading the file, click on the Install Now button.
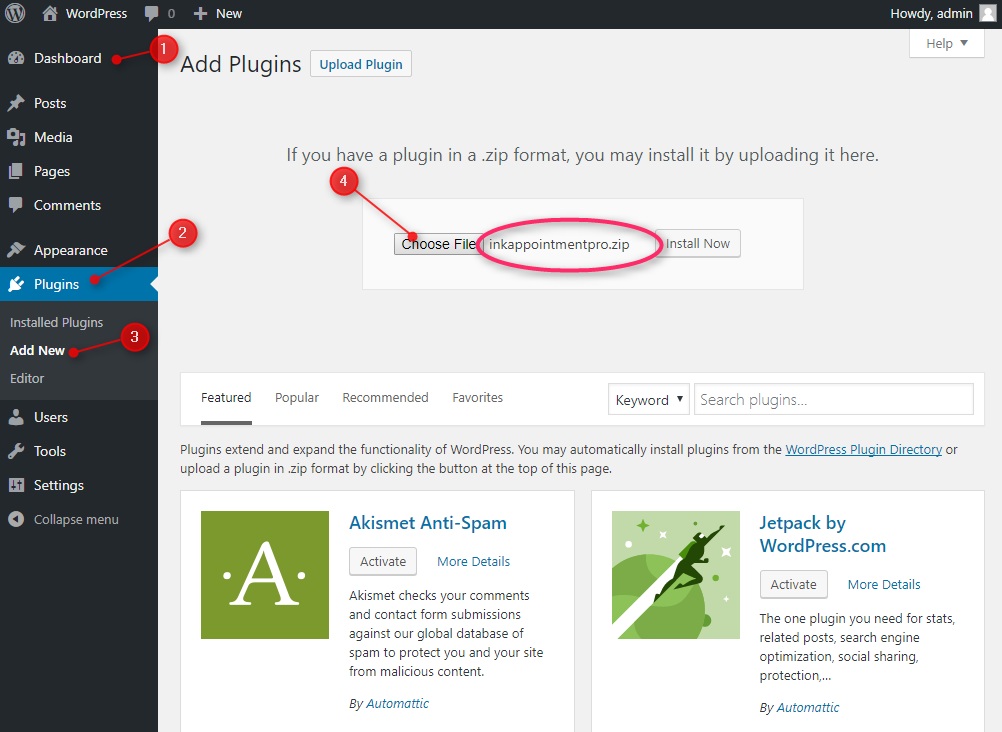
- Click on Activate Plugin option to activate the plugin on your website, you can see the Appointment plugin icon and Menu under your dashboard. See the image for reference:
How To Use Ink Appointment?
It has some of the basic inbuilt features that help you to customize your services according to your website niche.
Create Appointments:
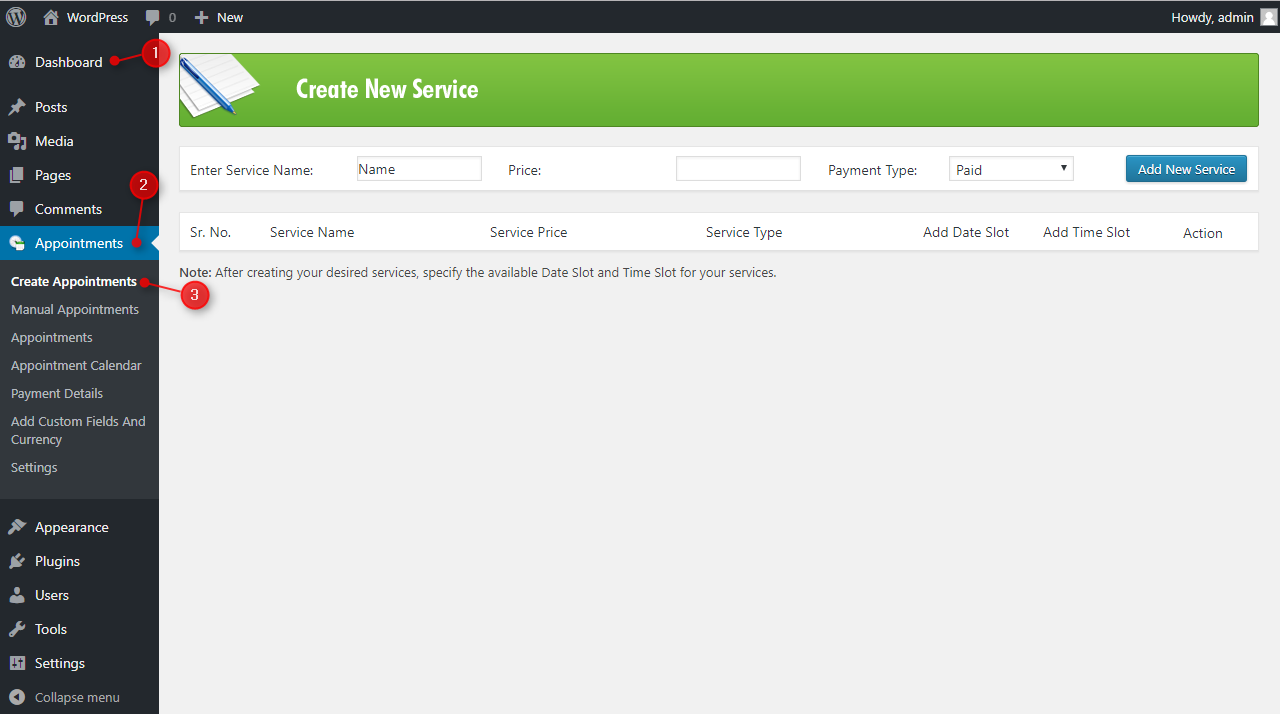
It allows you to create your desired services specifying date, timing and pricing detail to display in the appointment form on your website. Follow these steps to create your services to display them on your website:
Go to Dashboard -> Appointments icon -> Create Appointments.
- After that Create New Service page will appear. Enter the name of your service and its price and then click on Add New Service button. If you want to add multiple services repeat the above step for the same. See below the screenshot:

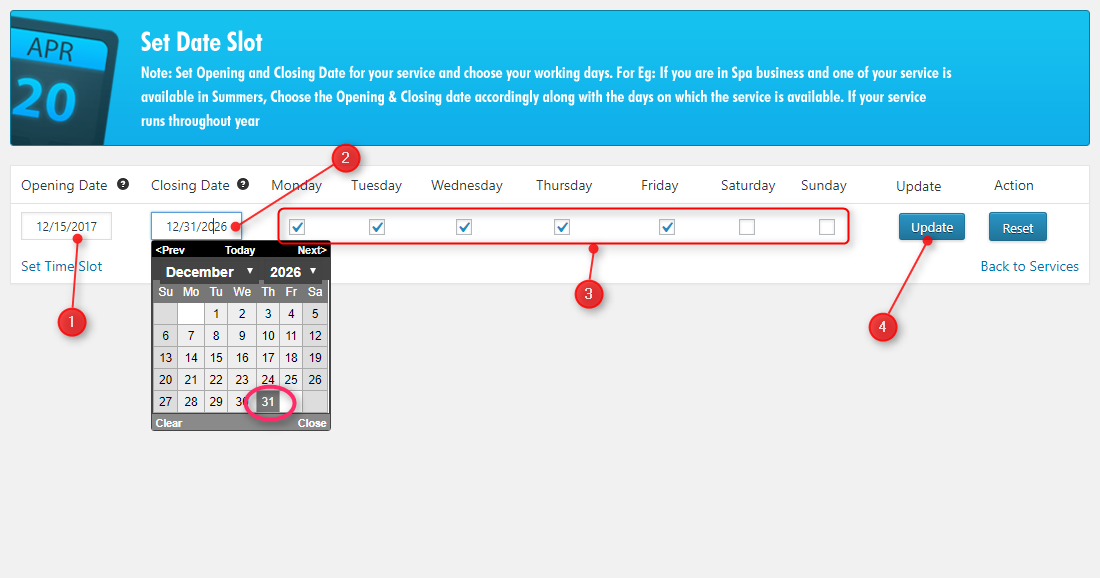
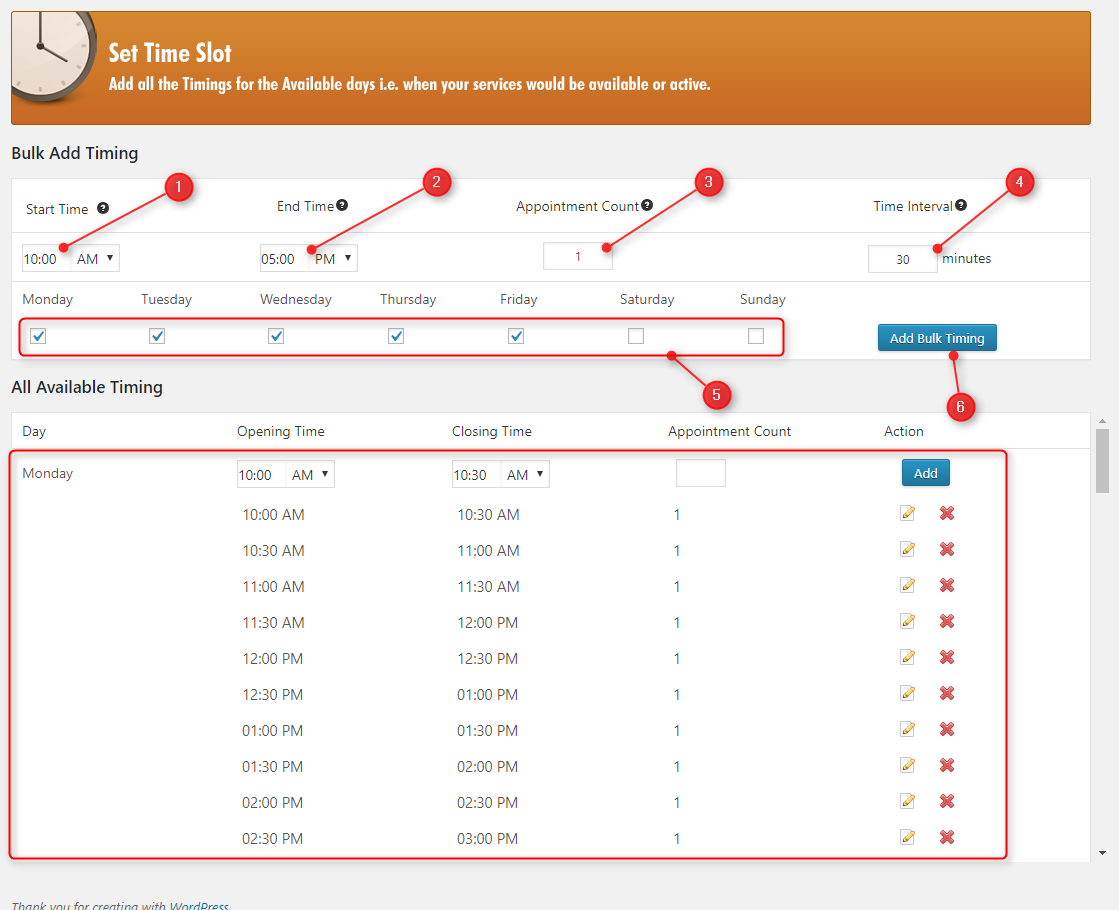
- In the next step, set the date slot and time slot of your services. Just click on the Add Date Slot button to mention the dates and Add Time Slot button to mention the time duration in which the services will be available for customers.
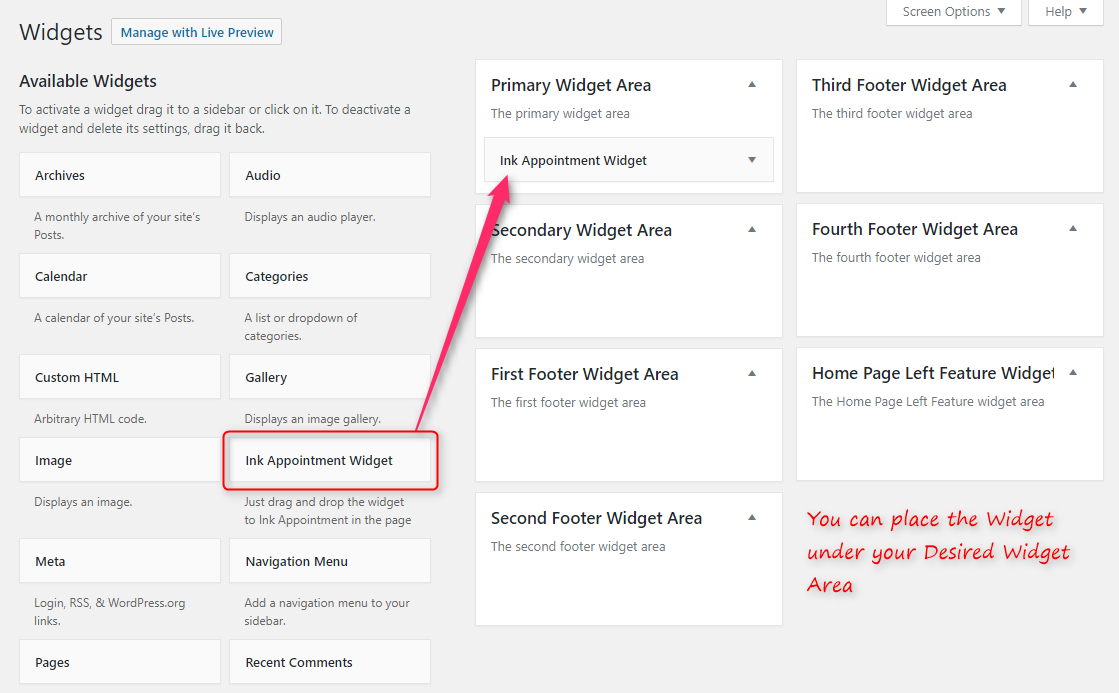
- Drag and drop Ink Appointment Widget on any of the sidebar widget according to your requirement, follow the steps:?Go to?Dashboard -> Appearance -> Widgets.
- Visit your website where you can see an appointment form. Your Customers can fill the details in the form and book the appointment. See below the screenshot:

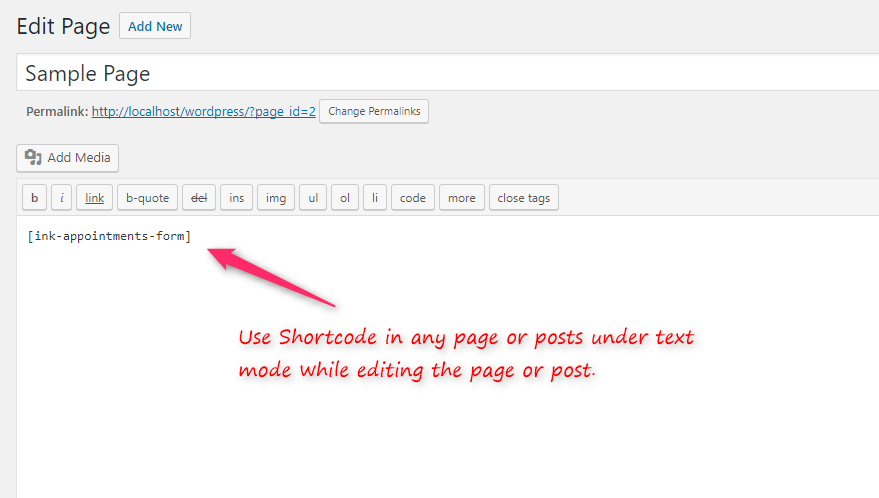
- You can also use below Shortcode to display the Appointment form in any page or post of your WordPress site.
[ink-appointments-form]
Payment Details:
This feature allows, displaying all the transaction details of your customers on the WordPress dashboard. To view the customer’s transaction details follow these steps:
Dashboard -> Appointments -> Payment Details -> Payment Transaction Details.

Book appointments:
The customers will be able to book their appointment for a particular service from the frontend, by selecting the desired services from the drop-down menu at a particular time, only one appointment can be booked. You as an admin can book appointments for users manually, there is an option provided under Dashboard->Appointments->Mannual Appointments. Once the appointment is confirmed, the customer will be notified by the email and SMS (If configured from the settings).
All the appointment details will be stored in the admin dashboard. To view the booking details on dashboard follow these steps:
Dashboard -> Appointments -> Appointments -> View All Recent Appointments/View All Past Appointments.


Calendar View:
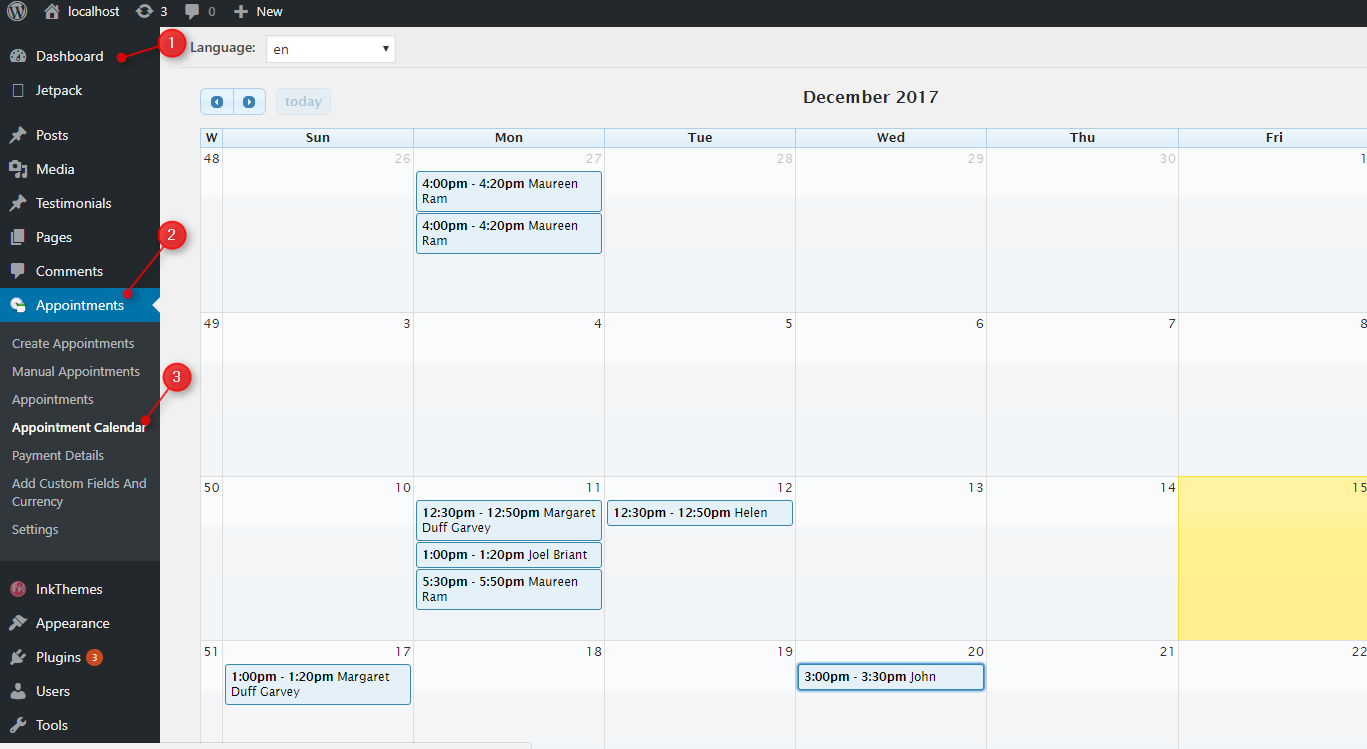
The plugin has a Calendar View option and you as an admin can check the booking on the calendar.
Adding Custom Fields and Currency
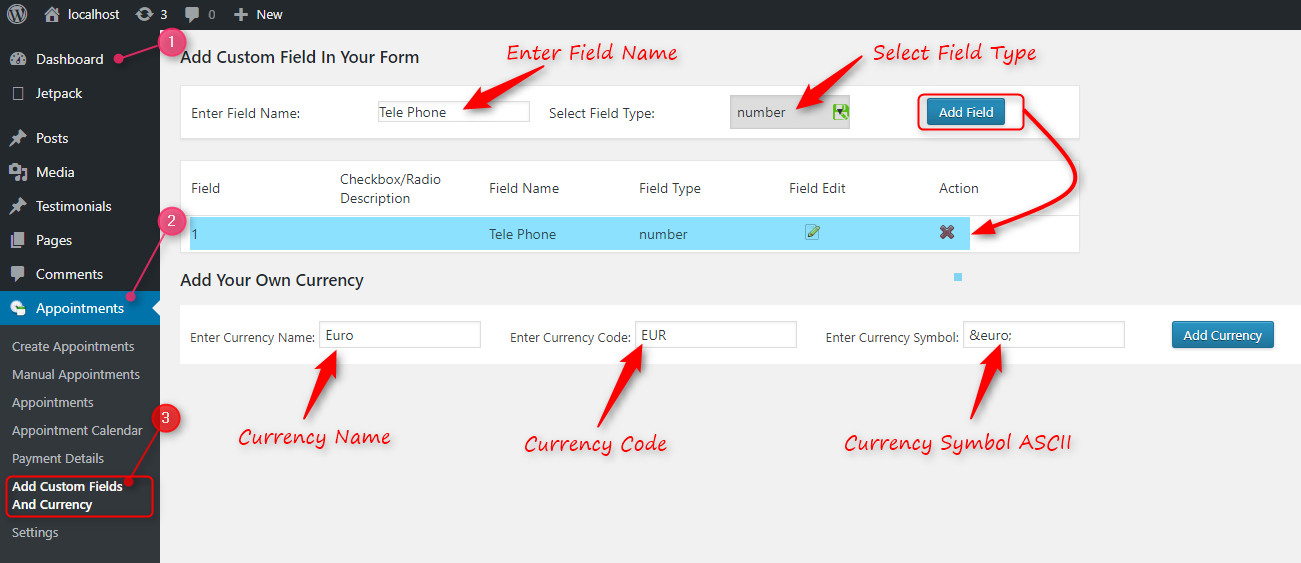
You can add your desired custom fields to the form and your own currency if you want.
Settings:
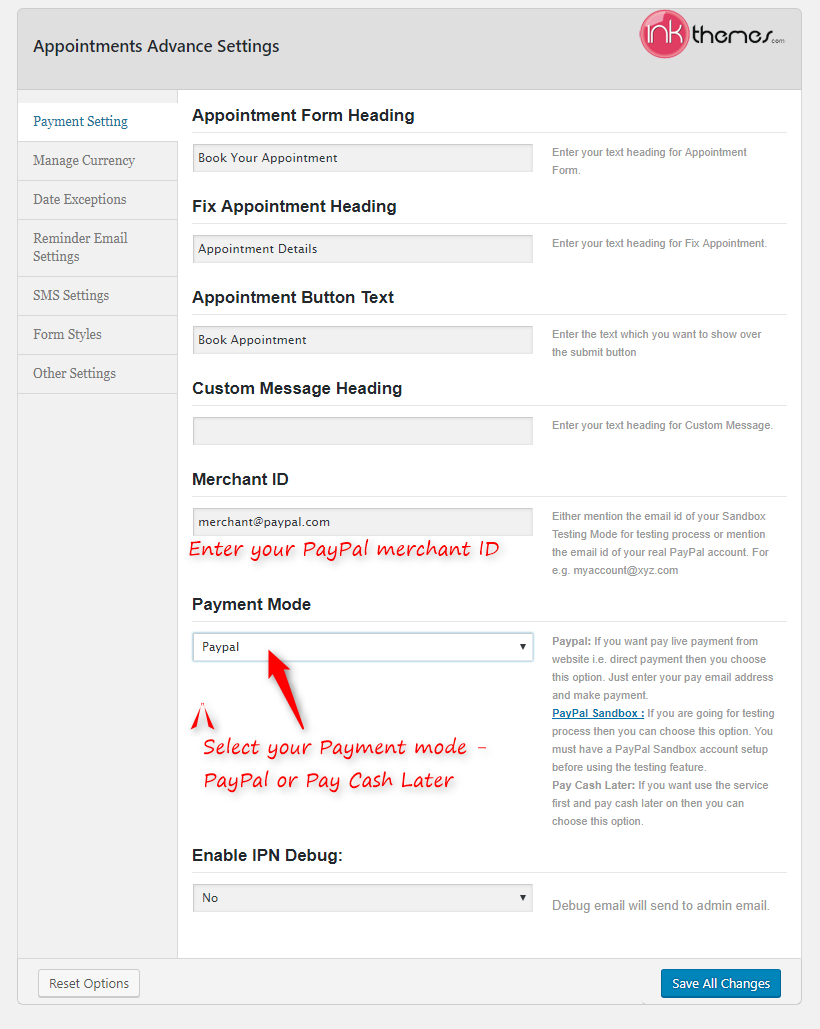
This feature is meant to customize the appointment form on your site according to your website niche.
Payment Mode:
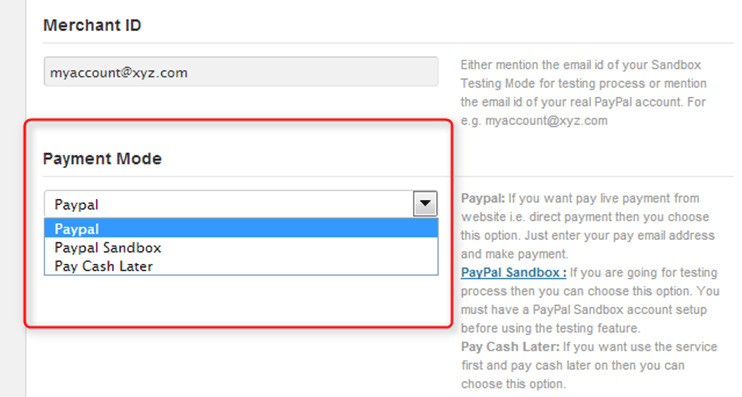
The Ink Appointment plugin provides three payment modes through which you can personalize your customer with the required option they want to pay through. It has following three options:
PayPal: When you set this option in Payment Mode field, you can receive customer??s payment through their PayPal account.
PayPal Sandbox: It is used in the testing process. Here admin can check whether the money transaction is occurring correctly or not.
Pay Cash Later: If you want your customer to pay cash after accessing your services, set Payment mode field as Pay Cash Later.
- To set the Payment mode, follow these steps:?Go to Dashboard -> Appointments -> Settings -> Payment Setting -> Payment Mode, select one of the options from the drop-down list and then click on Save All Changes button to save the changes.
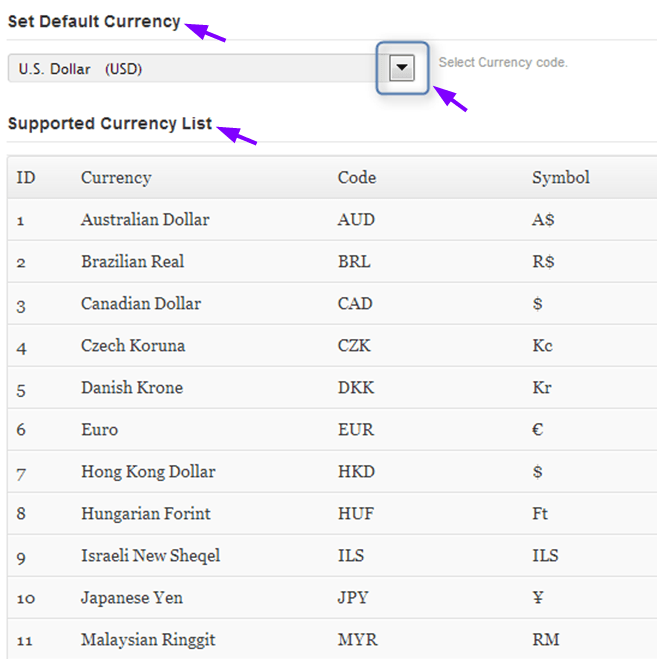
 In addition, Ink appointment plugin provides facility to the admin to set the currency according to their respective countries. It provides 24 options of various countries and its currencies.
- To set the currency option follow these steps:
Dashboard -> Appointments -> Settings -> Manage Currency -> Set Default Currency. See the screenshot below.
Conclusion:
Last but not least Ink Appointment plugin will customize your appointment form on your website and enhance the functionality of your appointment form. Additionally, it will give ease to your customers to book appointments directly from your website from anywhere in the world without any constraints. It will provide clutter-free management to your customer’s record.
If you have any queries regarding the Ink Appointment plugin, do write it down in the comment form. We’ll feel happy in helping you in any of the way.


