In the following tutorial, you will get a complete step by step procedure of using One Page WordPress Theme for building a website. All steps have been briefly explained out so that you don’t stuck anywhere while setting up things for website.
Listed below are the points that have been explained in this tutorial –
- Introduction to One-Page WordPress Theme
- How to install One-Page WordPress Theme?
- How to use the customizer panel?
Read more our popular one-page template article:-
Let’s Begin..
Introduction to One-Page WordPress Theme
One-Page is a professional and outstanding multipurpose WordPress Theme. It is based on the single-page layout that displays all the essential features on a single page and thus, makes it an easier task for the users to get all the required information within a single page.
This One-Page WP Template was built keeping the simplicity of design in mind. The theme has a clutter free interface and holds various sections so that you can effectively showcase your important business contents. Collectively, you can say that this theme will get you a website that will definitely mow down your competitors.
Download One Page WordPress Theme For Free Here

How to Install One-Page WordPress Theme?
Before installing, One-Page theme on your website make sure of the following two points –
- You have a web server installed on your machine.
- You have installed WordPress on your server.
Installing any WordPress theme is very simple and easy task. It hardly requires few minutes, and you’ll be all set with the new look of your one page or landing website. Just follow these simple steps given below –
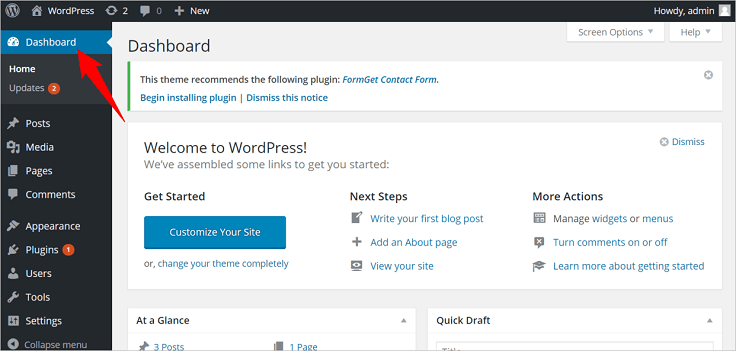
STEP#1 – Go to your WordPress dashboard.
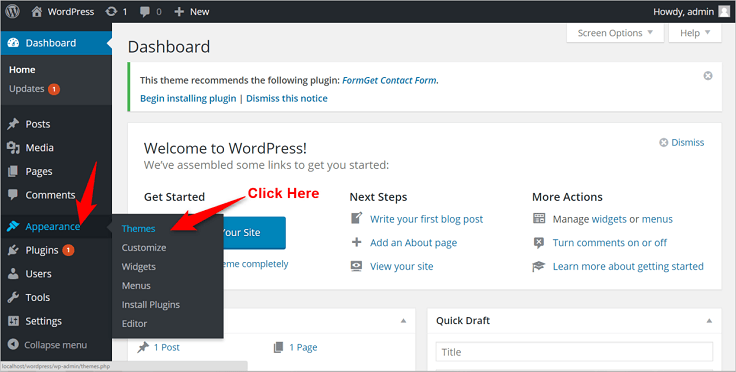
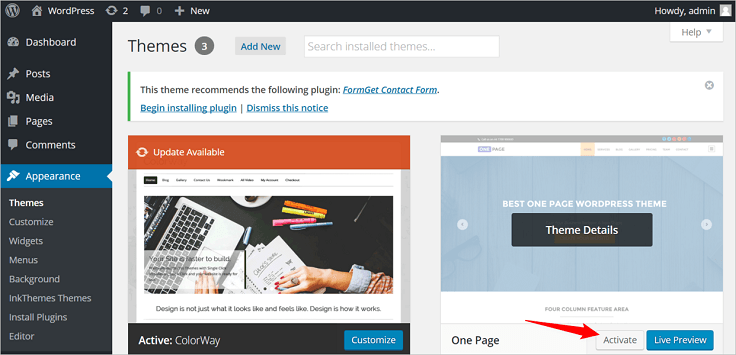
STEP#2 – Going onto Appearance tab, a new sidebar will appear. Then, Click on Themes tab and you will be redirected to the theme managing section.
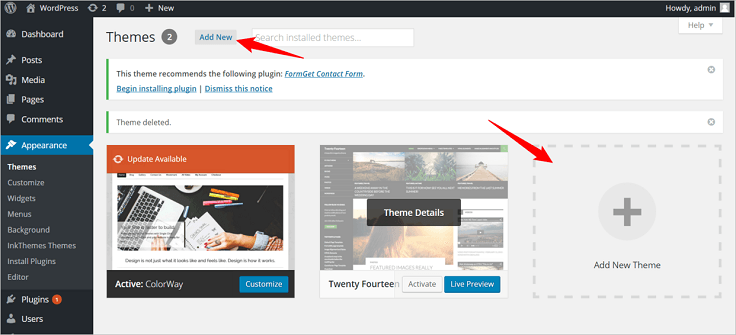
STEP#3 – Then click on Add New option and install the One-Page theme zip file, which you’ve downloaded.
STEP#4 – Now you One-Page WordPress theme will start appearing in the themes section. Click on the Activate button and you’re all ready with your new website layout.
Now, let’s move onto Customizer Panel.
How to use the Customizer Panel?
A Customizer panel in the theme allows a user to set us all the major sections in the one-page layout. In simple language, you can see it as the theme commanding center from where you can custom-make the theme as per your requirement.
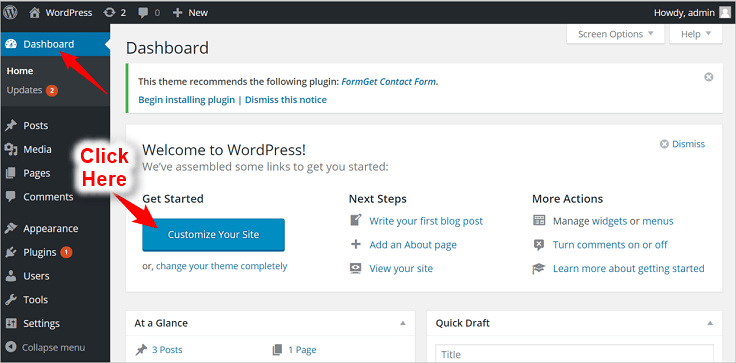
For proceeding towards customizer panel, you need to click on “Customize Your Site” tab which you’ll see on your dashboard as shown below.
Now, the customizer panel will appear as shown below. You will see various sections in the customizer panel from where you can easily configure the website as per requirement.
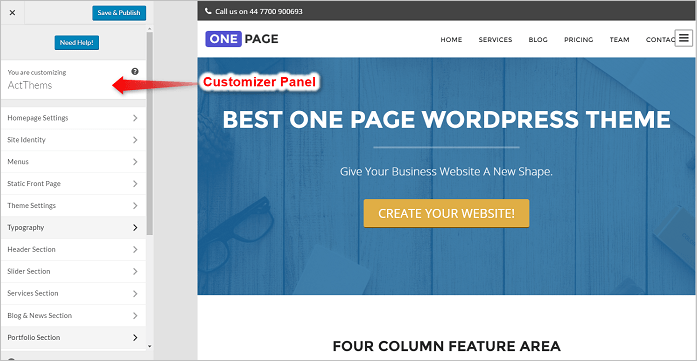
Generally, the customizer panel consists of various segments. Let’s check out each customization segment one by one.
Homepage Settings
In this segment, you can configure whichever section you want to get displayed on your homepage. These sections generally are Service section, Blog Section, Video Section, Portfolio Section, Testimonials Section, Price Section, Team Section and Contact Us Section.
You can easily add/remove various sections just by using the check-mark provided in front of the section names. Plus you can also settle the order of different sections as per your need by simply Drag-and-Drop.
If in case, you want to add some other section, you can do that it by using Add a Widget option.
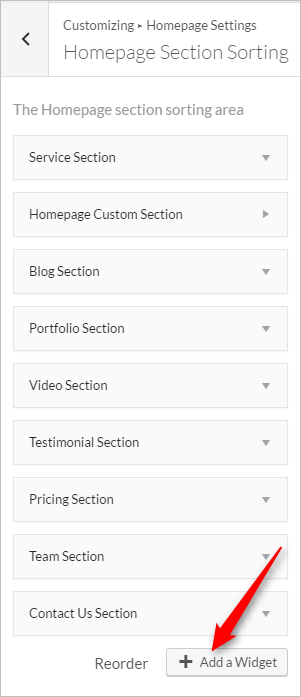
The best thing that here you’ll will like is using Homepage Custom Section where you can decide the section heading, subheading and can also writeup short description. Just see the below figure, which will clear all your doubts.

Site Identity
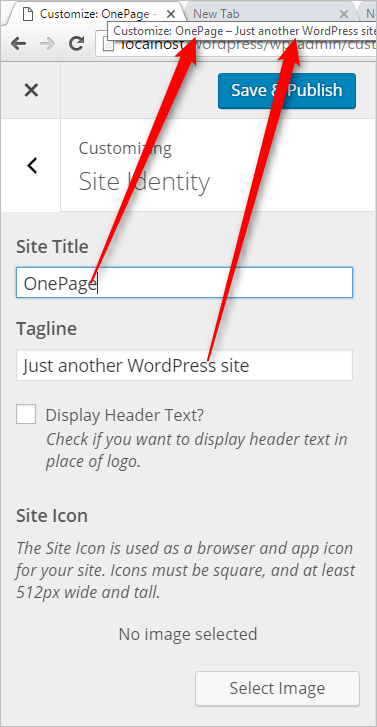
In Site Identity segment, you can set the website Title, Tagline, and Icon elements. These elements appear when your mouse pointer moves over the Title bar of the website site. The below figure will help you in understanding this segment.
Menus
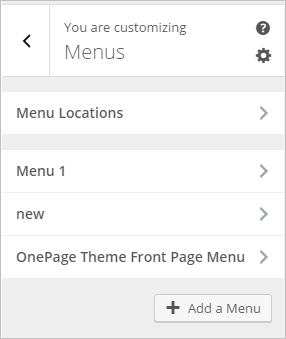
The menu segment in the customizer allows you to replace the default menu of the menu with your menu. You can set up your own customized menu which could contain the pages and menu defined by you. Hence, you could display only specific pages/menus as per your requirement.
You have the option of adding a new menu and then setting it up accordingly to be displayed in the menu bar section of your site.
Static Front Page
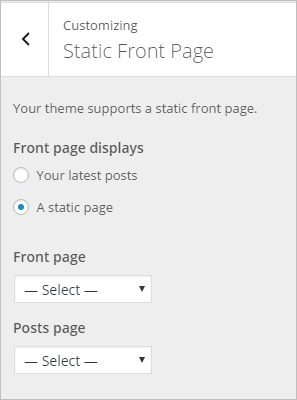
Using this segment, you can easily manage your homepage look. If you select ‘Your latest posts’ option, then the website will be displayed with the default settings. And in case, if you want to set another page as the homepage, then you can use ‘A static page’ option. There you will get the choice of setting any appropriate page as the Front Page and, similarly other pages as the Post page.
Theme Settings
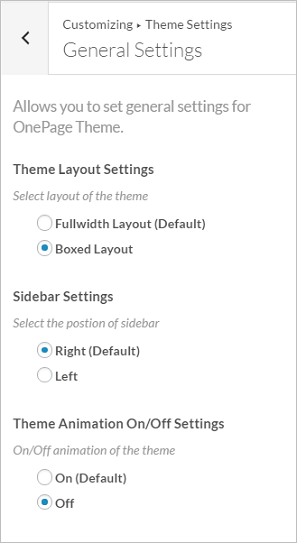
- General Settings – Here you can shape your website appearance like select either to have full-width layout or boxed layout. Plus, you can also monitor the animation effects, which is incorporated with the theme. Likewise, you can figure out where you want to show the sidebar section also.
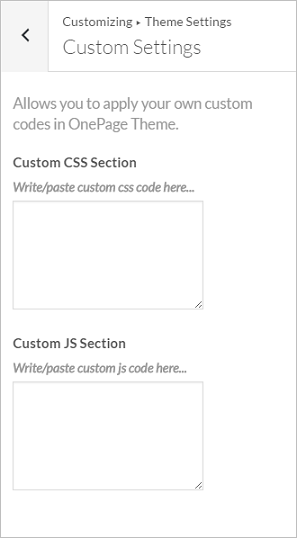
- Custom Settings – This segment includes two sections namely, Custom CSS and JS section. Those who want to customize the website by coding can do accomplish their task here.
Typography
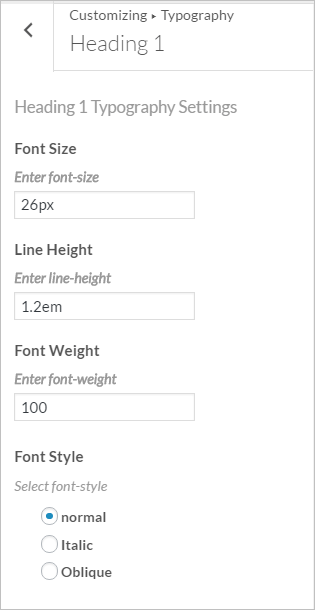
This segment comprises of Google Fonts section, where you will find multiple fonts options to give your website text unique look. A pictorial image of this section is shown below –
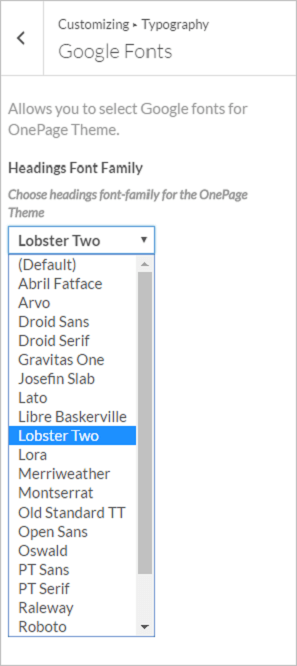
Moreover, you’ll also find alternatives to alter the look of your content like its font size, line height and many more.
Header Section
In this segment, you’ll find three divisions namely –
- Header Settings – Here, you can place your brand logo and figure out the position of the header like fixed or static, as per your need.

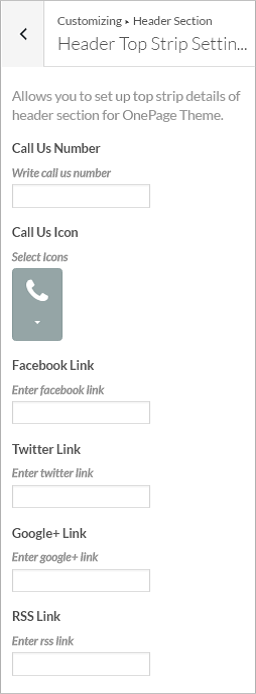
- Header Top Strip Settings – Here you will get options for placing your contact details such as Call Number and social sharing links to make it an easier work for your leads to reach you.
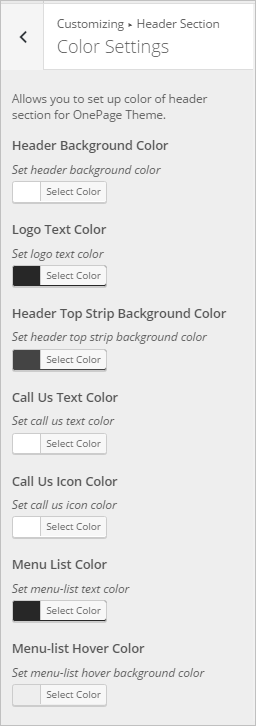
- Color Settings – Make use of this section to alter the color combinations such as for background, logo, header, etc.
Slider Section
Under this segment, you will get options to configure 5 image sliders within the theme. Going to any image slider tab, you will find options for adding an image, heading, sub-heading, button text and button link.
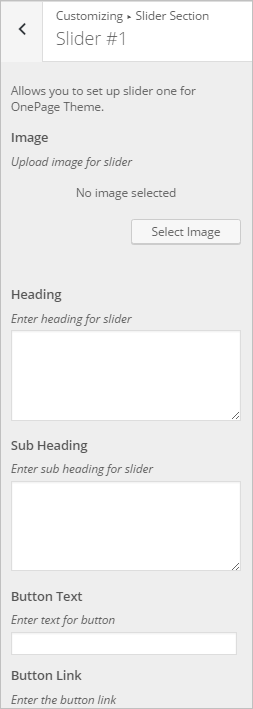
Plus you can set the transition effects and overlay color for every slider individually as shown below –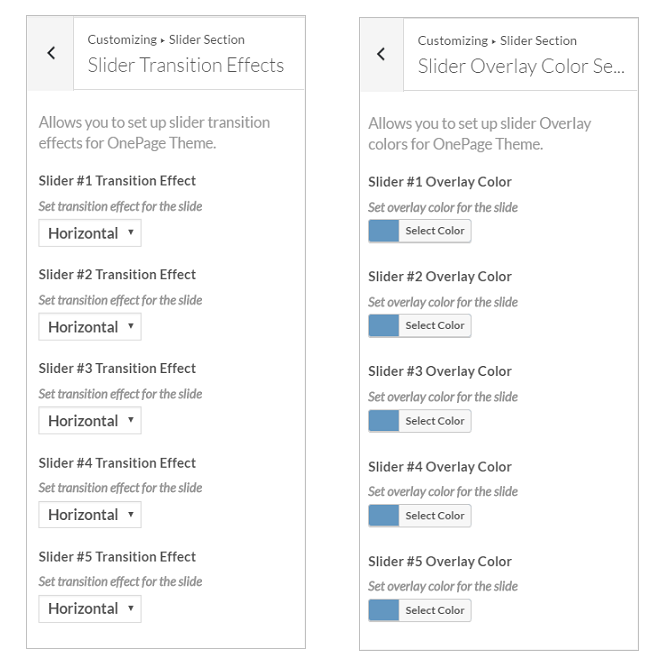
Services Section
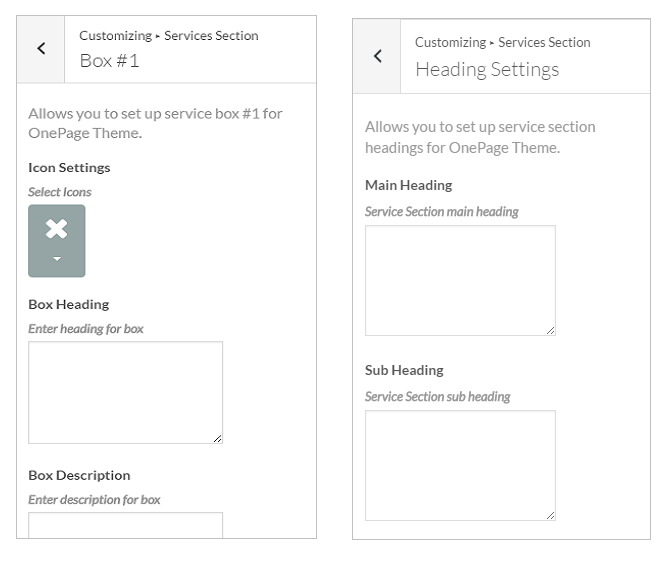
Services section provides you with four service boxes and the options to configure those boxes individually. First of all, you can set the heading and subheading for the services as shown below in the picture. Then for all the individual boxes, you can set the icon, heading and description. Also, you’ll see a color setting tab from where you can modify the color combinations such as background color, sub-heading color, etc.
Blog & News Section
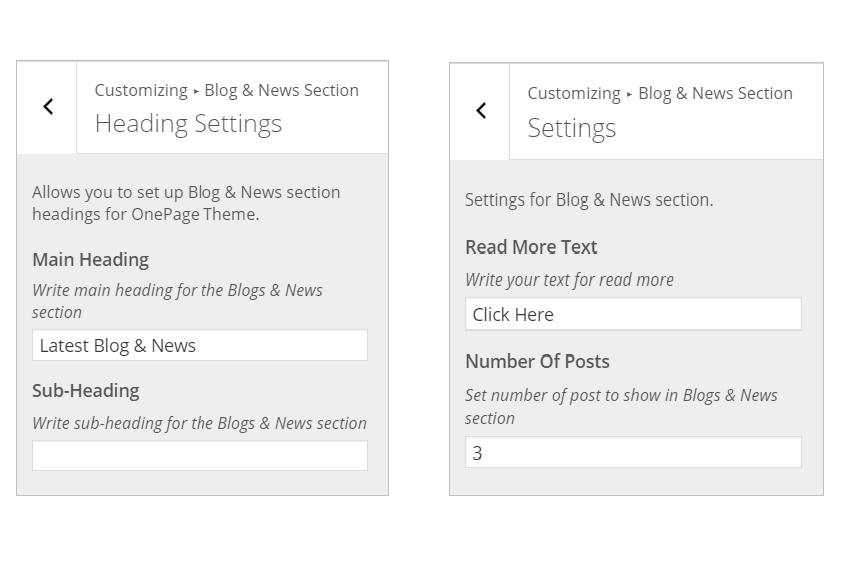
In the blog and new section segment, you can set up the heading and number of posts to be displayed. You can also modify the color for background, main heading, subheading and read more button.
 Portfolio Section
To set up the gallery section in your theme, you need to follow the steps below –
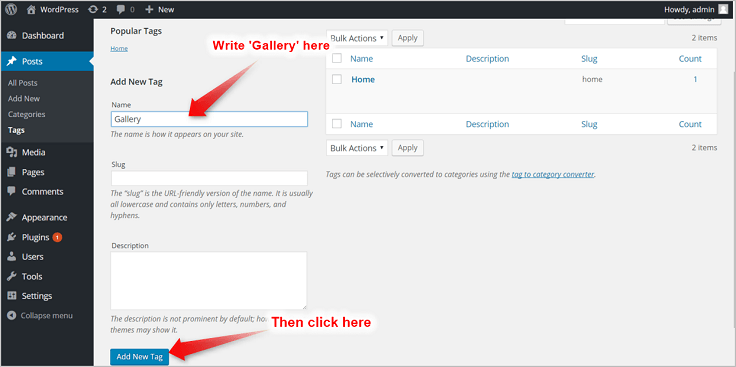
- Just visit your Dashboard->Posts->Tags and create tag(s) say: Gallery
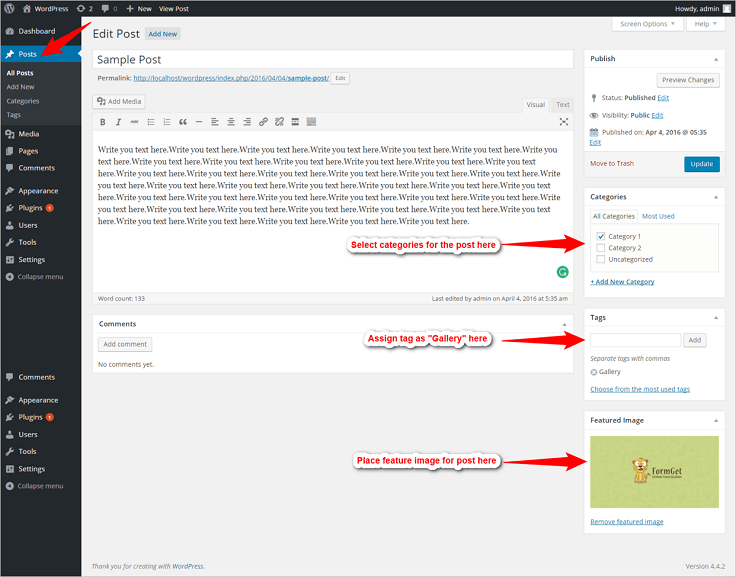
- Then move on to your any post. Add the same tag(s) say gallery, which you’ve created in above step with your desired categories to your post and update it. Add feature image for your posts. Do this for your other posts and then click on update button.
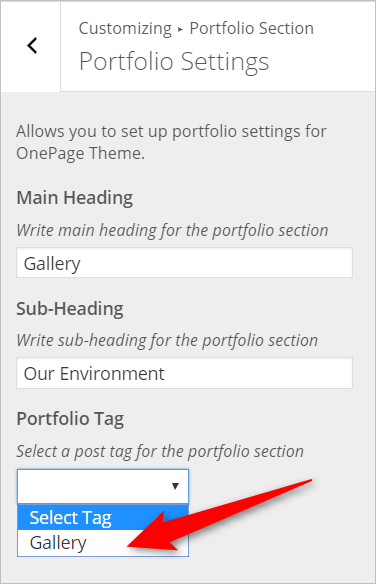
- Now, visit Dashboard->Appearance->Customize->Portfolio Section Settings. There you will have to select the tag from the dropdown list and save the settings. In this way, you will get your gallery section on the homepage.
Video Section
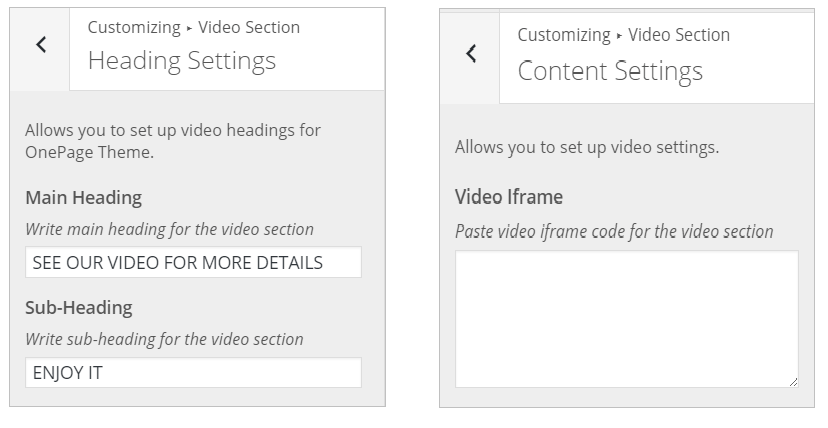
The One Page theme comes with a very exciting feature of adding videos on your homepage. You can do this in the video section, whereby simply embedding code of the video. The various options are categorized under Heading Settings, Content Settings, Color Settings. There you will find options for writing the main heading, sub-heading and video Iframe code for the Video Section. Further, you can also change the styling colors also.
Testimonials Section
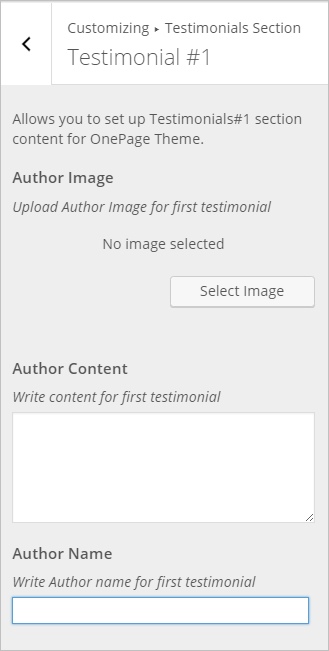
This segment allows you to add three testimonials on your website. On each testimonials section, you’ll get options for adding author’s content, image, and name. Along with it, you can change the color of the background, main heading, subheading, and border also.
Pricing Section
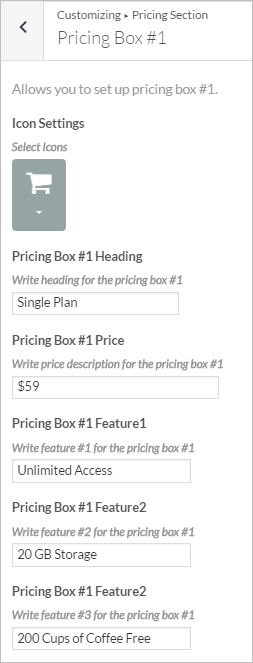
The pricing section area in the theme allows one to display the plans/features or some special offers that are meant to be exhibited. You will get three pricing table tab. Landing upon each of pricing box, you’ll see various options for customizing the pricing table, as shown below –
Team Section
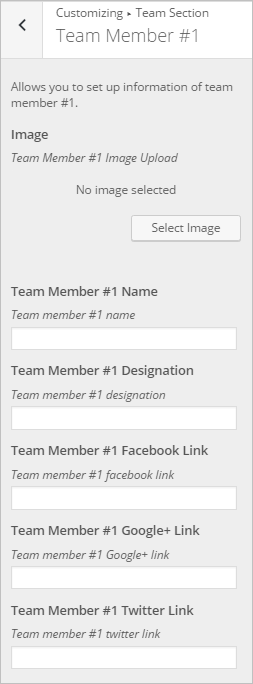
This segment allows you to showcase team members of your organization. You can add details of your team member like post image, name, designation and post various social sharing links to get connected with them. And, yes you’ll have color setting tab also.
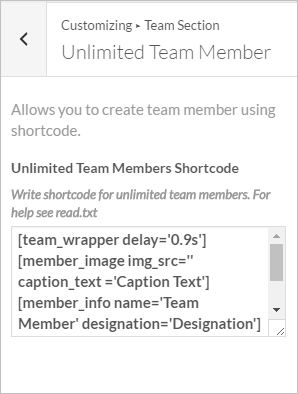
The most favorable part of this segment is that you can display as many team member as per you. With the help of shortcode, you can fulfill this requirement.
Contact Section
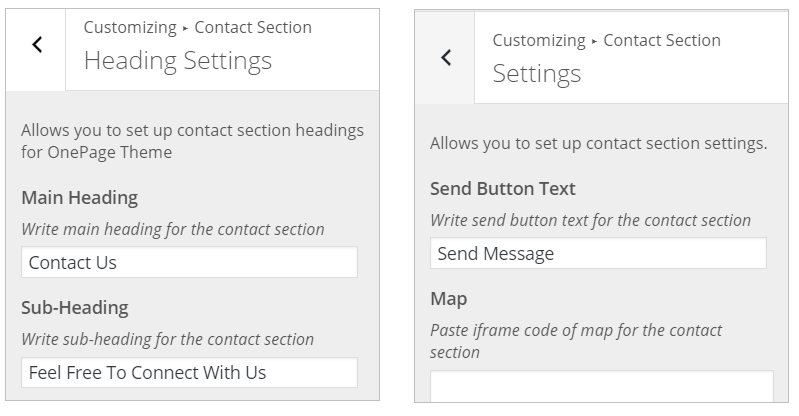
In this segment, you can place your contact details and organization address by embedding map location code. You will also get options for configuring the main heading, subheading, button text and colors as shown below.
Footer Sidebar Section
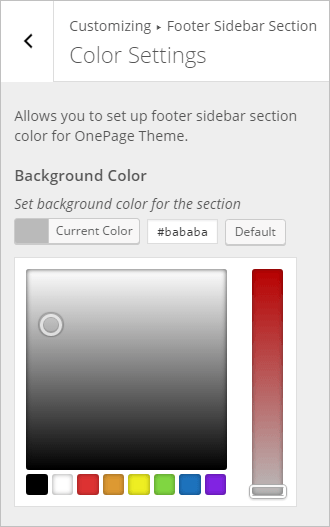
Using this segment, you can change the color of the footer area. This section will appear as shown below –
Footer Section
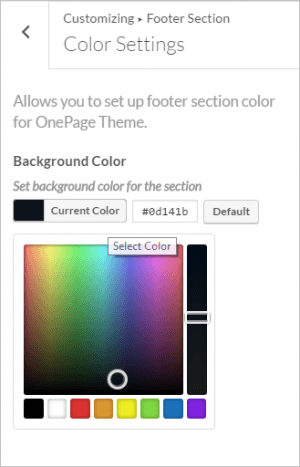
The Footer Section allows you to edit the copyright information in the footer area. Like you got choices of displaying bottom footer, embedding brand logo, displaying of social sharing widgets, shortcode options, etc.

Additionally, you will also have the alternatives of color styling as displayed below –
Page Settings –
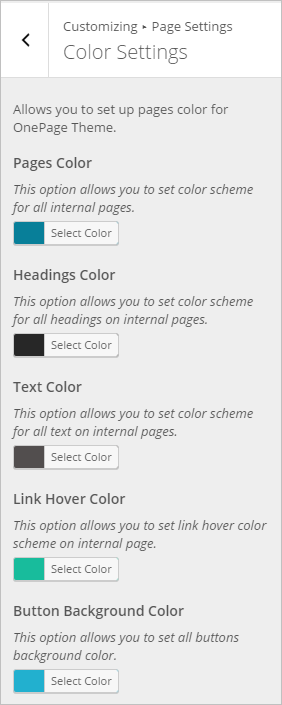
This segment allows you to set some of the distinctive features of your theme such as –
- Pages Color
- Headings Color
- Text Color
- Link Hover Color
- Button Background Color
- Button Hover Background Color
Hopefully, you must get all things related to One-Page WordPress themes and how to use it. Still, if you have any queries that are beyond the scope of this documentation, feel free to post it in the comment box below.
Other Related Posts –
- 20 Best Free & Paid Landing Page WordPress Themes 2022
- 10+ Best Free & Paid Beautiful & Responsive Multipurpose WordPress Themes 2022
- How To Create A WordPress Website
- 12 Simple Steps to Install WordPress Locally
- 20 Best Free & Paid Landing Page WordPress Themes 2022
- Create Your Own YouTube Like Video Site Easily With WordPress

