UPDATE – In Latest version of WordPress 4.1 q-translator plugin don’t work.. Kindly refer this particular post
WordPress Tips Check it Now.
For expanding the client base, increasing sales volume, multilingual websites become a necessity for businesses and organisations. So that you will be able to deliver your products or services in different parts of the world.
WordPress by default is not multilingual, so you need to add multilingual functionality to your website.
This tutorial will teach you how to translate your WordPress based website in multi-languages using qTranslate plugin. Below are step by step implementation with Colorway theme.
Remember, this process is only applicable with WordPress themes.
1. Introduction
qTranslate is a free plugin which helps to translate the theme to multilingual content with the help of WordPress.
qTranslate supports infinite languages, which can be easily added/modified/deleted via the comfortable Configuration Page.
All you need to do is activate the plugin and start writing the content!
2. Download qTranslate plugin
3. Plugin Installation
Installation of plugin is very easy.
- Finish downloading the plugin
- Extract the files.
- Paste the qTranslate plugin directory in /wp-content/plugins/ directory
- Activate the qTranslate plugin through the ‘plugins’ tab in WordPress.
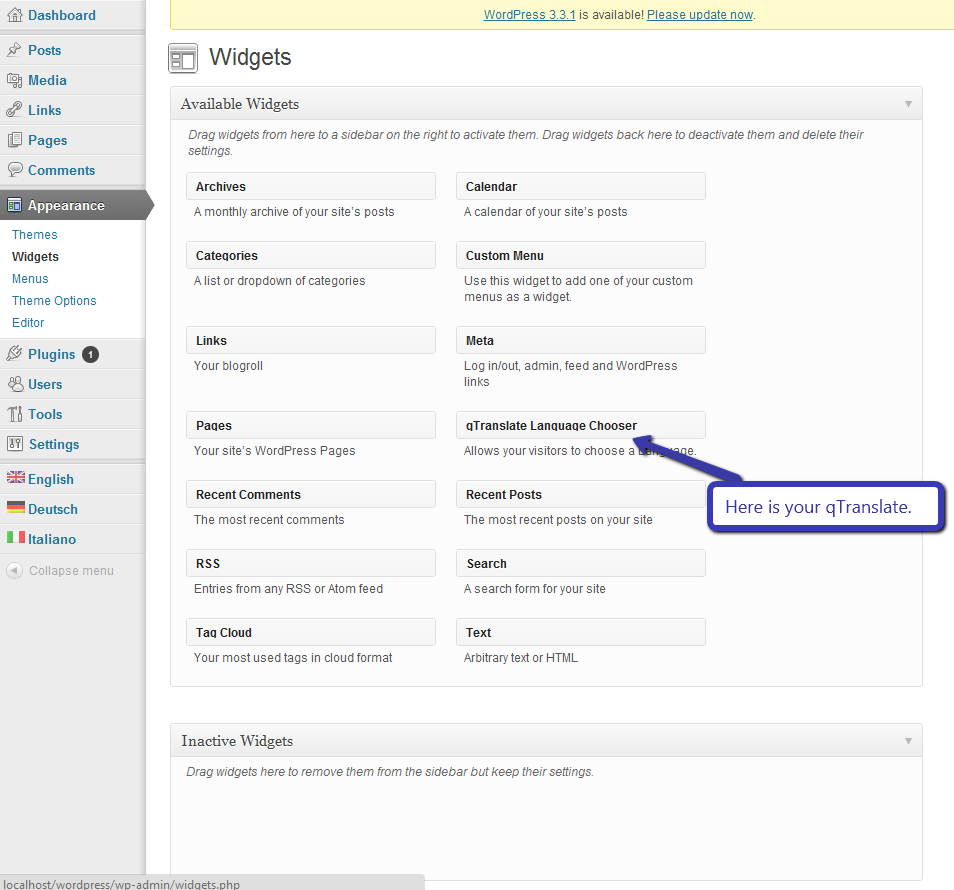
Refer image below.

As soon as you do that, your qTranslate will show on widgets i.e.
Appearance -> Widgets
From here you can drag and drop it to any of your widget areas, This will be explained in depth later on.
4. Configuring qTranslate with Colorway WordPress Theme
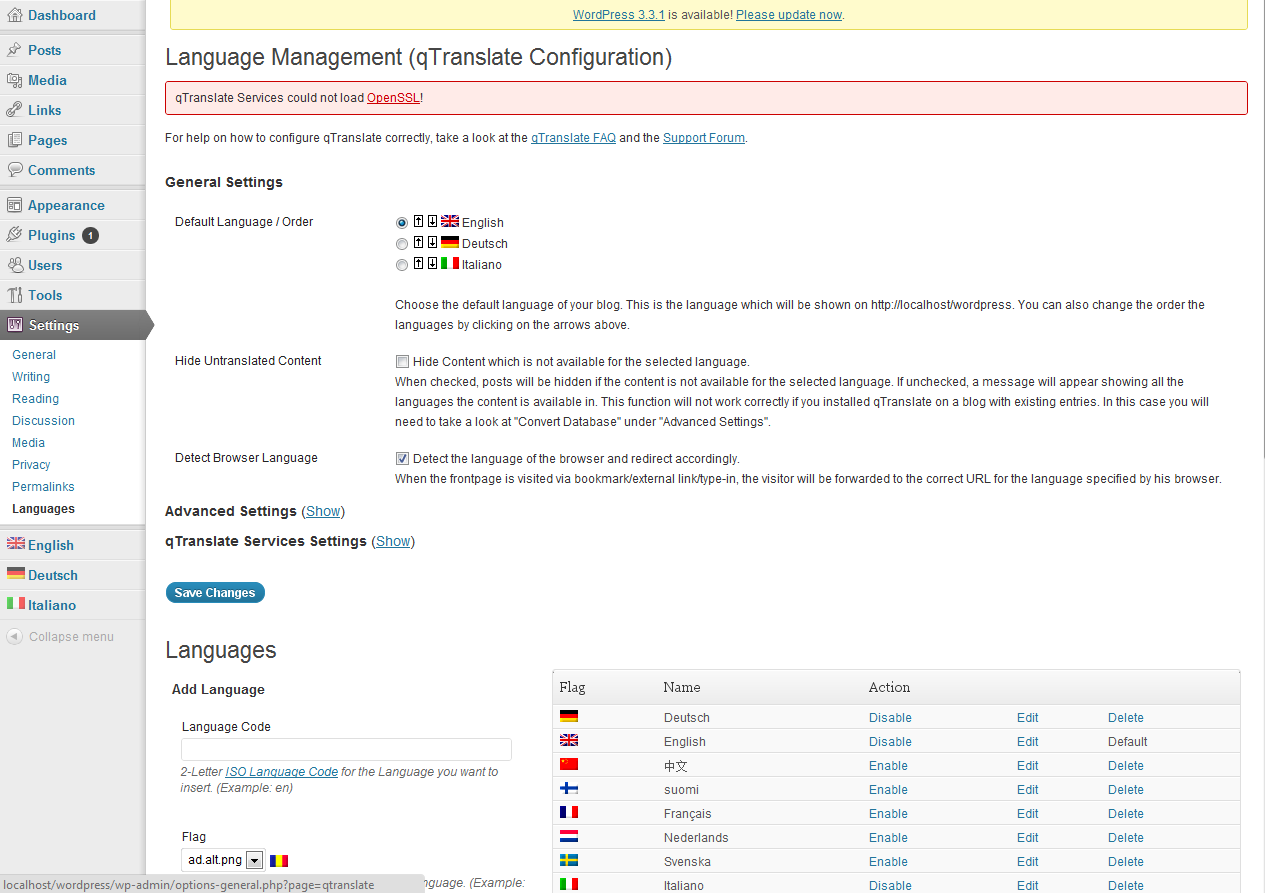
To configure, go to settings and then choose languages from WordPress dashboard i.e.
Settings -> Languages
This will open a setting window in WordPress as shown below
Selecting language
You can enable or disable language in which you want to translate. You can choose multiple language at a time.
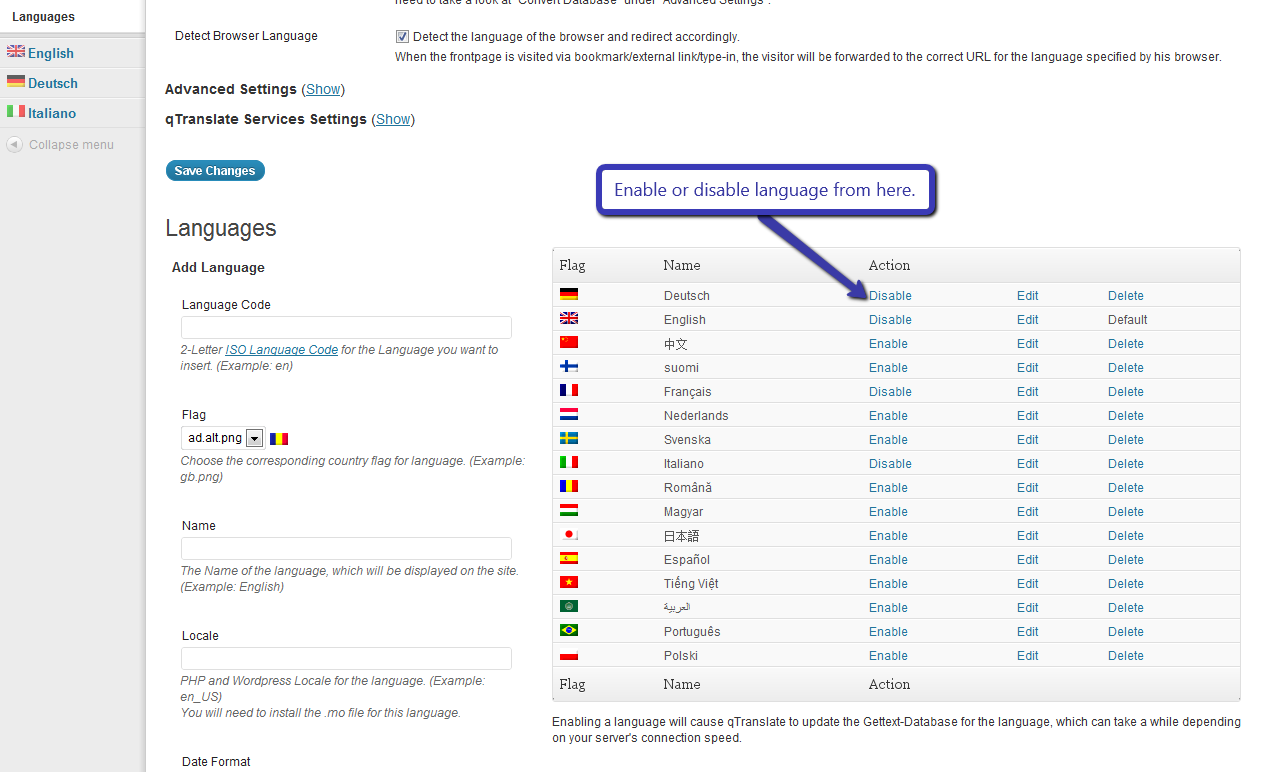
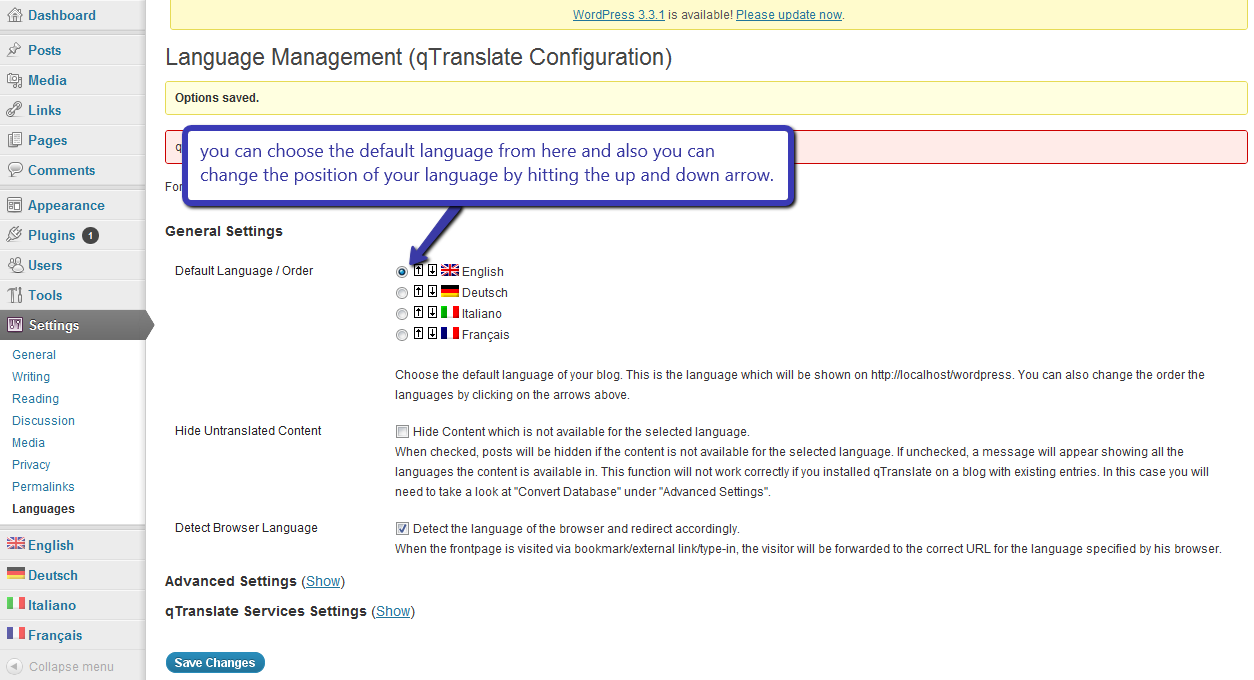
When you enable a language it will show under general setting heading.
From here you can select the default language what do you want under “Default Language / Order”.
And also you can choose the order of the language from here.
5. Enabling the qTranslate widget
Enabling the widget is very easy.
Just go to widgets section and drag and drop the “qTranslate Language Chooser” in your desired position i.e. in footer or in sidebar area.
Appearance -> Widgets
You can write the name of your widget, by default it is blank
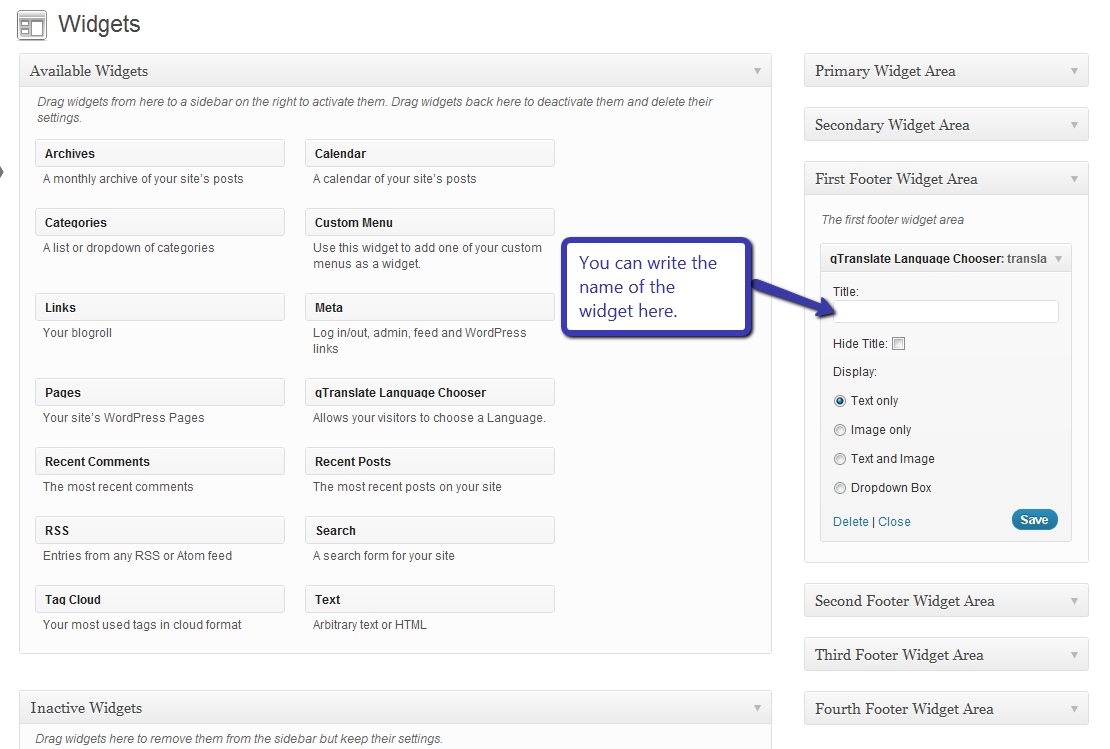
Suppose we add the widget in the first footer area then it will be displayed like this-

6. How to add content in different languages
Changing the content of Home page
To change the content of home page just go to theme option panel and using language ISO code, put all the language translation in the same text area.
Example is shown below.
Suppose you want to translate the ‘Home Page Intro’ of the ‘Home Page’
Then put the code in the text area, As shown in the image below.
The en, de, it, fr ISO codes stands for English, German, Italian & French languages.
You can similarly use the ISO codes for other languages as well.
Then put the code in the text area.
<!- -:en- ->Your text in English.<!- -:- ->
<!- -:de- ->Your text in Deutsch<!- -:- ->
<!- -:it- ->Your text in Italiano<!- -:- ->
<!- -:fr- ->Your text in Français<!- -:- ->
As shown below.
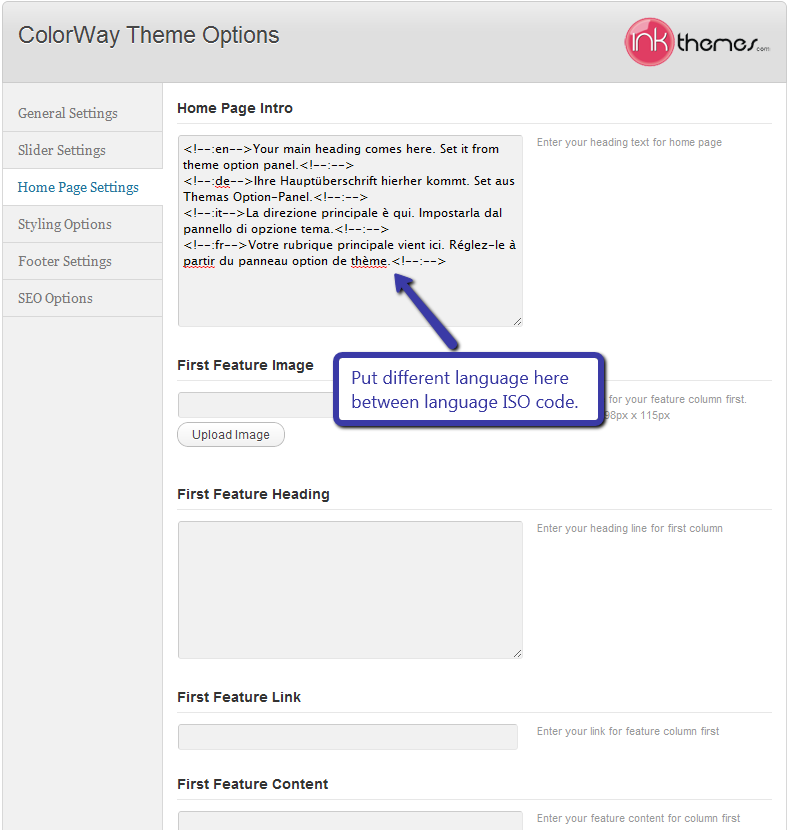
Then this will convert the home page intro in the desired language when selected by user.
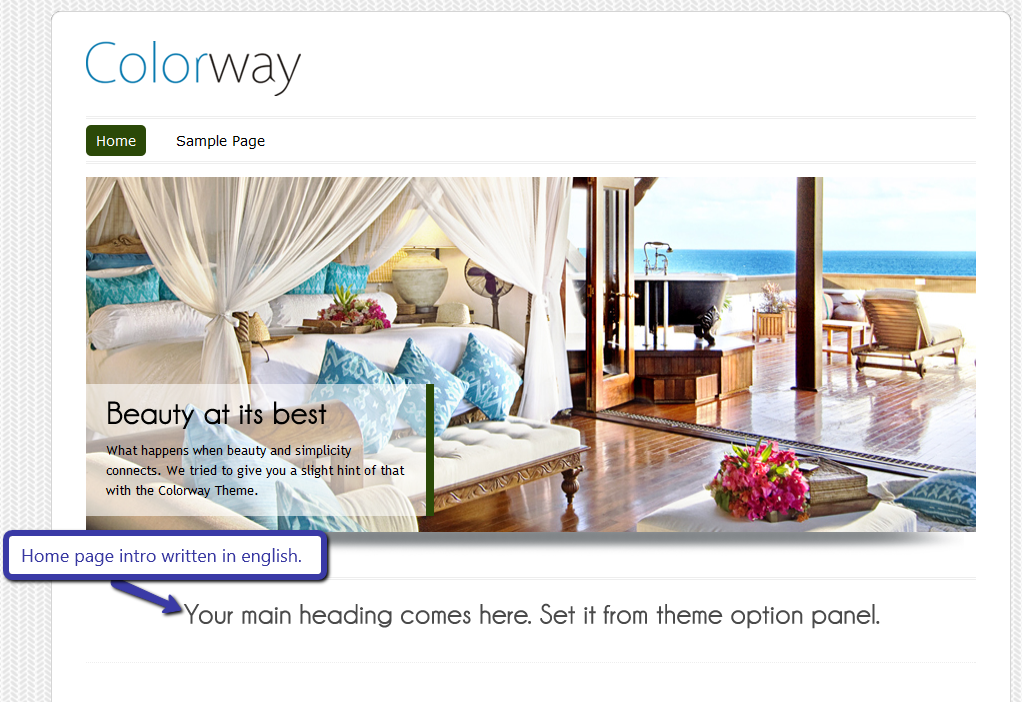
Firstly the content is shown in English shown in image.
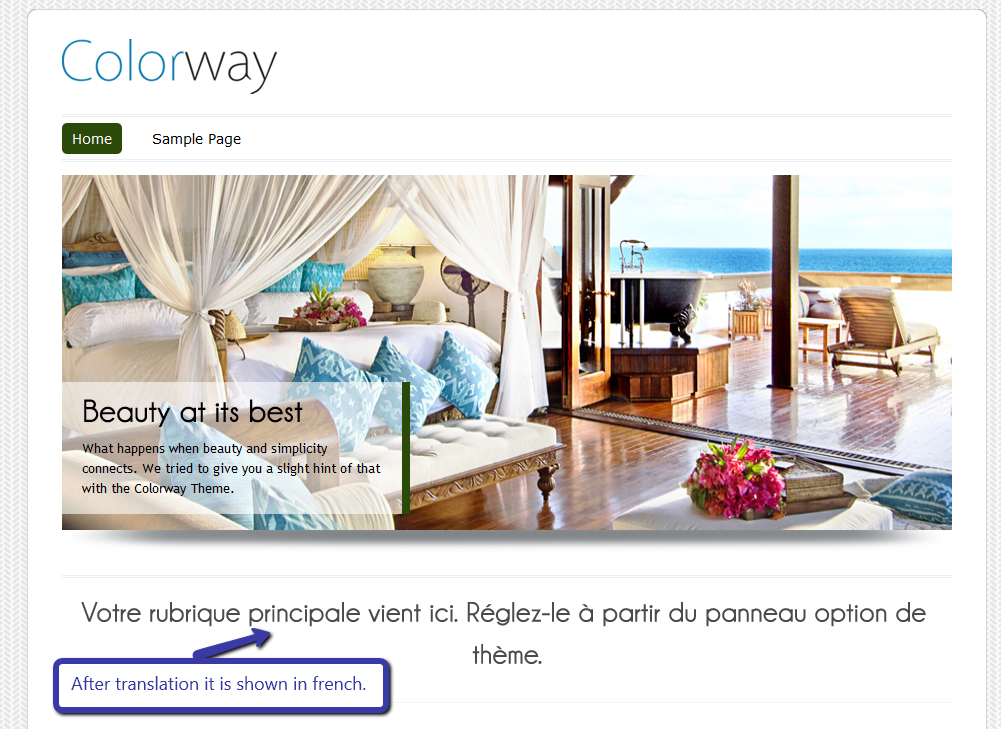
Now when you translate the intro in French then it will be shown like this-
Adding the page in different language
To add the page in different languages you have to add a new page from page section.
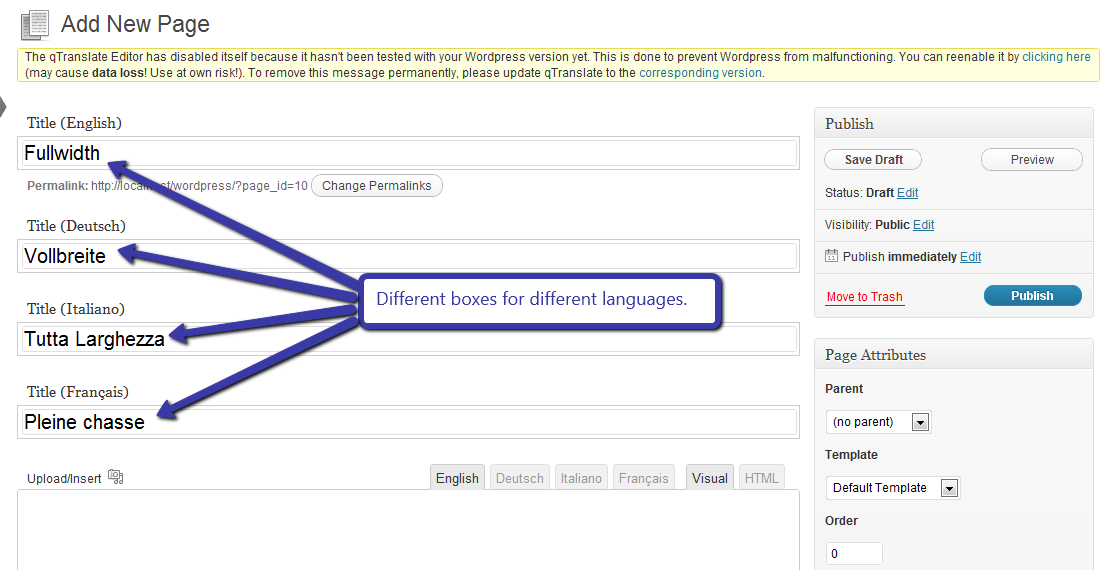
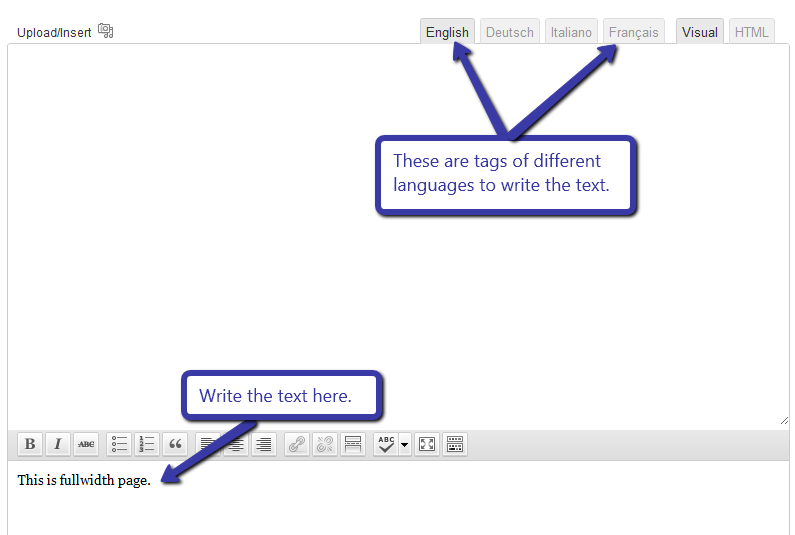
And put the heading in different language and also there are different tag for every language to write their content.
Suppose we are making a ‘Fullwidth’ page, then we will write the name in each text box.
And write the text in text area in each tab i.e.
After writing the text publish the page.
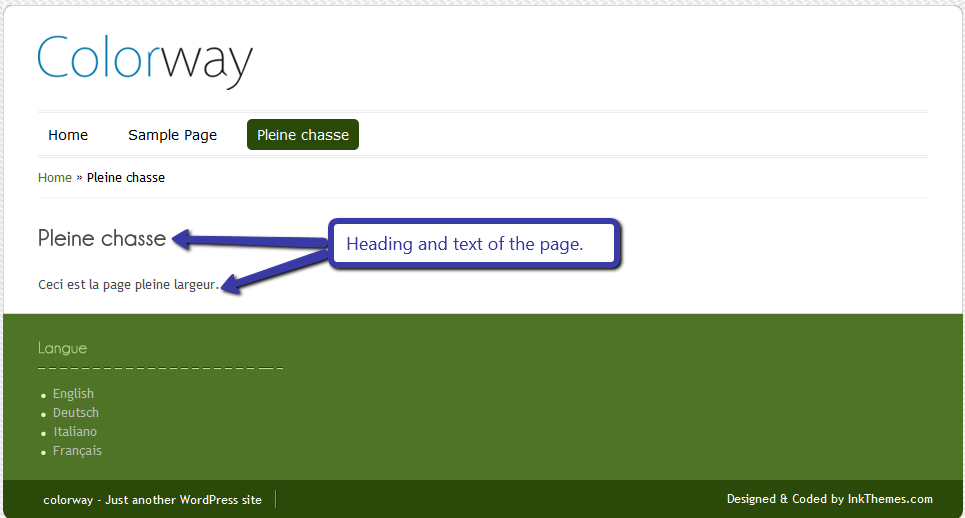
Now if we select the French language for fullwidth page the it will be shown like this-
Adding the post in different language
To add the post in different language you have to just add a new post from post section.
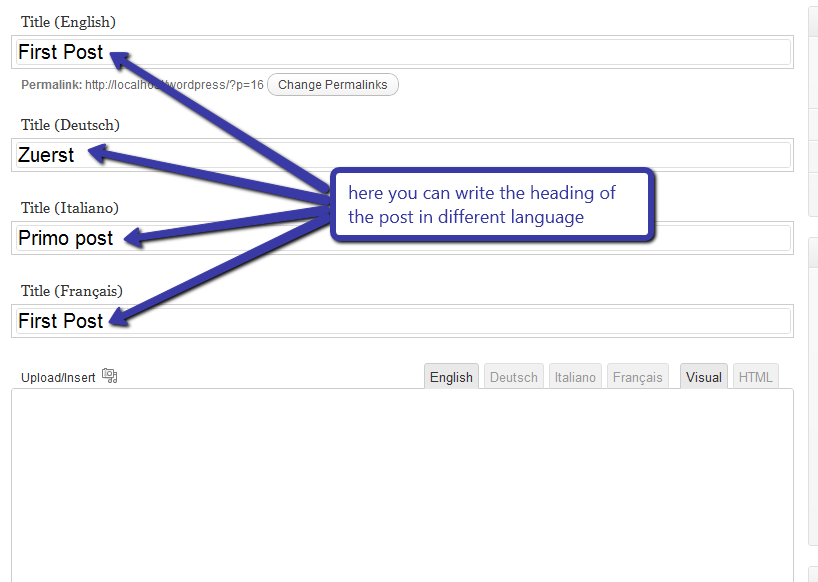
And put the heading in different language and also there are different tag for every language to write their content.
Suppose we are adding a post in blog page. Then we have to write the heading in different languages in text box. Shown in image-
And write the text in text area in each tab i.e
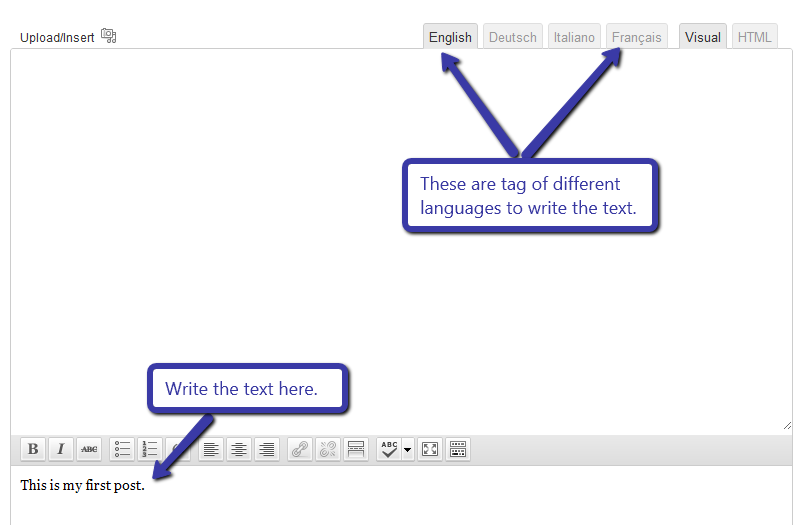
After writing the text publish the post.
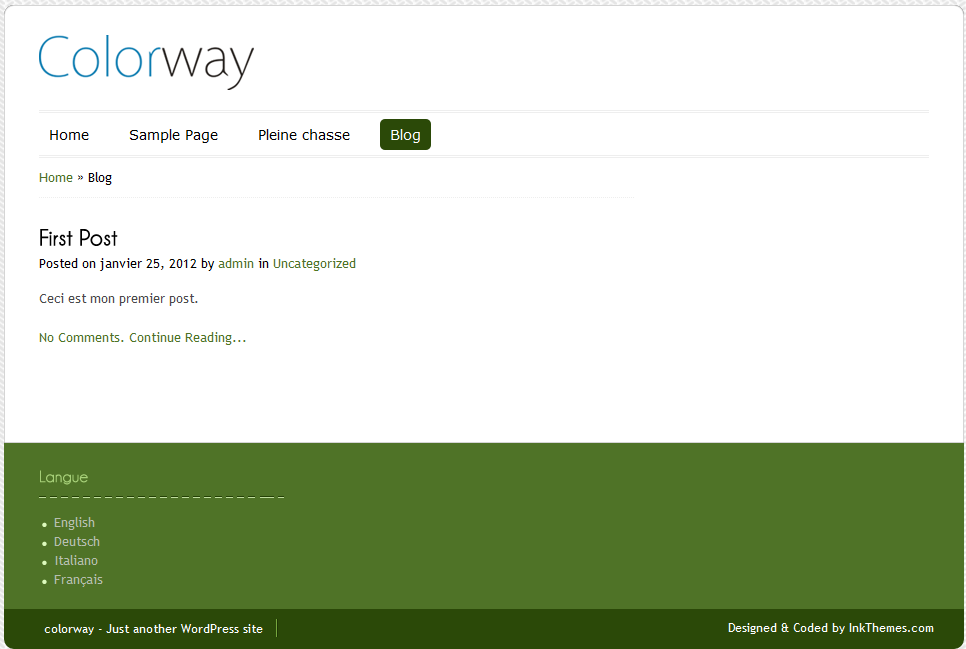
Now if we select the French language for post then it will be shown like this-
Translate text in php files
Translating the text in the php files is very easy. You just need to edit front-page.php file and place given code as shown in image.
<?php _e(“<!–:en–>english text<!–:–><!–:sv–>german text<!–:–>”); ?>
You just need to mention your language text in place of english text and german text.

Translate Widget title
To translate the widget title you just need to drag and drop your widget and put the following code in your field.
[:en]My English Title[:sv]My Swedish Title
It’s really easy to convert your WordPress based website in different languages with q-translator. Any theme of InkThemes can be translated with q-translator. You can download any theme and try it by yourself.
Another possible way to translate your website into multiple languages is by using the Google Language Translation plugin.
PS- Checkout the entire WordPress plugins collection by InkThemes here-
You might also be interested in:


