Recently I have come to know about an interesting plugin of WordPress which not only gives your webpage an attractive look but also extends the functionality of your Website. I am talking about the “Price Table” plugin.
Business owners who sell their product and services can use this plugin to show their products and services features on the website. It proves to be an icing on a cake for a service enabled websites.
What is Price Table?
Price Table plugin will help you to give description of your services and products features, without long textual paragraph which is quite boring and hefty to read. Instead, it uses a perfect table format through which one can describe their amenities and features point by point which is easy to read and understand.
In the following post, I have explained the detailed procedure that will guide you how to install and use the Price Table plugin on your website. Before going to read the procedure make sure that you fulfill the following prerequisites.
- You have a WAMP (localhost server) or any other server installed on your system.
- You have installed WordPress on it.
In case you need a step by step procedure to implement the above two features, you may like to read “How to Install WordPress on Localhost“
Steps To Implement Price Table Plugin
In the following procedure, I have implemented the Price Table plugin in the Colorway theme. Although you can implement the same plugin with any of the InkThemes.
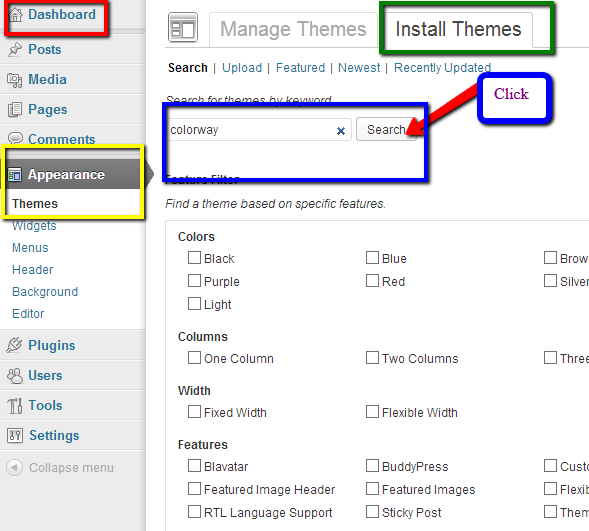
- Installing the Colorway theme on the Dashboard. Follow the steps:
Dashboard –>Appearance –>Themes –>Add New –>Install Themes.
- Now type your theme keyword in search bar and click on “Search” button. Follow the screenshot as shown below.
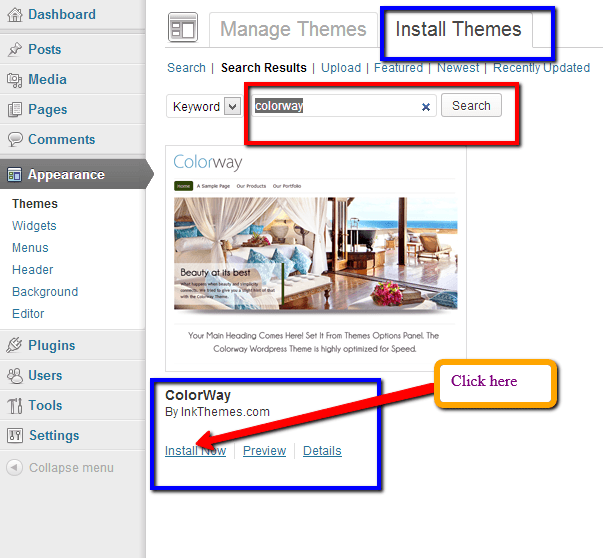
- Install the theme and activate it.
- On next step, add “Price Table” Plugin to your Dashboard. Go to
Dashboard->Plugins->Add New.
- After that a page will appear with heading “Install Plugins” option.
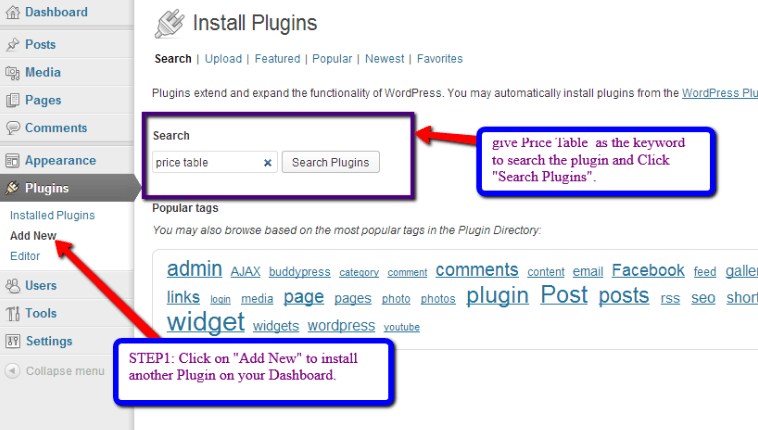
- Write the name of the plugin and just click on “Search Plugin” option.
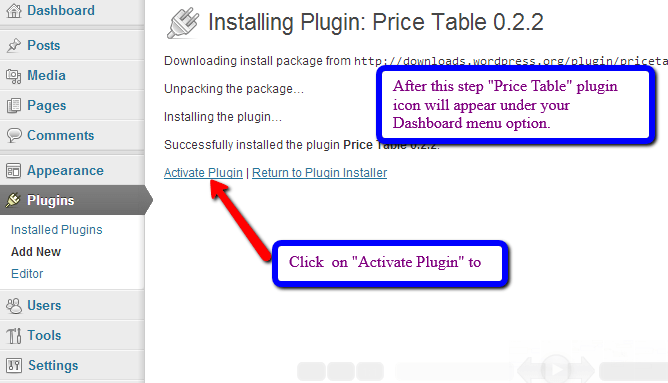
- A “Search Result” page will appear, select the “Price Table” plugin from the options and then click on “Install Now” button. See in the screenshot below.

- Install the plugin and activate it, as soon as you activate the plugin, “Price Table” plugin option will appear under the Dashboard.
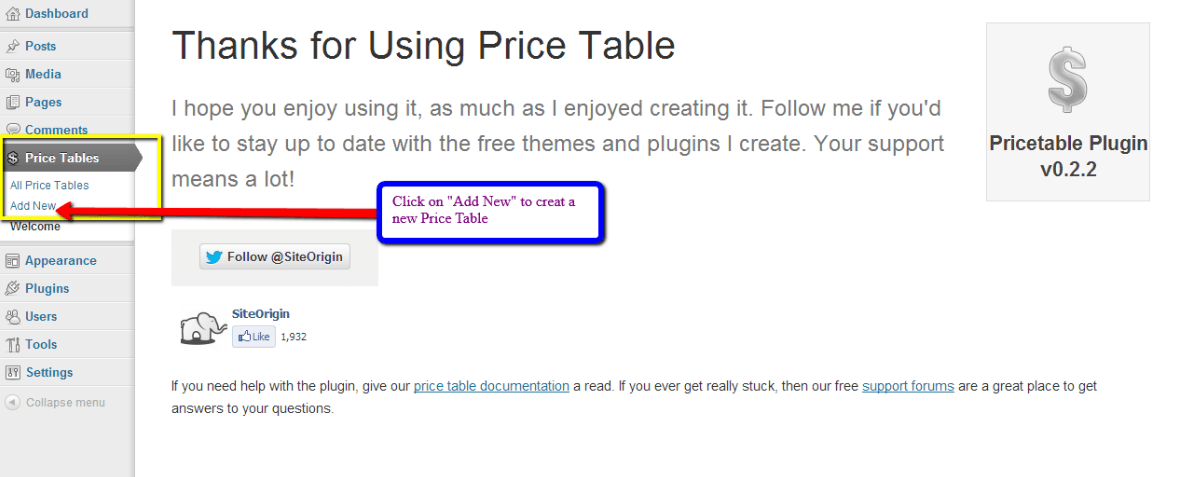
- Now click on “Add New” option.
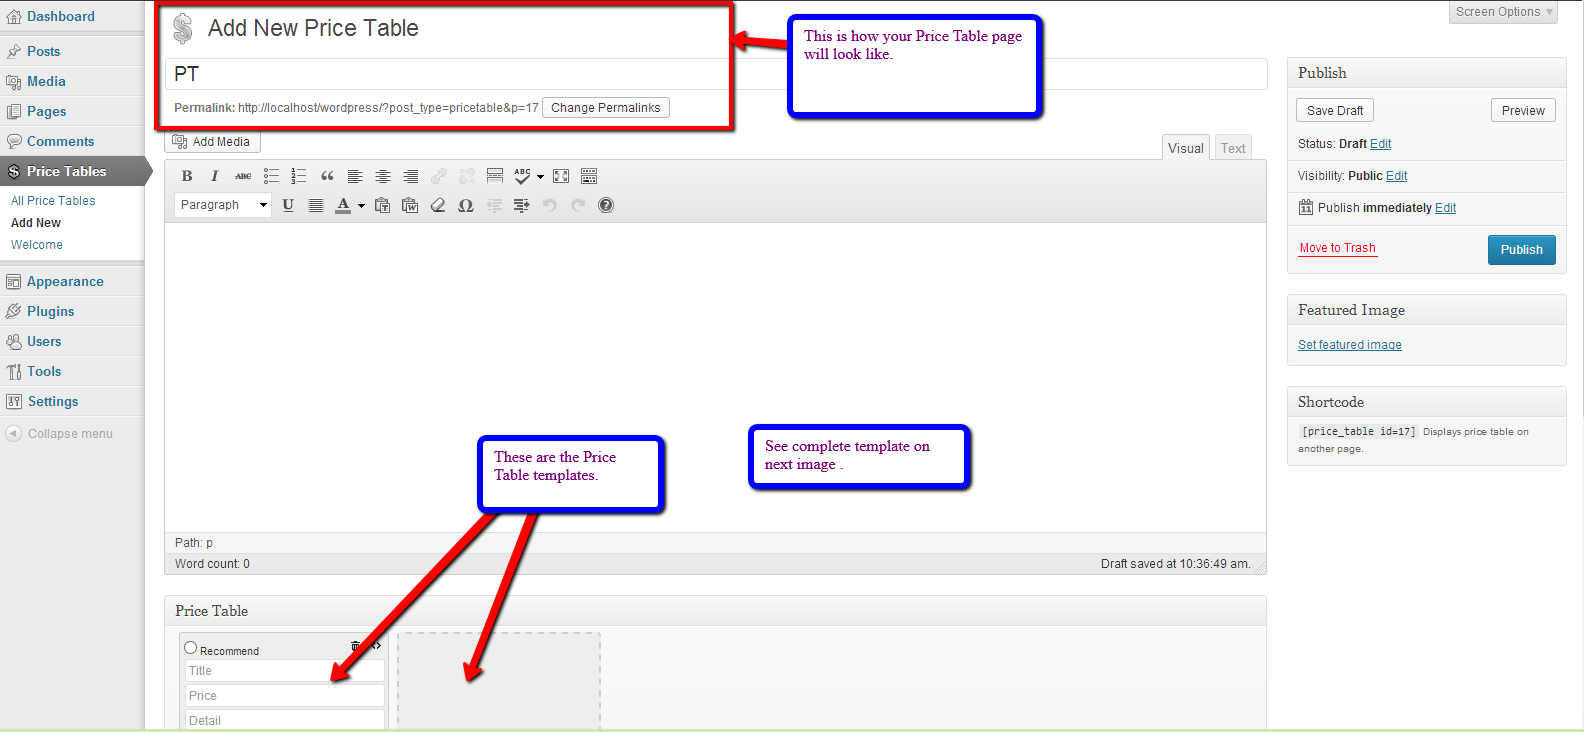
- Price table page will appear. Mention the title of the page.
Note: This name will not appear on the target page.
- Under the “Add New Price Table” there is an option of “Add Column”, click here to add more columns.
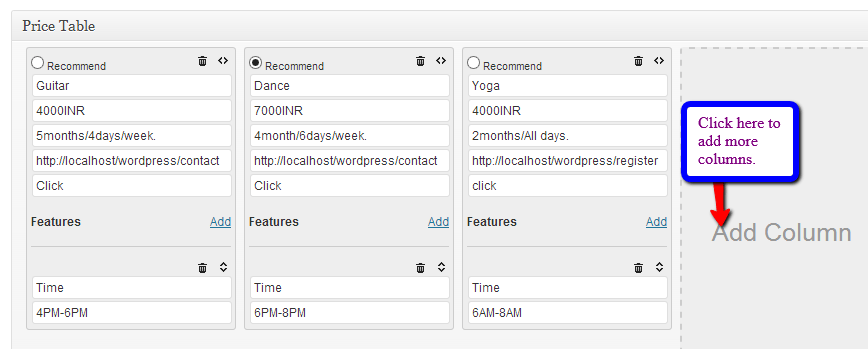
- As soon as you finish up with writing all the features of your product in the columns select the shortcode appeared below the “Featured Image”.
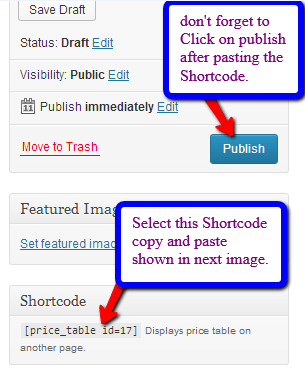
- Paste this shortcode on the Price table page as shown in below in the screenshot.
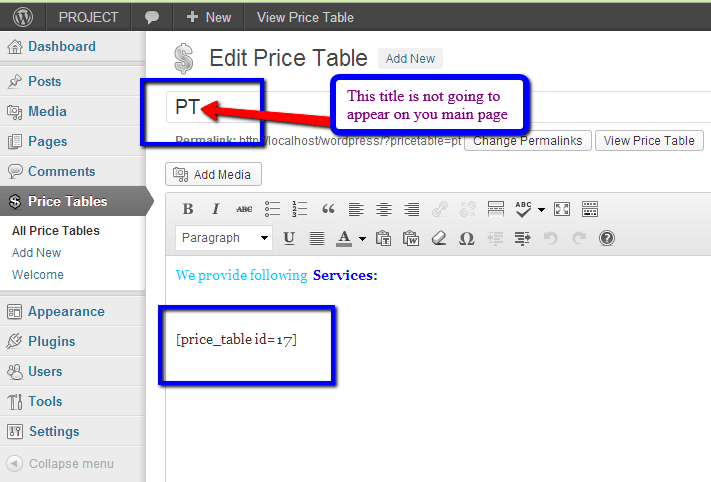
- After that click on “Publish” button.
- You have to select the shortcode again and paste it on the target page where you want to display the Price Table of your services. Go to
Dashboard–>Pages–>All Pages–>The target page, paste the shortcode there as shown below:
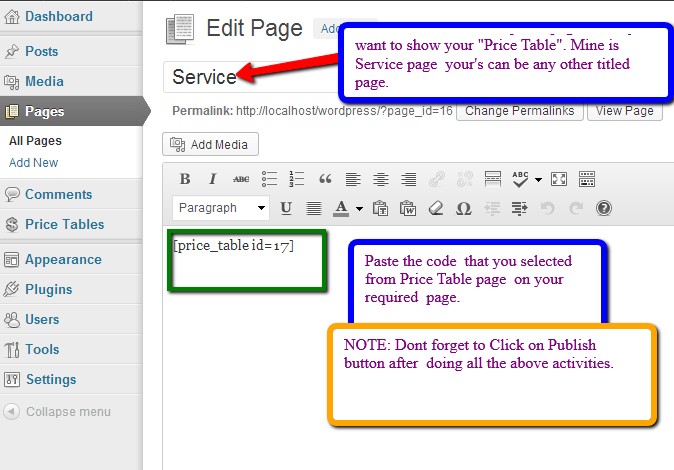
- Now click on “Publish” button.
Remember, every time you create a new page in which you want to display the Price Table, you will have to place the shortcode on the same page and after that click on “Publish” button.
- At last follow this step:
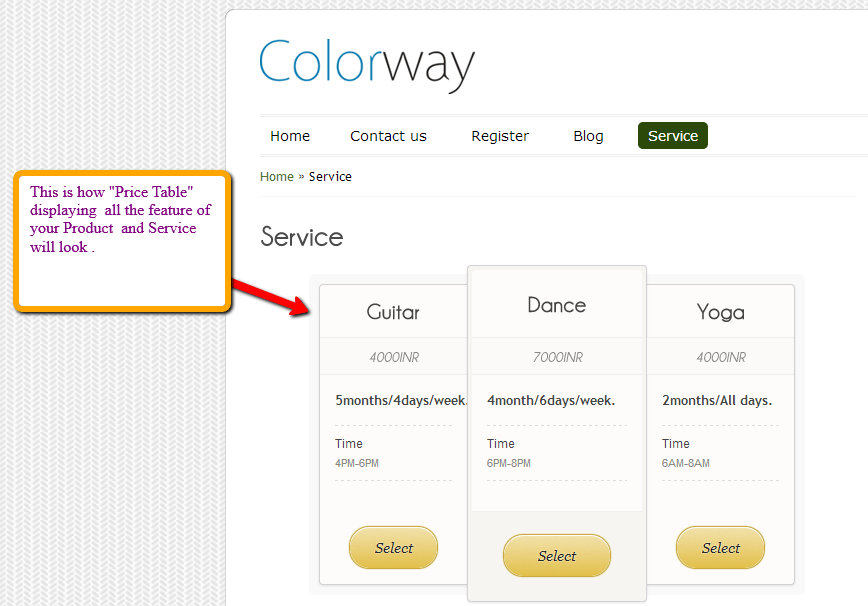
Go to your website -> Open the target page -> You can see your Price table on the website.
Conclusion
When I finished with the process I found that its better to adopt a plugin instead of making everything complicated. The Price table plugin provides all the framework for service details. You just need to install it and configure it according to your service details.
I hope you like reading this blog post and will surely implement this interesting feature on your website. It will help you to let the visitors know about the pricing details of your services in a particular format with all the required information. Feel free to share your comments and feedback regarding the post. I would appreciate it.
You might also be interested in:


