If you want your WordPress theme to be localized into your native language then why to wait for it, just keep on reading the easy steps as guided here.
Let us first discuss about 3 important and helpful files – .PO, .MO and .POT files.
.PO stands for Portable Object.
.MO stands for Machine Object.
.POT stands for Portable Object Table.
Mechanism/Working :
Actually what we need to do is open a.POT file in a gettext file editor POedit, then translate each line of English text into your selected language (The language you wish to be displayed) and after it saves this file with an extension.PO, once it is saved with such extension it automatically forms a.MO file. A.MO file is a compiled format of.PO file.
After this process, you need to go to “wp_config.php” file and edit it according to the guidelines given below, save and close it.
That’s it, now when you refresh your site, it will be changed and will be looking according to your translation. This was an overview about WHAT you need to do? Below are some guidelines that will explain to you HOW you need to do?
Guidelines To Translate :
Now if you are already with yours.POT file then its well and good otherwise follow this link to do so, by default all the theme owners/developers provide themes with a .pot file. This file can be found under the folder “Languages”.
Creating a .PO file –
PO (Portable Object ) is a list of all the English-language text found within the files of a localized WordPress theme translated into desired language.
To create a .PO file download POedit (According to your operating system)
POedit – An open source program for Windows, Mac OS X and UNIX/Linux which provides an easy-to-use GUI for editing PO files and generate MO files.
Once you downloaded and installed it, you need to run/open it on your computer, and then edit your .POT file in it.
This can be done by following step by step procedure mentioned below –
- Download the official WordPress POT file
-
Open this file in Poedit. (As shown in the image below)

3. A new pop up dialog box containing few options will be displayed which is optional as shown below –
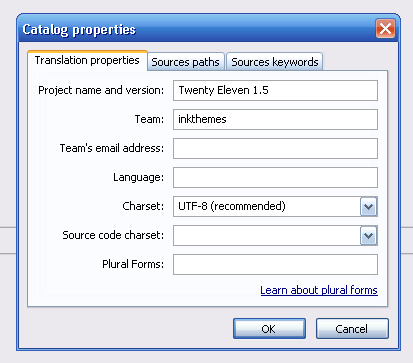
4. Now either click on “OK” and save it or click on “Cancel” and move further, you will view a screen as shown below –
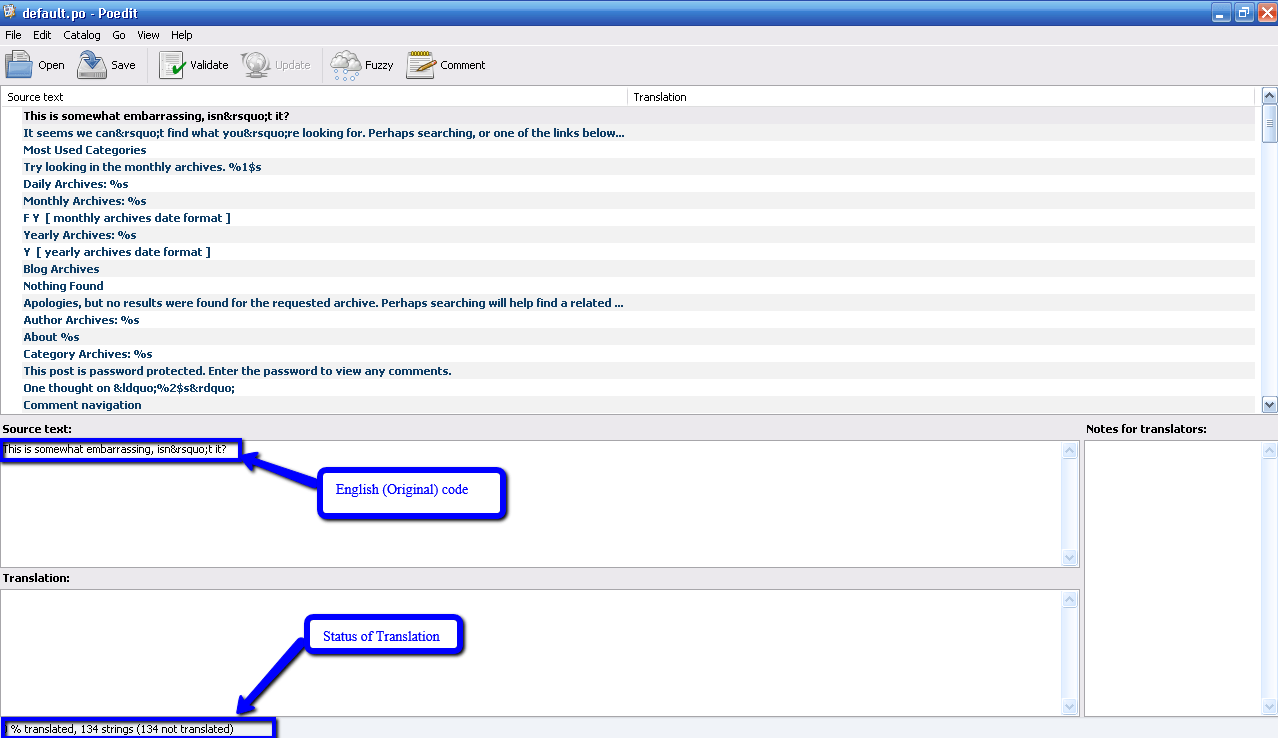
5. Now simply open Google Translator and translate the English language text into the desired language. For an example here I am translating it into french. ( As shown in the images below). Here you first need to copy the text one by one and translate it, then again copy the translated text in the POedit’s translation space.
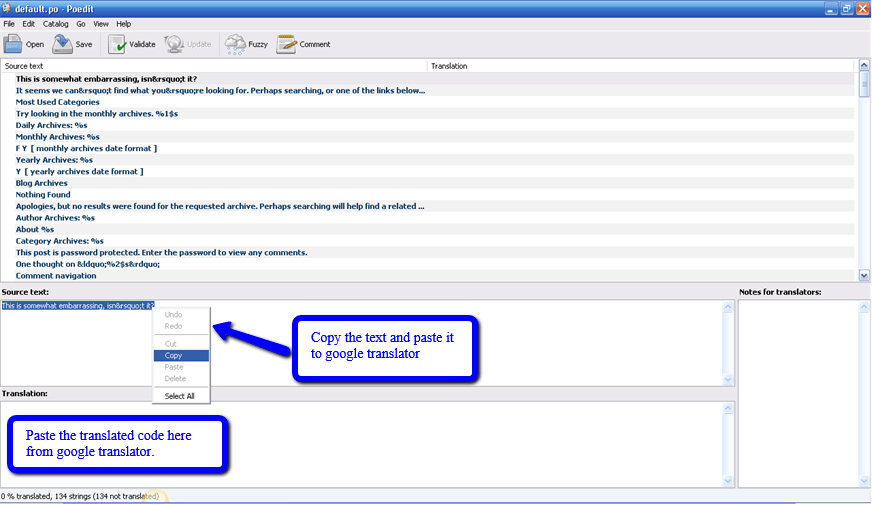
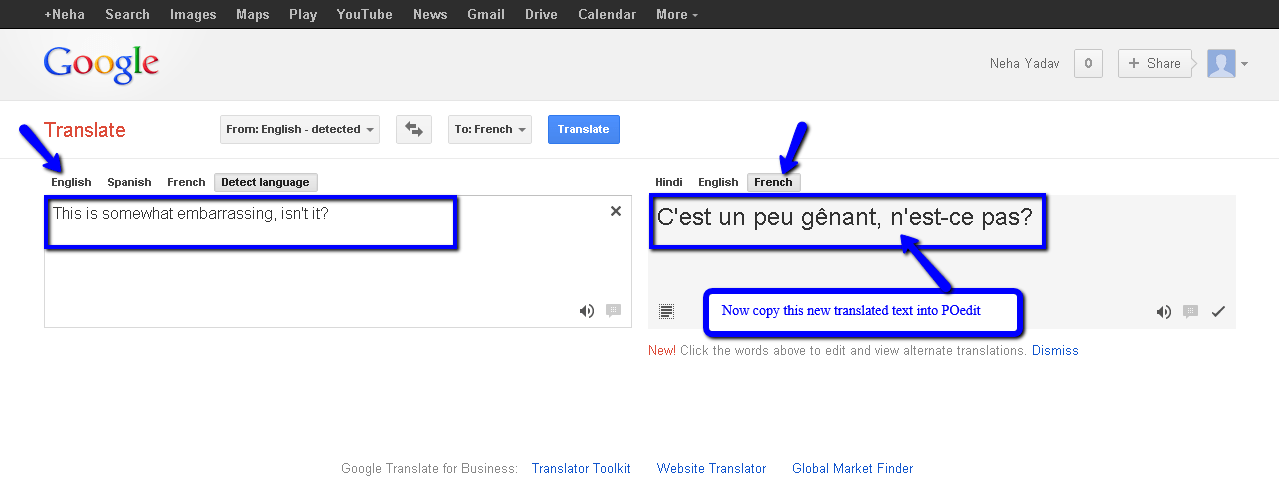
6. The translation of theme is started now and will display the translated text in front of the original text.
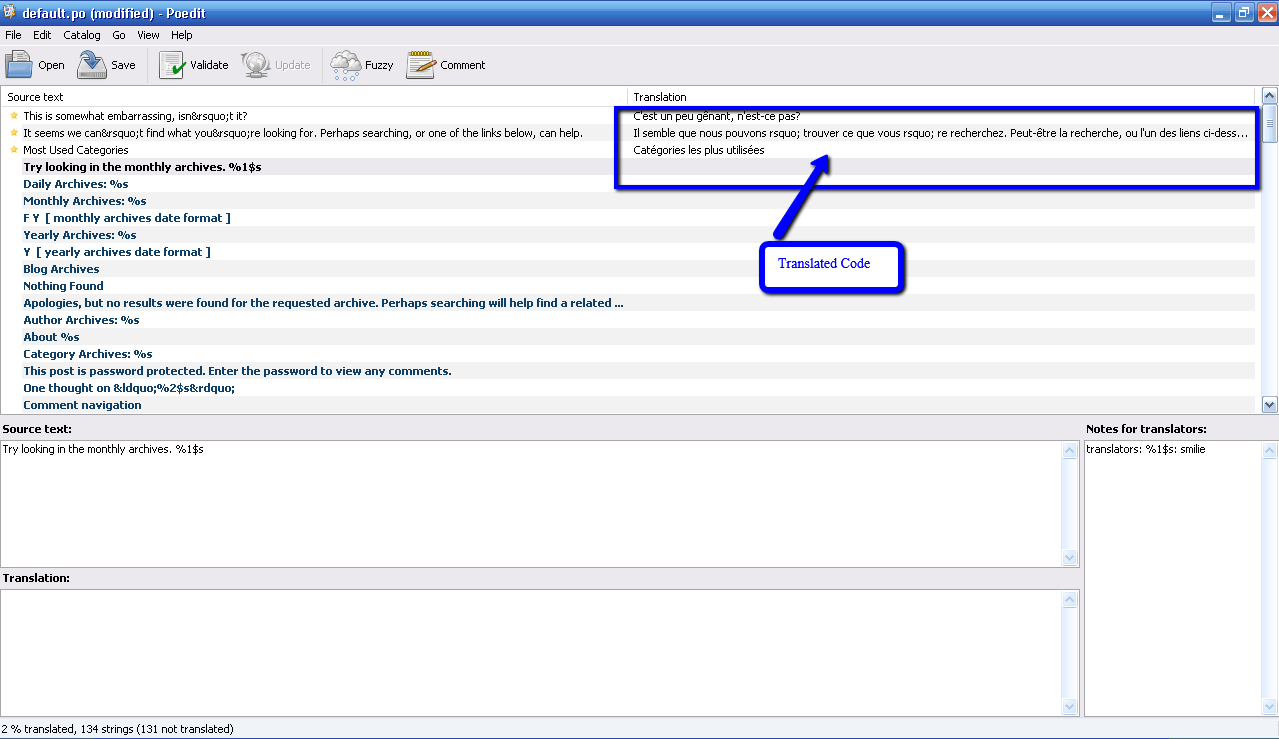
7. Go to File → Save as… to save your translations in a PO file.
8. When you save this as .PO file, open it and then again close it. This will generate a .MO file as shown below.Or you can set your Poedit to always compile a MO file when saving changes by clicking File → Preferences and on the Editor tab check the Automatically compile .mo file on save box.

The naming of your .mo files is very important and must match the desired locale otherwise it won’t work. The naming convention is based on the language code (e.g. pt for Portuguese) followed by the country code (e.g. _BR for Brazil). So, the Brazilian Portuguese file would be called pt_BR.mo. See the complete list of language codes and country codes to find your exact locale.
9. Now after renaming your both the files to the exact language and country code, copy the files to Language folder and then open wp_config file and edit a short line code in it.
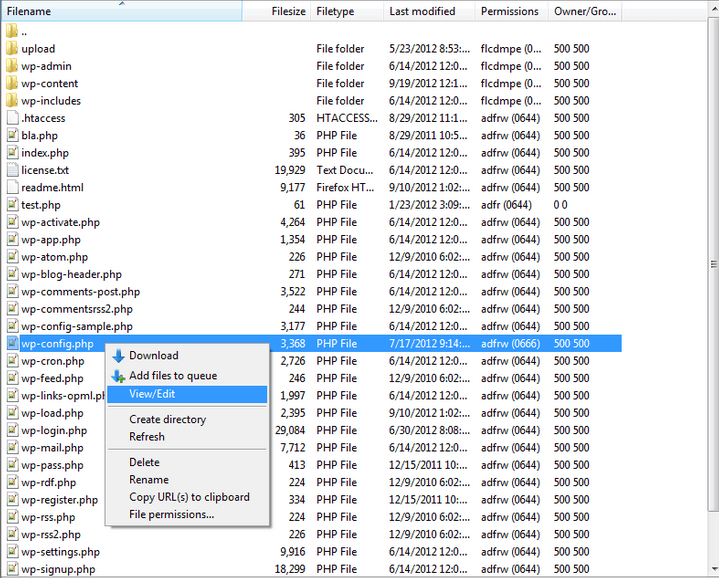
Open your file and replace the code
define (‘WPLANG’, ‘en_EN’);
to define (‘WPLANG’, ‘fr_FR’); and save it and close it.
Finally you have done it and now refresh your theme/site again, it will be displayed in the new language. Congratulate yourself now. That was all about how you can translate your theme into some other language.
Hope you find this article helpful, let me know through suggestions and comments.
You might be also interested in:


