Most business owners want to show exciting coupons on their business websites to attract the visitors. A Viral Plaza is a useful plugin for such purpose, that offers special coupon codes on the website. Once the visitors share your content, they get access to a particular page. Check out more information about the Viral Plaza plugin .
How to install Viral Plaza:
- Make sure that you have purchased the Viral Plaza plugin from the Flubers market.
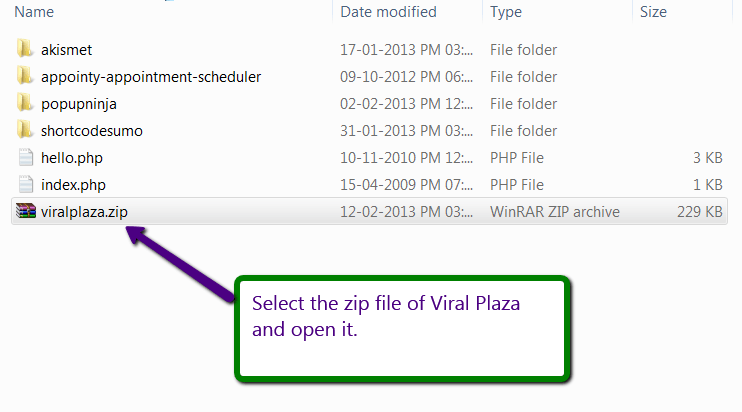
- Now go to your dashboard and download the plugin from the “Download Product” option. You will get a zip file once you download the plugin on your machine.
- Now open your WordPress website (where you want to activate the plugin) and click on Dashboard.
- Under the dashboard choose “Plugins” option.
- Click on “Add new” option.
- Next choose “Upload” option under the install plugin’s field.
- Now click on “Choose file” button and upload the zip file of the plugin.
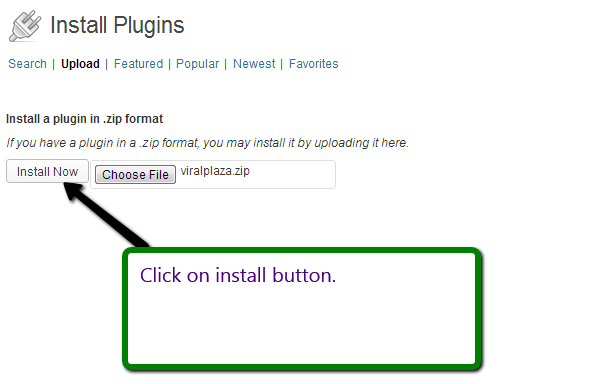
- After uploading the file, click on “Install now” button.
- Click on “Activate plugin” option to activate the plugin on your website.
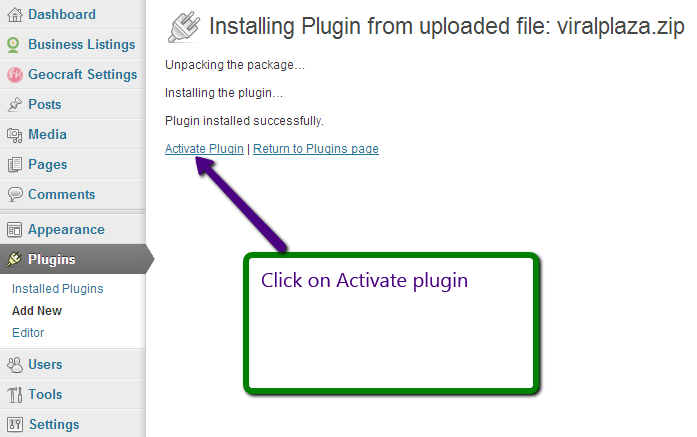
- After activating the plugin you can configure it.
How to use Viral Plaza:
- Under the dashboard, select Viral Plaza plugin as shown below:
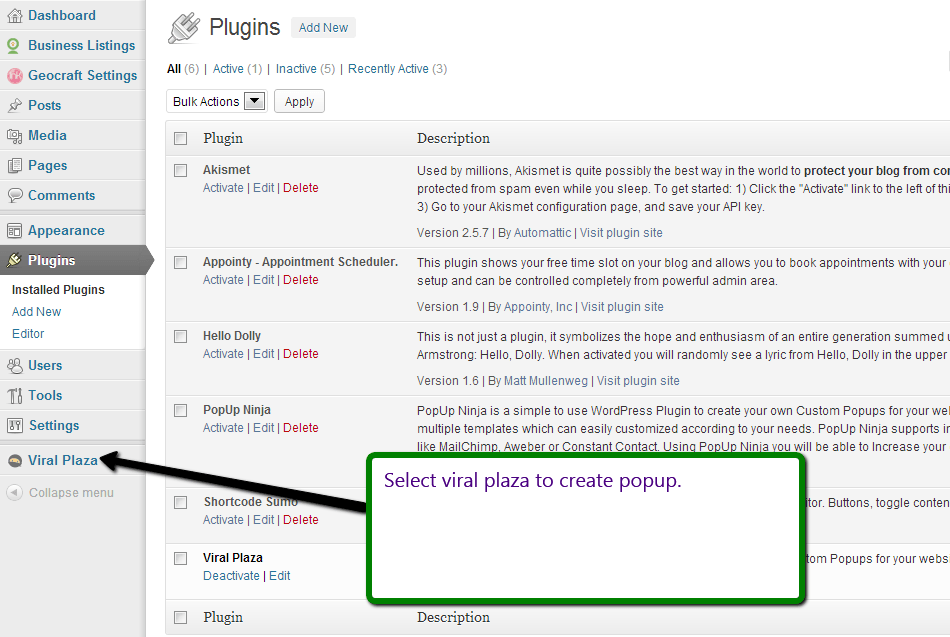
- By default there are no popups in the plugin. To create a popup click on “Create a popup” button.
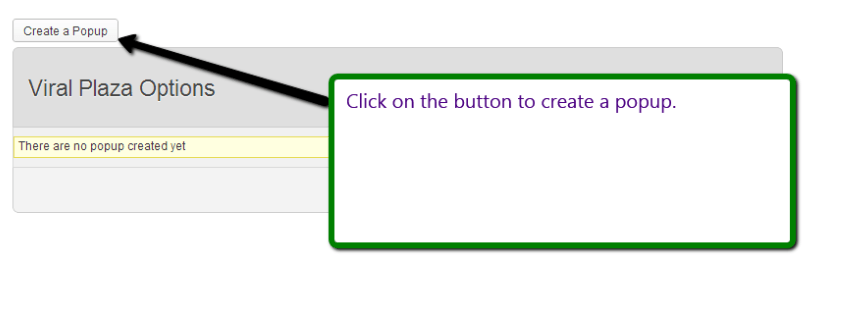
- After this a page of “Viral Plaza Options” will be opened. Under this page various field options are available:
- Popup Details– Here in this field, you can mention the details regarding popup like popup name, popup content, icon for popup etc.
- Coupon Page– Here you can mention the redirected URL which will be visited by the visitors once they share or like your content. You can mention your coupon title, content etc. in this field.
- Display Setting– Under this field, you can set the time duration of the popup, adjust the size of the popup, activate the popup on some pages or all pages etc.
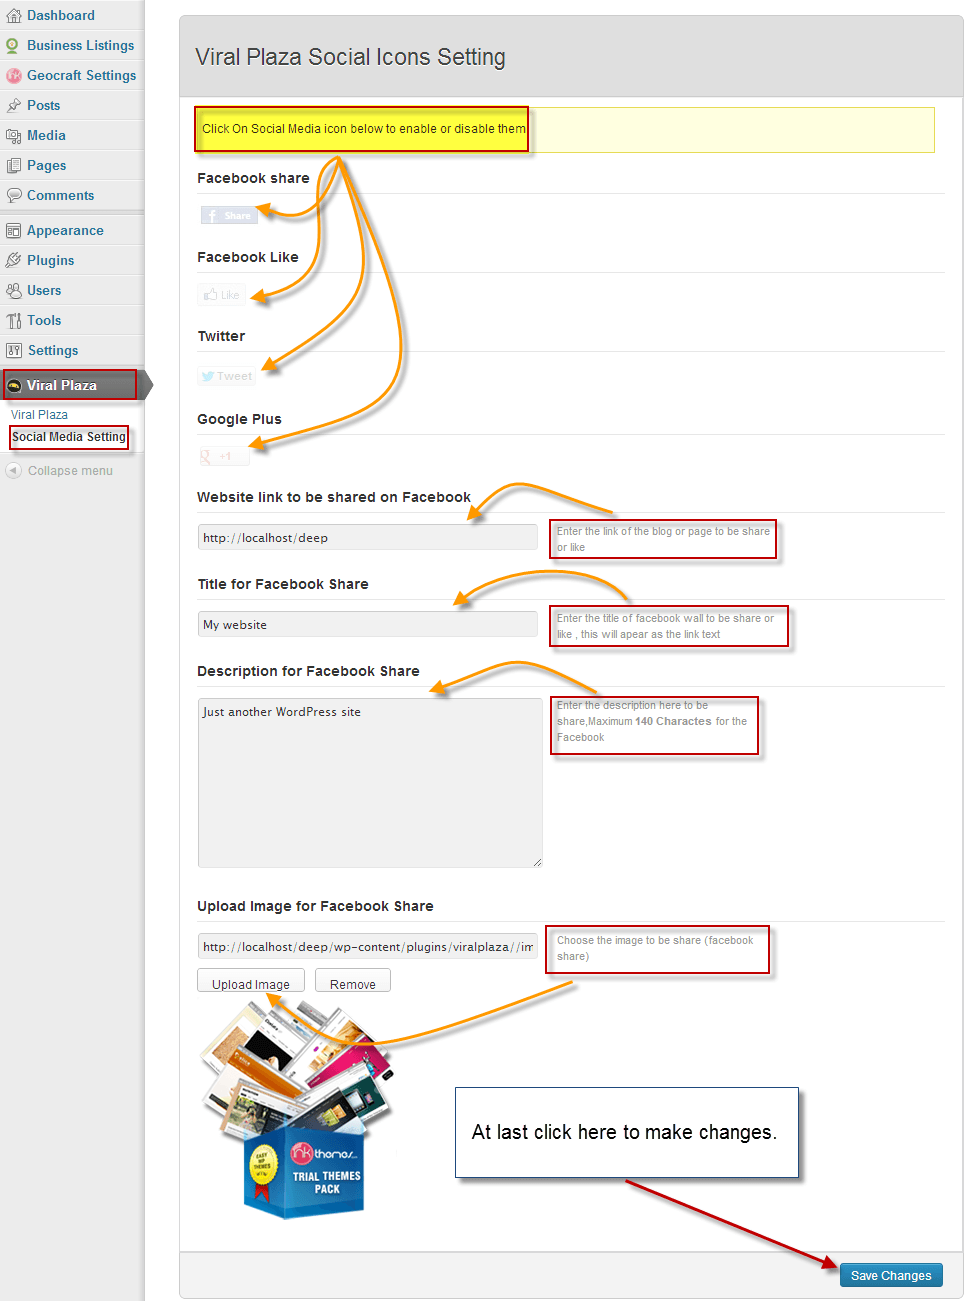
- Social Media Setting– In this field, various social icons are available which will be displayed on your popup. You can activate or deactivate the icons as per your requirement. After completing all the above fields you can click on “Launch preview” option to see how the popup looks like?
How to Configure the Field Options in Viral Plaza:
1. Follow the steps and manage the Popup Details field in Viral Plaza:
Dashboard –>Viral Plaza –>Create a Popup –>Popup Details
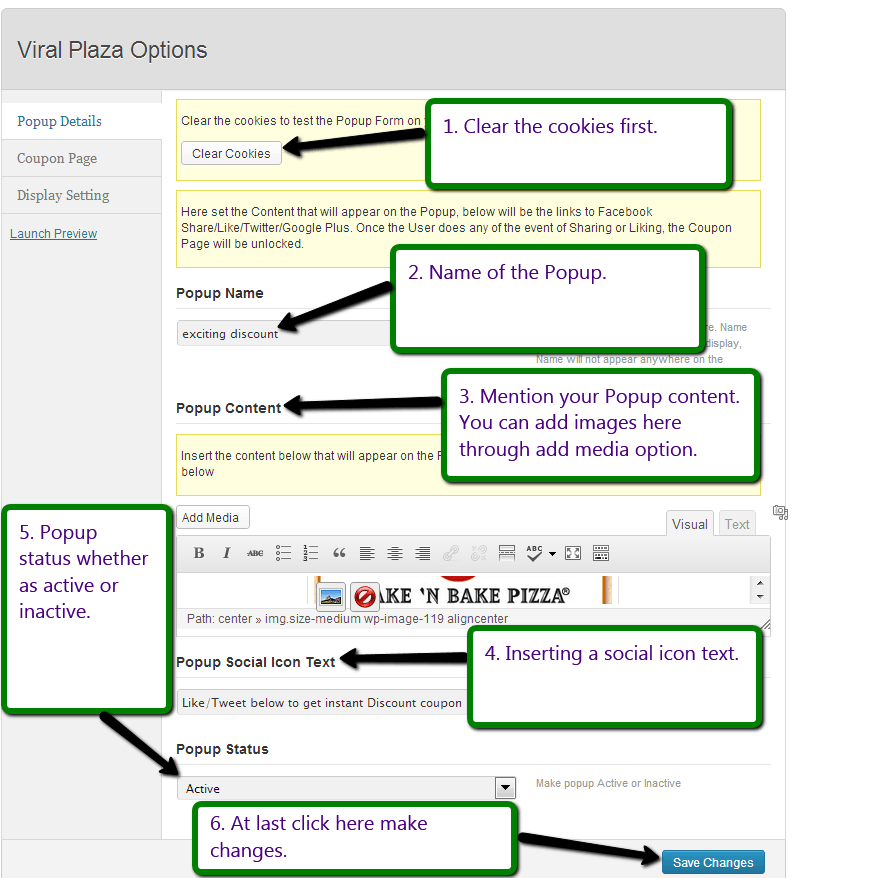
2. Follow the steps and manage the Coupon page in Viral Plaza:
Dashboard –>Viral Plaza –>Coupon Page
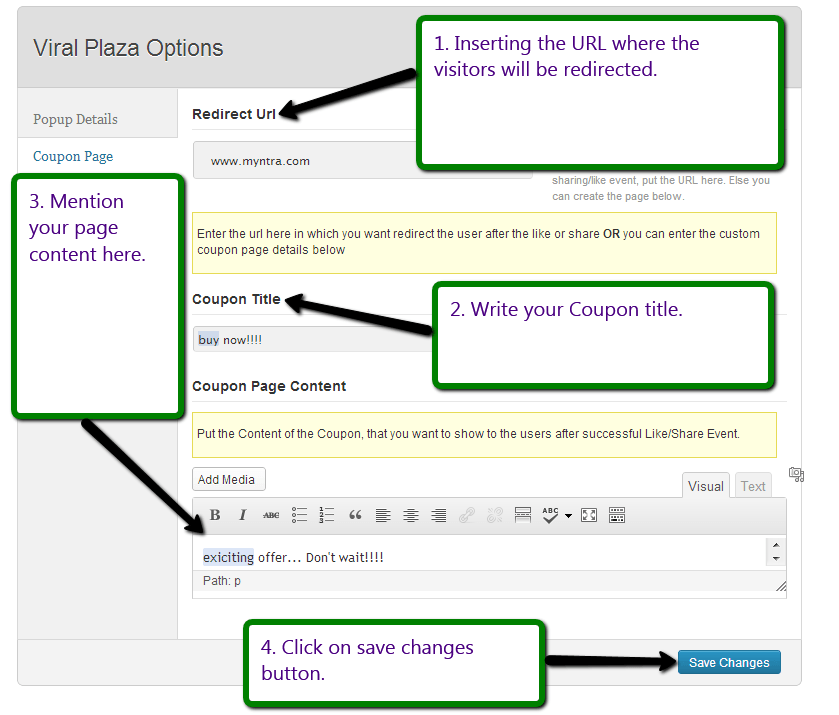
3. Follow the steps and manage the Display Setting field in Viral Plaza:
Dashboard –>Viral Plaza –>Display Setting
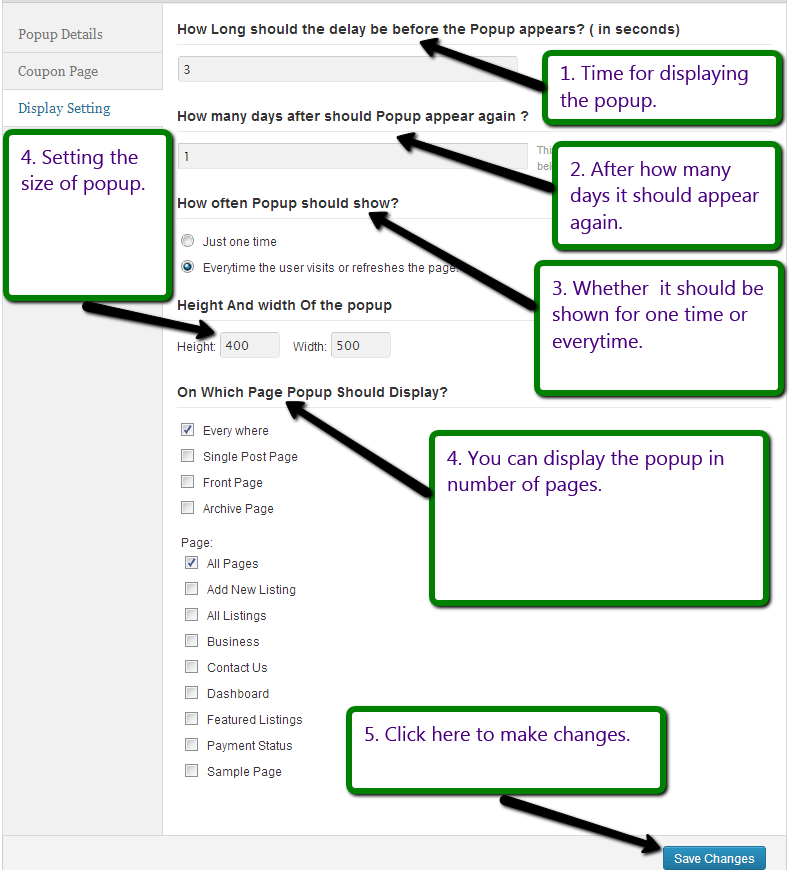
4. Follow the steps and manage the Social Media Setting in Viral Plaza:
Dashboard –>Viral Plaza –>Social Media Setting
You might also be interested in:
- Appointy– A Powerful Plugin Software for Appointment Scheduling


