It is important to provide the front visibility of your latest announcements in gist, on your website’s front-view, as it proves to be the effective communication tool to convey your latest updates to viewers, about your most appealing deals on website. Besides, when you release a new product, it should be highlighted on the top of your website so that it should be able to draw visitors’ attention frequently when they visit your site.
In order to meet this objective notification bars are becoming so vital element in the website’s conventional structure which includes catchy heading, interactive navigation bar, properly aligned paragraphs and it is unending…..
InkThemes has come up with its new release Infobar plugin to give your website a new feel and look with an enhanced functionality to engage your users and inviting greatest opportunity of accelerating business profits.
What Is Infobar Plugin?
Infobar is a hybrid term which stands as Informational bar. Infobar plugin is a website’s element that displays important messages/announcements/communique/bulletin/statistics to your viewers in a single statement. It is going to be displayed in the extreme top area of your website.
Infobar includes effective micro-copy i.e. It gives the gist of valuable information, about beneficial proposals regarding your business.
If you want to promote your products or notify your customers about your latest emerging e-services, Infobar plugin is the key to perform the task for you.
It will not be wrong to comprehend Informational bar as a purposeful call to action that enables users to acknowledge your important notifications and respond to it accordingly.
Advantages Of Infobar Plugin
- One sight overview of your products, services and the incentives stick to it: Promote your products and invite prospect leads for your business growth.
- Provides hook appeal in front of your website visitors: An informational bar, which is structured above the fold on your website, capable of attaining customers attention immediately, so in a way it is delivering the information gist in a fast pace .
- Handy method to promote your business elements online: By business elements I mean the discounts and new proposals associated with your products. So, you can familiarize your website visitors about the new schemes you are introducing.
Some Multiple Ways To Use Infobar Plugin
- A method to display catchy statistics: Suppose you are running some classified websites or some running some affiliated e-store, you can use Infobar to display number of customers who accessed your services, number of products available on your website and many more.
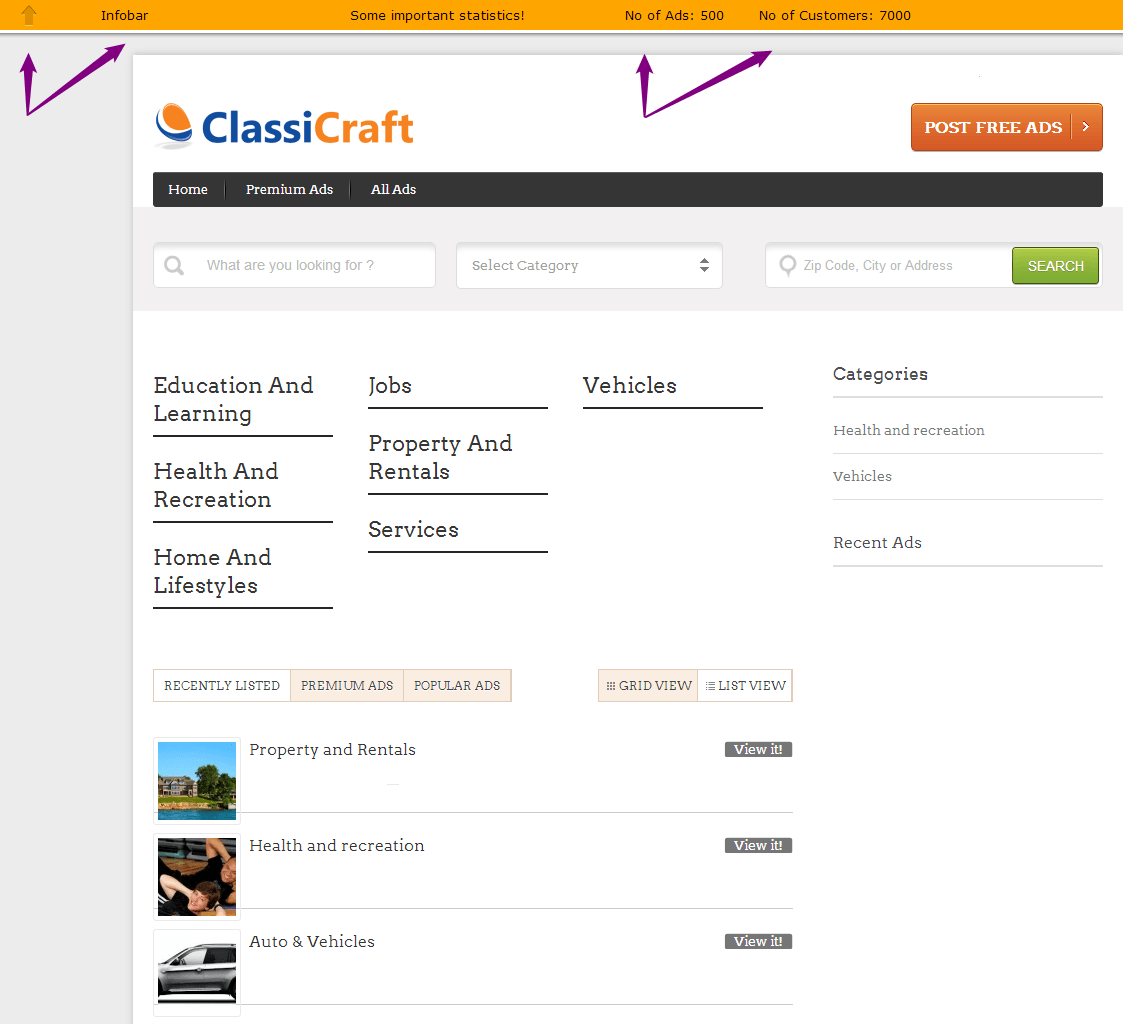
- Highlight and promote your products/services: Infobar helps you to advertise your products worldwide, thus you can invite lead prospects for your business and make it as a brand-able face.
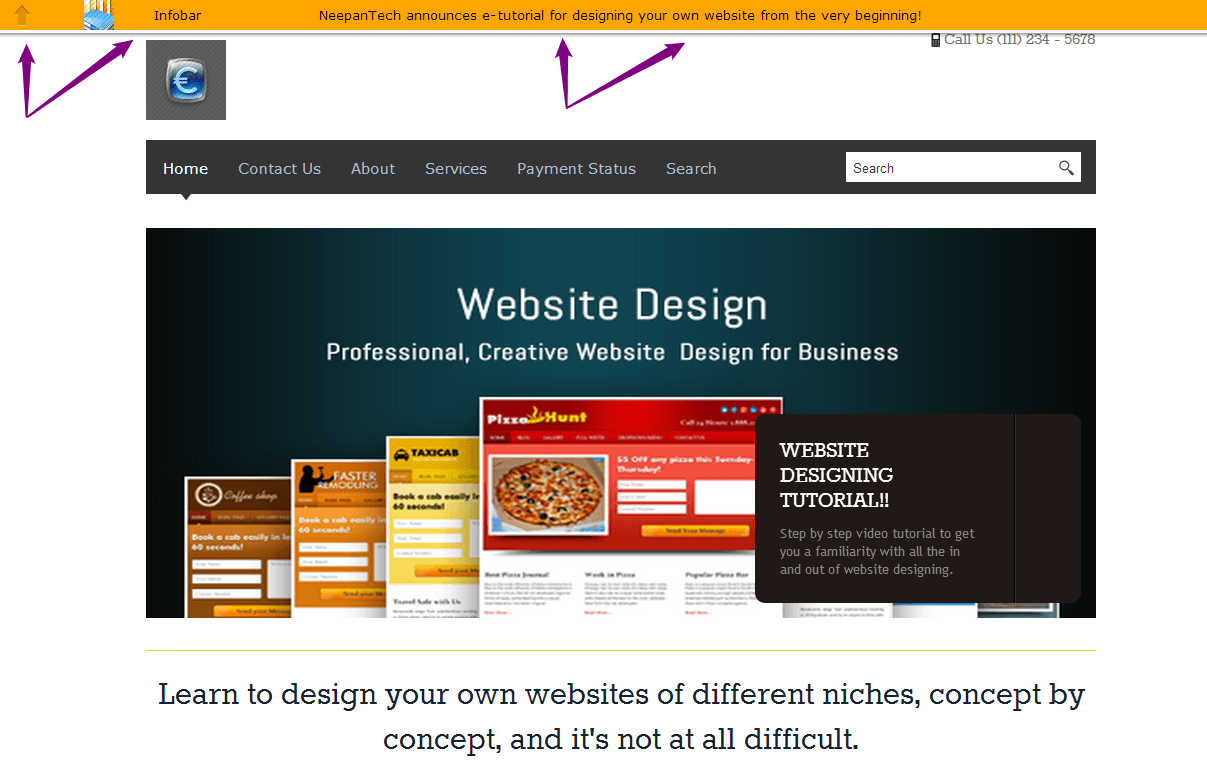
- Convey information regarding important deals of your business:If you are about to give incentives and perks to your customers such as discounts, coupon codes, info-graphics, e-books, downloadable reports, software, which you need to inform about these beneficial proposals to your website visitors, you can do it with the help of infobar plugin.
How To Install Infobar Plugin?
It is very easy to install and configure the Infobar plugin in any of the InkThemes themes. Although in the follwoing procedure I have used Colorway theme but you can use it with any of the InkThemes. Just go through these steps and implement an Infobar plugin in your website.
- Login to your WordPress dashboard and install the theme. Follow these steps:
Go to Dashboard -> Appearance -> Themes -> Install Themes.
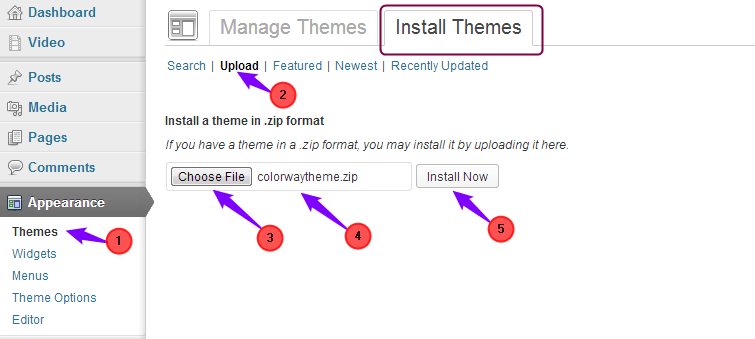
- Upload the zip file of the theme and then click on Install Now button.
- In another way type the theme keyword in the search bar and click on Search button. Install the theme by clicking on the Install Now button.
- Activate the theme.
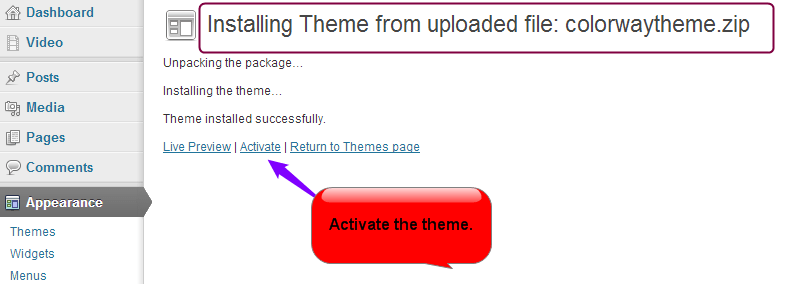
- In the next step, install the plugin.
Go to Dashboard -> Plugins -> Add New.
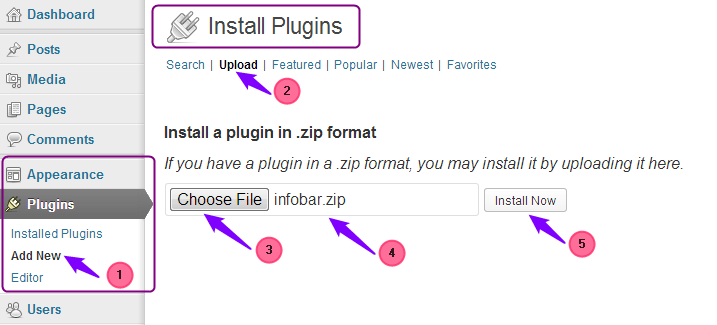
- Install Plugins page will appear, upload the infobar.zip file from the desktop, then click on Install Now button.
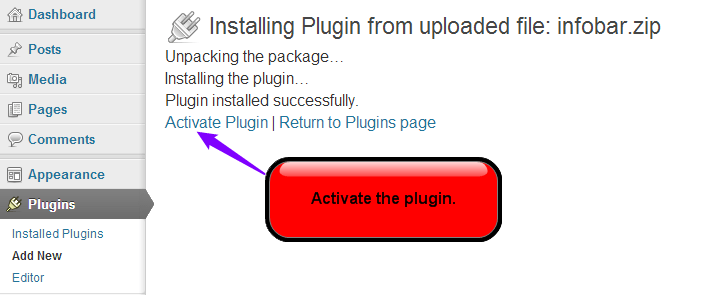
- Activate the plugin.
- You can see an Infobar plugin notification icon under the dashboard. Click on it and start configuring it.
How To Use Infobar Plugin?
Infobar plugin encapsulates three most important features which helps you to create a brief potential messages. The features are listed below:
- Notification entries.
- Notification types.
- Settings.
It allows you to customize the text color/font size and, change the height of the Infobar, Set the cookie enable/disable and many more things according to your requirement. Take an insight look of the features below:
Notification types:
Under the Info Bar icon it is lined up after the Notification entries but it performs a very important functionality i.e. To create your own essential announcements according to your prerequisites.
Note: Infobar plugin include three types of notifications by default. So when you activate the plugin, you can see the notification list under the Entries table. See below the screenshot.
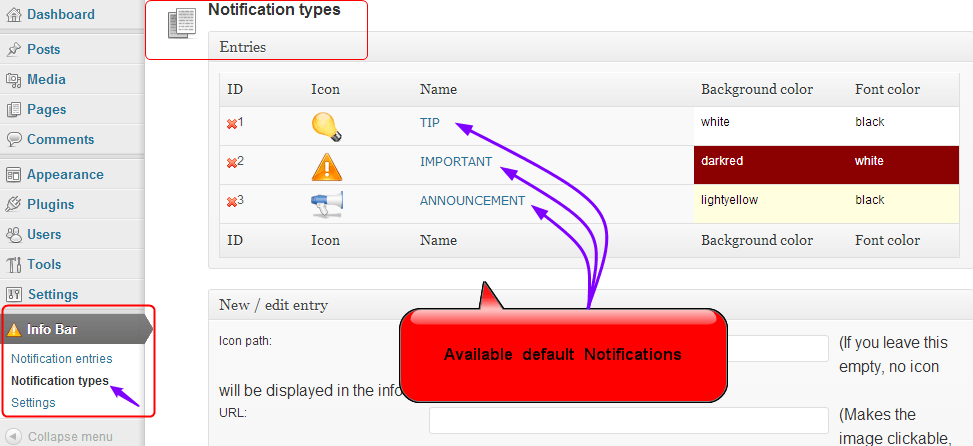
- To create your own notification follow the steps given below:
Go to Dashboard -> Info Bar icon -> Notification types -> New/edit entry. - Give the title to your notification in the Notification name field.
- In Notification size give the size of the text font which will be appearing on the Infobar. Just type the number 10,15 according to your requirement.
- Give the background color of the infobar and font color of the text in Background Color and Font color field respectively. Just give the color name as blue, red, green etc.

- Click on Save button. You can see the new notification title name in the Entries table.
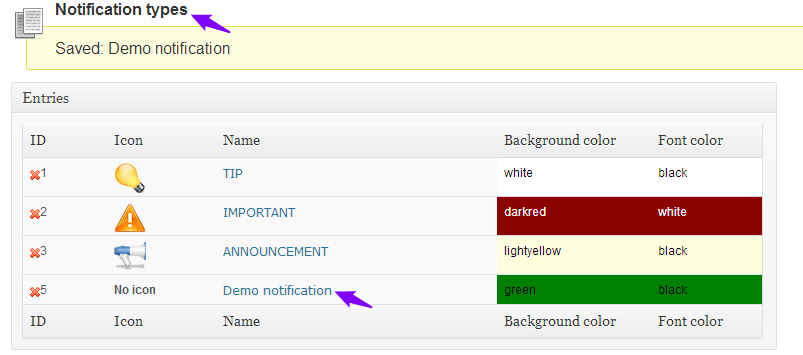
- In the next step you need to import your notification you have created from Notification types to Notification entries. To do this follow the steps given below.
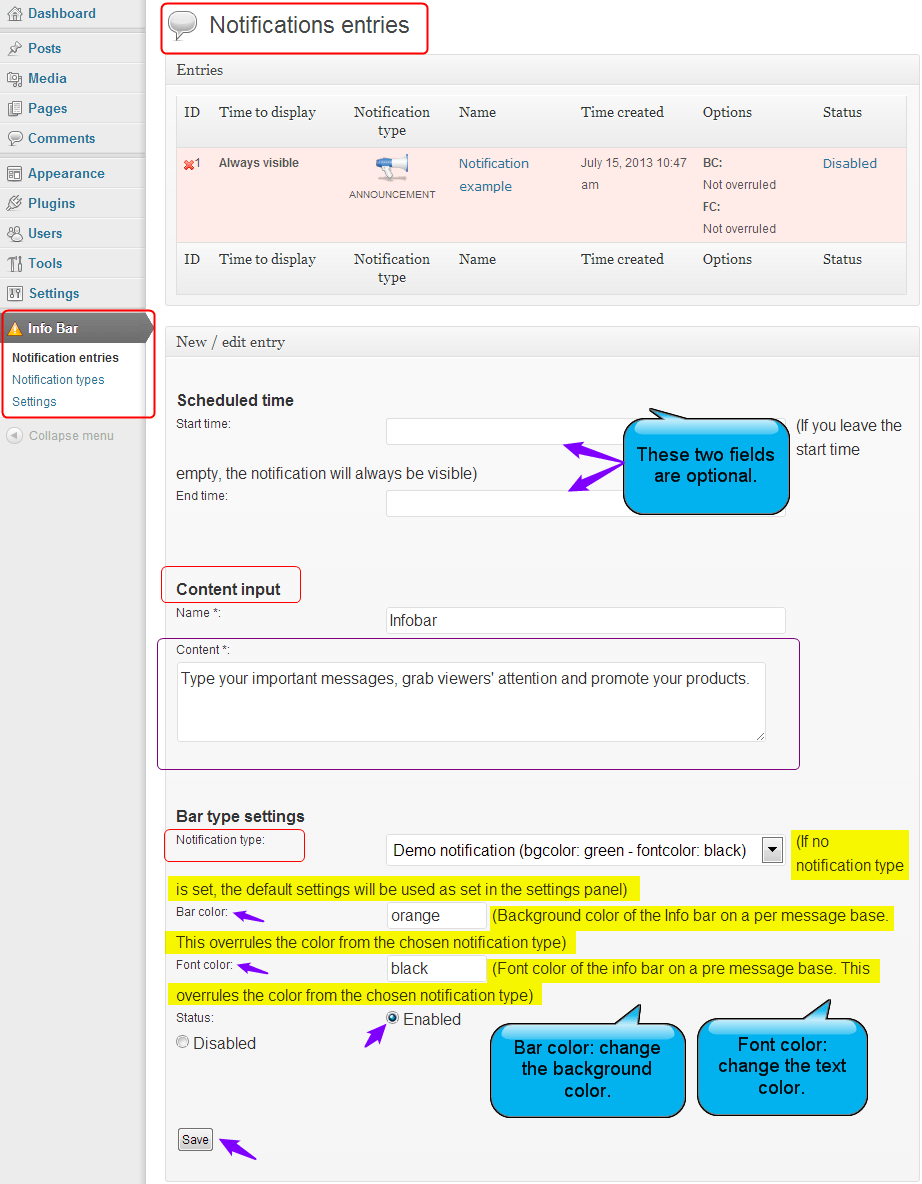
Go to Dashboard -> Info Bar -> Notification entries. - A Notification entries page will appear, you can see the sub-heading Content input under New/edit entry, give the suitable name to your notification bar in Name field.
- In the Content text box type the message/content you want to display on your website. In the next step import the notification you have just created in Notification types.
- You can see the sub heading Bar type settings under New/edit entry -> Content input.
- Select the notification from the drop down list in front of Notification type field.
- In Bar color give the color name, the background color you want to give to your notification bar.
- In Font color give the name of the color, you want to show text color of the notification bar.
Note: The background color and font color you are going to give in Bar color and Font color will replace the background color and font color that you have given in Notification types window. See the screenshot below for reference.
- Click on Save button. You can see the notification title name listed in an Entries table under the heading Notifications entries. See below the screenshot to get more clear picture in your mind.
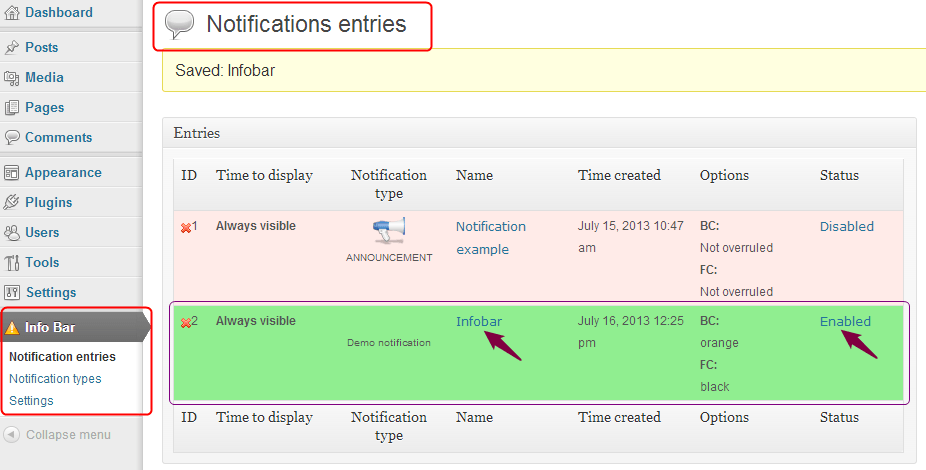
Note: When you have multiple notification in the Entries table, the Status of the notification that you want to display on the website should be Enabled, and Status of the other notification should be Disabled.
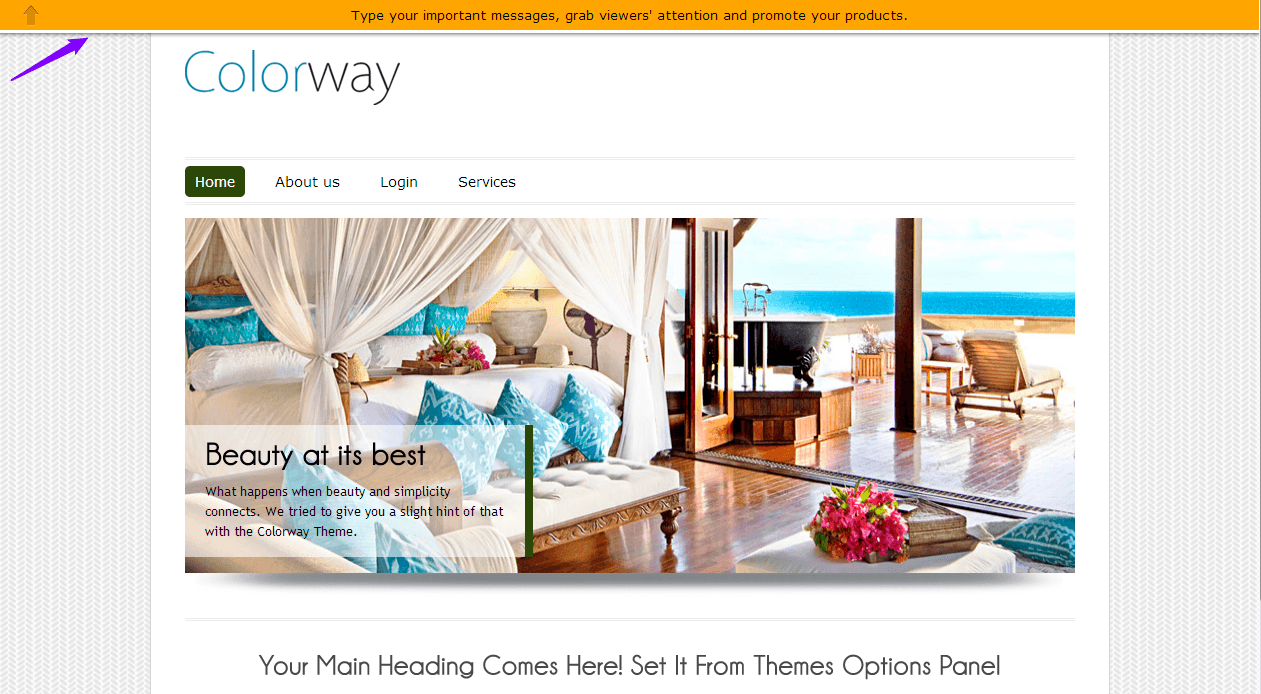
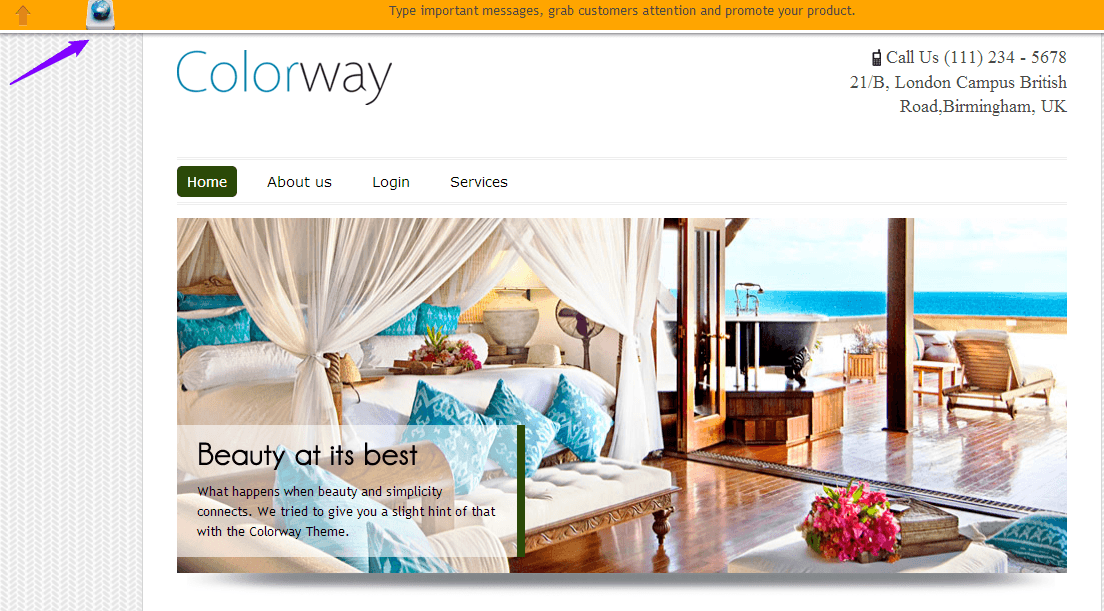
- In the next step, visit your website, you can see the required Infobar button up above the fold. See the screenshot below for reference.
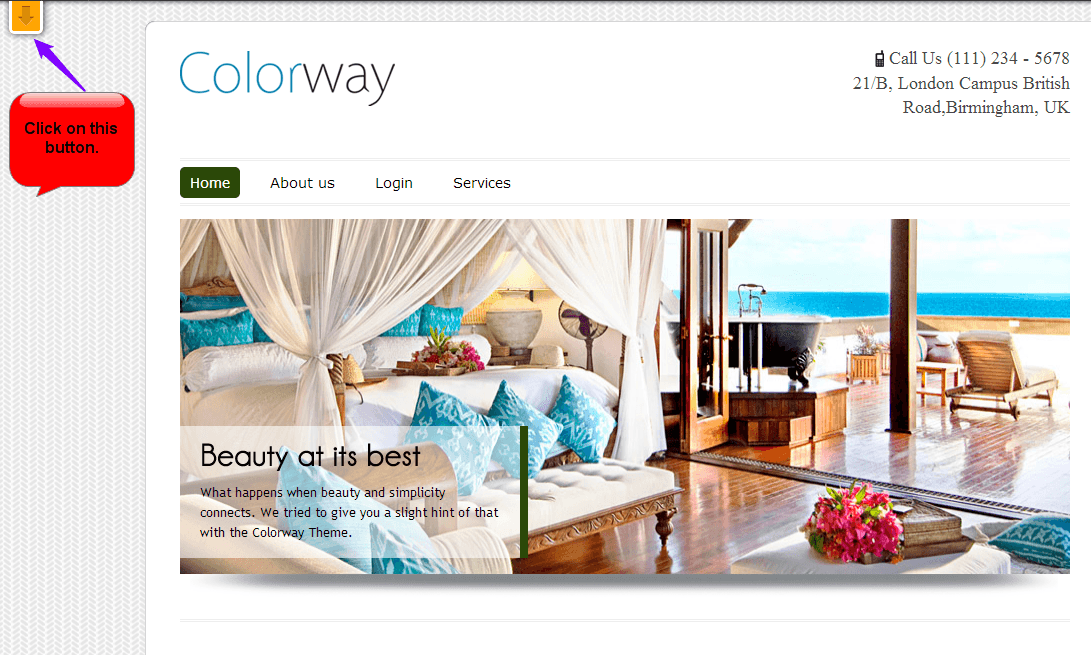
- Click on the Infobar button, you can see the sticky rectangular strip with defined text and color gets appear on the front-view, above the fold on your website, highlighting the required information. See below the screenshot.
- If you want to show some mini icon along with the text you can do it in the following manner:
Go to Dashboard -> Media -> Add New.
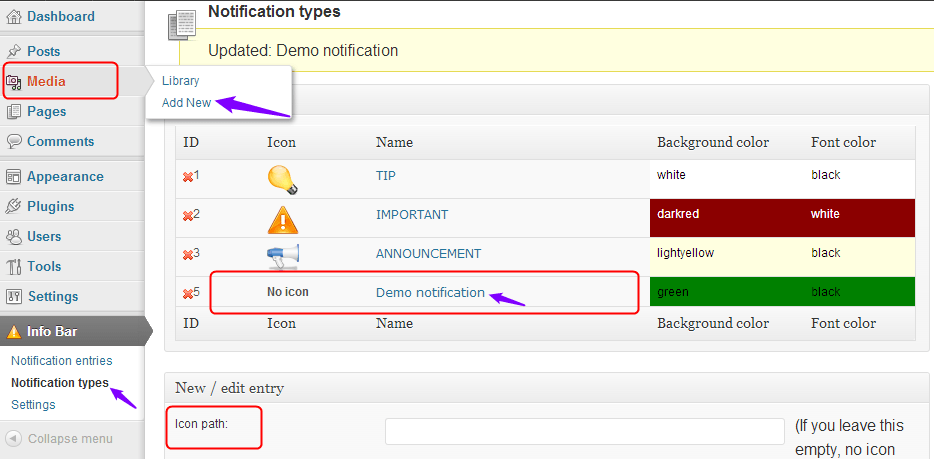
- Click on Add New, Update New Media window appears.

- When you will upload the image you can see the icon image on the Upload New Media window, click on the Edit button.
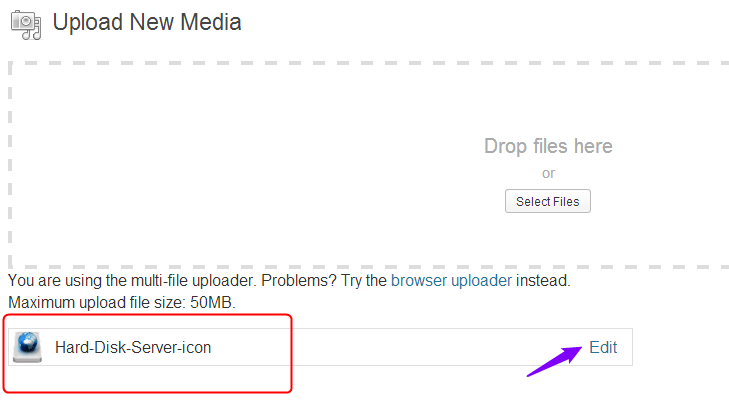
- You will redirect to the Edit Media window, copy the File URL.

- In the next step, insert the File URL.
Go to Dashboard -> Info Bar -> Notification types. - Below the Entries table click on the required notification you want to show the image icon, paste the File URL of the image next to an Icon path field. Click on save button.
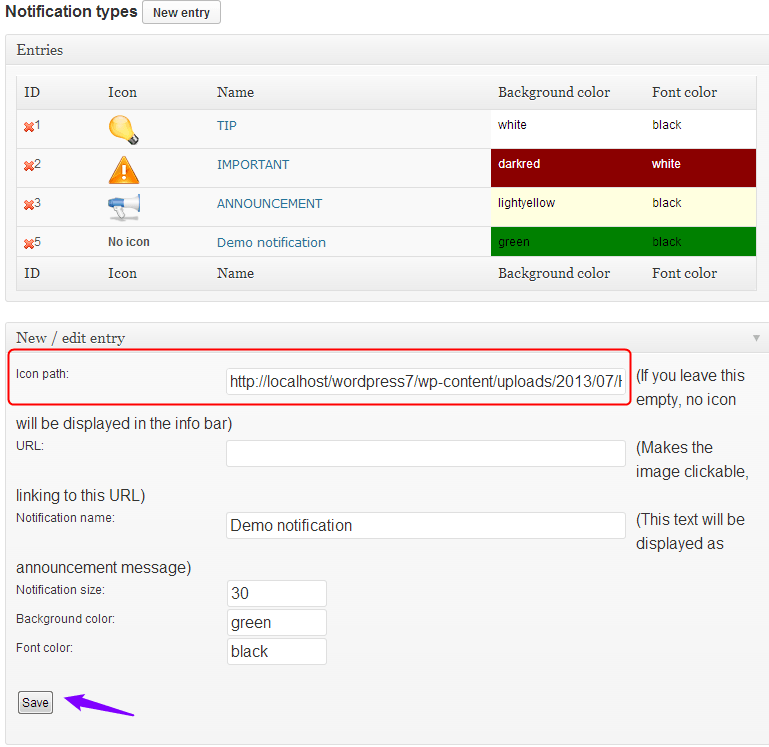
- You can see the icon with notification under the Entries table.
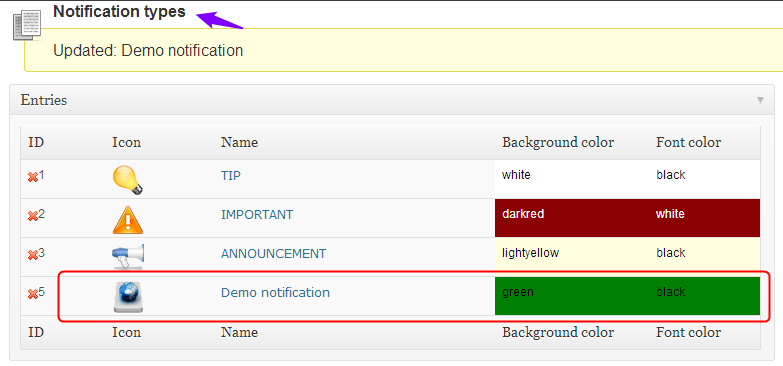
- Now you can visit the site and see the change.
Settings:
In Settings you can customize your Infobar in every possible related to setting cookies, changing the height of Infobar button and Infobar height itself.
Go to Dashboard -> Info Bar -> Settings. A Notification Settings window will appear.
- In Bar type, you can select the Inline option if you want your infobar to to move along while scrolling the page or you can choose Fixed.
- In Insert type choose Header if you want to display infobar at all the pages or posts or choose Widget if you want display infobar on every web page but not the homepage of your website.
Note: To insert Infobar with the help of a widget you need to set Infobar widget in the Widgets window.
Go to Dashboard -> Appearance -> Widgets.
- Drag and drop the Infobar widget under the Primary Widget Area and update the changes.

- Visit your website you will see infobar will display on all the web pages except the homepage.
- You can set the height of bar and button in Bar height and Button height field respectively.
- In Bar announcement text, you can write a few groups of worlds to be displayed on the left side of infobar on your website.

- You can change the settings of cookie with the options highlighted below.
- In Close/Open button positions option, set the position of Infobar button either on the left side of the webpage or at the right side.

- If you want to create a good looking text in the updated editor as given below:
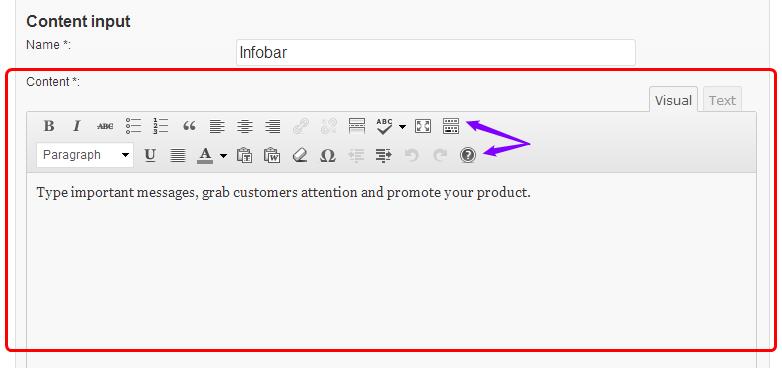
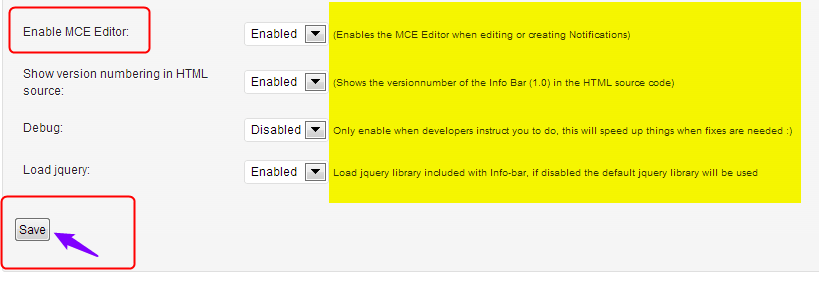
- For the above editor set Enabled option in the MCE Enabled Editor field.
Conclusion:
You should always be looking for easier ways to direct your users towards the things you are conveying to them, either about your business or about the services you are offering them.
Infobar plugin aims to reflect big and bold ideas related to your business on your website, above the fold. It’s a mechanism to build a striking presentation microcopy of your business goals and services. Thus, Infobar plugin increases the chances of converting general visitors on your site to potential customers.
Moreover, Inkthemes will provide you in and out support regarding the issues, if you have while implementing the plugin on your website. Feel free to discuss your thoughts with us. We will be glad to help you.


